Summary: This article will tells the most simple and reliable way to directly restore the deleted and lost image files from your Laptop/Desktop without backup.
“I have a question asking for help, when I using my Laptop, I found that the images in my Laptop was deleted. If other data is deleted, I’m not too sad, but the images in the Laptop are really important to me. So I wanted to retrieve the deleted images, but I didn’t know how to do it.” – Asked by Kevin.
Have you ever encountered a similar situation, in fact, this is very common. Don’t worry when images are deleted from your Laptop/Desktop. In fact, they don’t really disappear. They are still stored on Laptop/Desktop, but we can’t find them in a normal way. That doesn’t mean there’s no way to retrieve deleted images. Here, I recommend a method for Laptop/Desktop users. When your Laptop/Desktop’s images are deleted or lost, you can use it to restore deleted images. And this method is used Best Data Recovery.
Best Data Recovery is a powerful and secure data recovery software. It can help you recover almost any deleted/lost files such as photos, videos, audio, document, email and more. There are many reasons for data loss on your computer, such as software crashes, computer crashes, formatting errors, accidents, partition deletions, virus attacks, and more. This full-featured data recovery software enables you to scan and find deleted data based on specific data types and hard drives. It’s designed with a very useful “filter” feature that helps you easily find the missing data you need. In addition, you can preview the details of each data.


Now, please follow ours tutorials to get back the deleted and lost images on your laptop/desktop by using this powerful data recovery software.
You have to download and install this Best Data Recovery on your computer in advance, and run it when everything is ready.
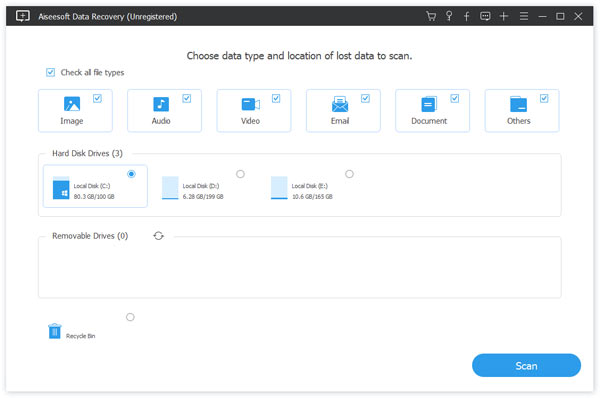
After running it, you will see the main interface of the software, which is a variety of data types that can be replied, and select some of them according to your actual needs. If you juse want recover image, just select it. Then select the disk drive that may find the missing file.

Once you have made your selection, you can click “Scan” to quickly scan the selected disk drive or other external storage drive(s).

After the scan is complete, all data that can be recovered is listed. You can use the “Filter” feature to quickly locate the files you want to recover.
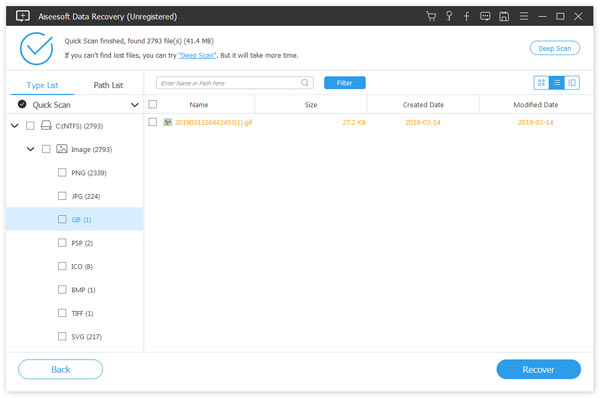
Note: If you can’t find the data you need, just pressing the “Deep Scan” button which is in the upper right corner of the interface to scan it again.
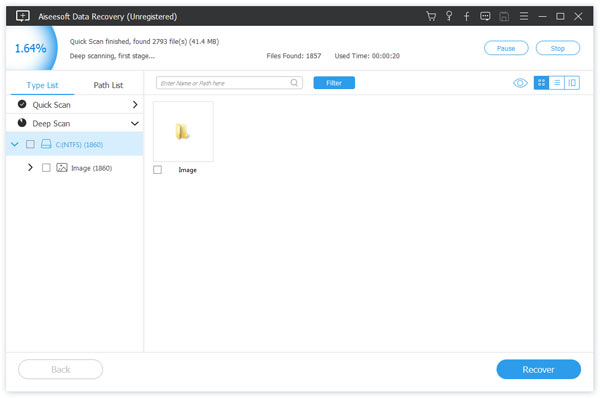
When you find the images you want after scanning, with a single click of the “Recover” button, you can easily bring all selected images back to your computer.
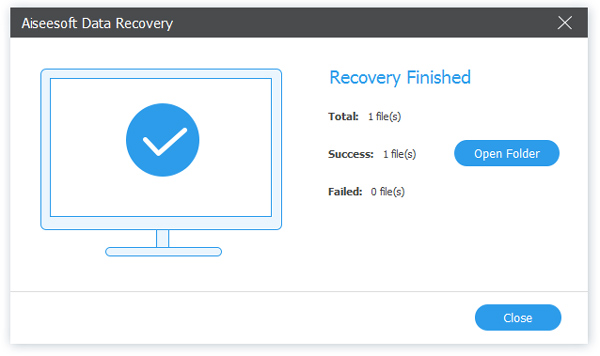
If done, you can press “Open Folder” to view all the restored files on the corresponding storage path.