Summary: This article will tells the most simple and reliable way to directly restore the deleted and lost videos from your Laptop/Desktop without backup.
Users will delete various types of data in Laptop/Desktop because of a certain demand. In particular, many Laptop/Desktop users delete data that they consider unimportant, such as a Videos. They often assume that the Videos is not primary, so they will delete the Videos. In fact, the idea is wrong, and the Videos allows us to remember the friend and family. When users are aware of this benefit, they might say, “I have deleted the videos in the Laptop/Desktop. What should I do?”
Don’t worry, even if you have deleted the videos, you can use some reliable data software to restore them. Here I will introduce a practical software – Best Data Recovery.
Best Data Recovery can help you recover any data type such as images, documents, audio, video, email, and more. Whether you’re losing data because of deletion, formatted partitions, hard drive problems, raw hard drives, crashed computers, or other reasons, this file recovery software is always your best choice. More importantly, if you care about the security of your important data, this file recovery tool can also be your first choice. When you retrieve a lost image, audio, video, document, or email, it does not store any of this data on its server. This reliable data recovery will ensure data security.


Without further ado, please see how our tutorial works.
Install and run this Best Data Recovery on your computer, then select the type of data you want in the main interface as below, such as video, audio, image, document, email, etc. If you only want to resume the lost videos, please uncheck other file types, by default they are all selected.
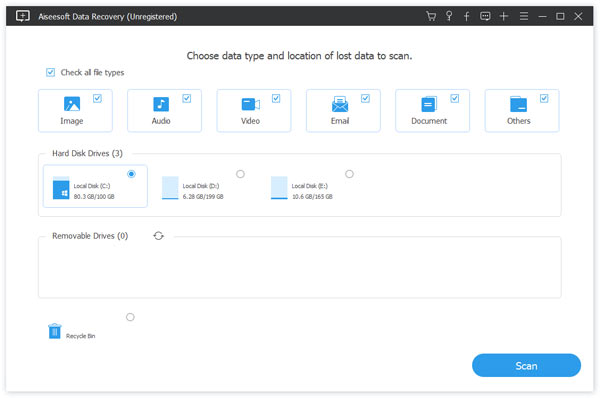
Here, you need to choose the hard drive and other external storage drive that you want to scan the lost videos from. When you have made your selection, click the “Scan” button to perform a quick scan of your computer.

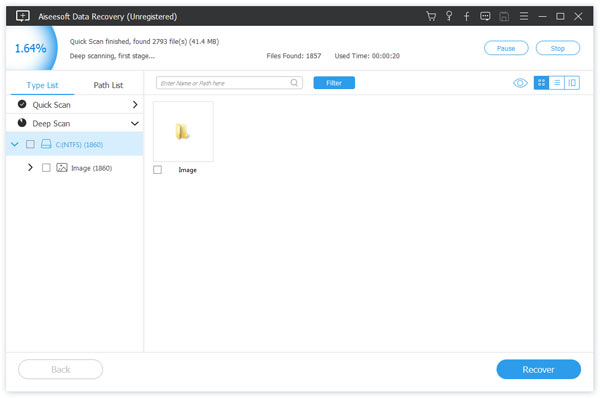
Just wait a moment and the scan will be completed. Then you can see the specific data that can be recovered. You can click to preview all of them one by one, of course, you can use the “Filter” feature to quickly locate the files you want to recover.

Note: If you can’t find the data you need, the program also provides the “Deep Scan” option for deeper scanning, just click to try again. It is worth noting that deep scans take longer and please be patient. We believe that waiting is worthwhile.
Once you find the videos you need, with a single click of the “Recover” button, you can quickly restore all selected videos to your computer.
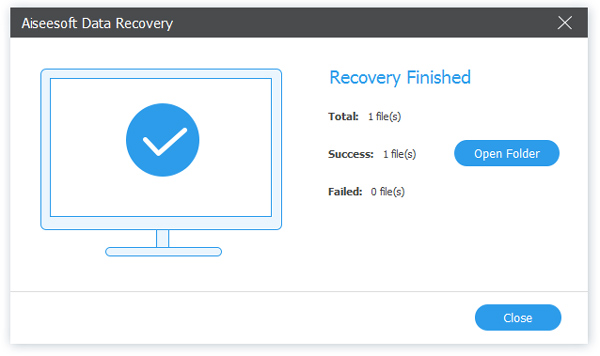
If done, you can press “Open Folder” to view all the restored files on the corresponding storage path.