When you read this article, you may have become the owner of Samsung Galaxy A73/A53/A33 5G. This article will focus on how to transfer and recover data for Samsung Galaxy A73/A53/A33 5G. I believe you will have a further understanding through this article.
Recently, Samsung Galaxy a series released three new machines, namely Samsung Galaxy A73/A53/A33 5G. All three new machines adopt chips made by 5nm process. In terms of appearance, the three new models all adopt the center perforated screen made of super AMOLED with a resolution of 1080p, and are equipped with the 5th generation gorilla glass panel. The difference is that the Samsung Galaxy A73 5G adopts a 6.7-inch Samsung AMOLED screen with a pixel resolution of 1080×2400, and the screen also supports 120Hz high refresh rate technology. The screen experience is very smooth. The front of the Samsung Galaxy A53 5G is a 6.5-inch center perforated screen. The front of Samsung Galaxy A33 5G is a 6.4-inch center perforated screen, U-shaped. In terms of performance, Samsung Galaxy A73/A53/A33 5G has a 5000mAh high-capacity battery built-in, and supports 25W wired charging, with a very long battery life.
In terms of configuration, Samsung Galaxy A73 5G is equipped with Qualcomm snapdragon 778g processor and adopts the design scheme of rear four cameras. It is composed of 108 million pixel main camera lens, 12 million pixel ultra wide-angle lens, 8 million pixel telephoto lens and 2 million pixel macro lens respectively. It also supports OIS optical anti shake technology, which is very powerful in photography. Samsung Galaxy A53 5G is equipped with Samsung Exynos 1280 processor and supports 120Hz high screen refresh rate. In terms of the camera, the front is equipped with a 32 million pixel self shooting single camera, and the rear is equipped with a combination of 64 million pixel main camera + 12 million pixel ultra wide angle lens + 5 million pixel macro lens + 5 million pixel depth of field camera. The Samsung Galaxy A33 5G supports a 90hz high screen refresh rate, with a 13 megapixel selfie single camera in the front and a 48 megapixel main camera in the rear + 8 megapixel ultra wide angle lens + 5 megapixel macro lens + 2 megapixel depth of field camera combination.
There is no doubt that no matter which version of Samsung Galaxy 5G you finally choose, it will bring you a very beautiful experience. It’s worth mentioning that when using Samsung Galaxy A73/A53/A33 5G, you can’t get rid of two common problems, namely data transmission and data recovery. Next, I will introduce you to four related methods from. I believe that through the following explanation, we will have a further understanding.
If you want to transfer the data from the old Samsung/Android phone or even iPhone to the new Samsung Galaxy A73/A53/A33 5G, there is no doubt that the Mobile Transfer software is your best choice. Mobile Transfer software is a multifunctional data transmission software assistant.
“Phone To Phone Transfer” option is the most commonly used function items refers to a simple and convenient one touch phone to phone transfer, which can transfer up to 17 types of data, can be transferred safely, and supports any model of smart phone, whether Android or iOS system, without resetting the device or deleting the original data. Now, please click the corresponding button according to your computer system to download the software to your computer. After installation, using this function according to the specific steps in Part 1.


Part 1 Transfer Android/iPhone Data to Samsung Galaxy A73/A53/A33 5G
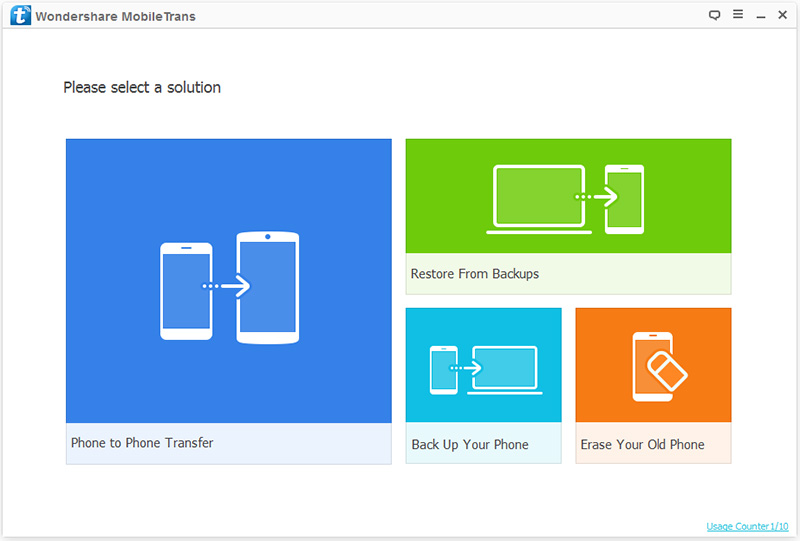
Step 1: Run the transmission software, select the “Phone To Phone Transfer” module, and press the “Start” button.
Step 2: Use two USB cables to connect your old Android/iPhone and Samsung Galaxy A73/A53/A33 5G to the same computer.

Tip: Please ensure that old Android/iPhone is connected to the left board and Samsung Galaxy A73/A53/A33 5G is connected to the right panel. If the connection is opposite, click “Flip” to convert Data will be transferred from the source smartphone to the destination smartphone.
Step 3: All the transferrable file types of your old phone will be listed, after selecting the file types as you need, then click on “Start Transfer” to sync them to your Samsung Galaxy A73/A53/A33 5G.

Step 4: Click the task box to view the transmission progress. At this time, you can check whether the selected file has been transferred to Samsung Galaxy A73/A53/A33 5G.
Note: Do not disconnect your phones and run other apps on your phones during the transmission process.
“Restore From Backups” function allows you extracting to restore your data from a backup file to any supported devices, as long as you have an available backup. Now use this function to restore data from backup to Galaxy A73/A53/A33 5G according to the specific steps in Part 2.
Part 2 Sync Data from Backup to Samsung Galaxy A73/A53/A33 5G
Step 1: Return to the homepage of Mobile Transfor software, select the “Restore From Backups” module, and press the “MobileTrans” button.
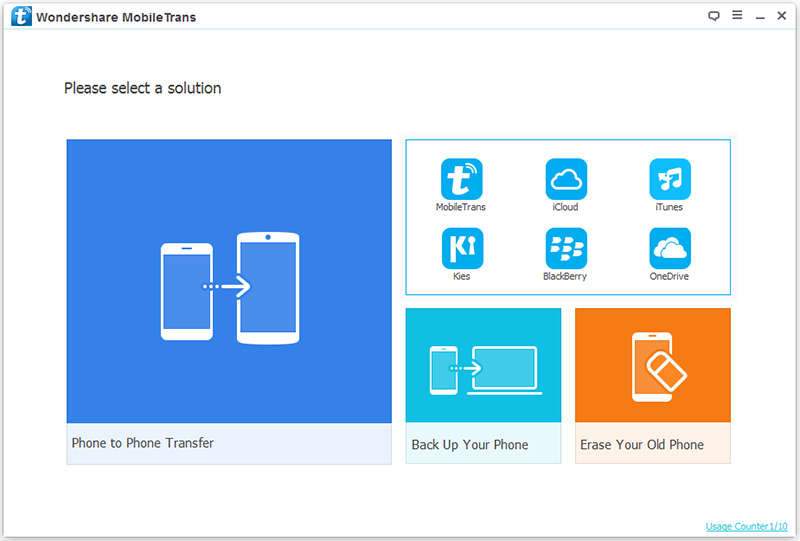
Tip: This time, just take choosing the “MobileTrans” option as an example. If you have backed up your old Samsung phone data with Samsung Kie, or sync your iPhone/iPad data to iTunes or iCloud, you can also select buttons such as Kies, iCloud, iTunes and so on.
Step 2: Please connect the Samsung Galaxy A73/A53/A33 5G to your computer using a USB cable. Then choose a backup file from the list as your needs.
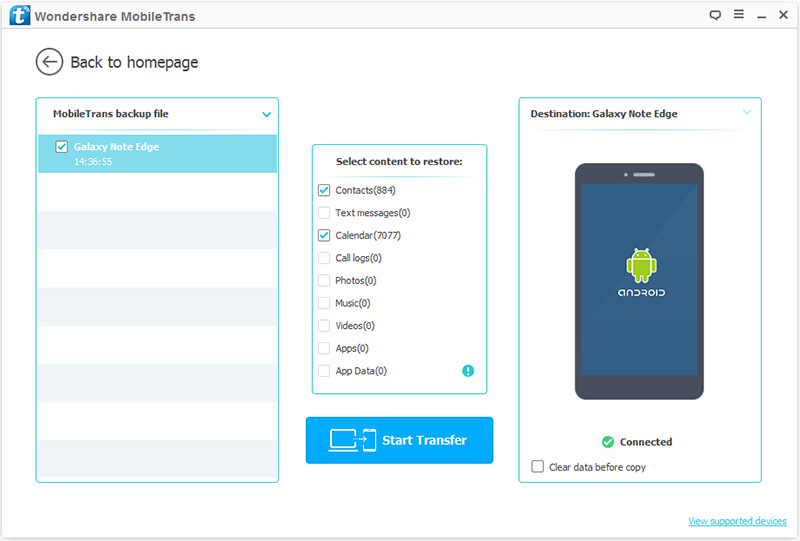
Step 3: After the mobile phone is detected, select the required file types in the middle panel, and click the “Start Transfer” button to complete the data transmission process.
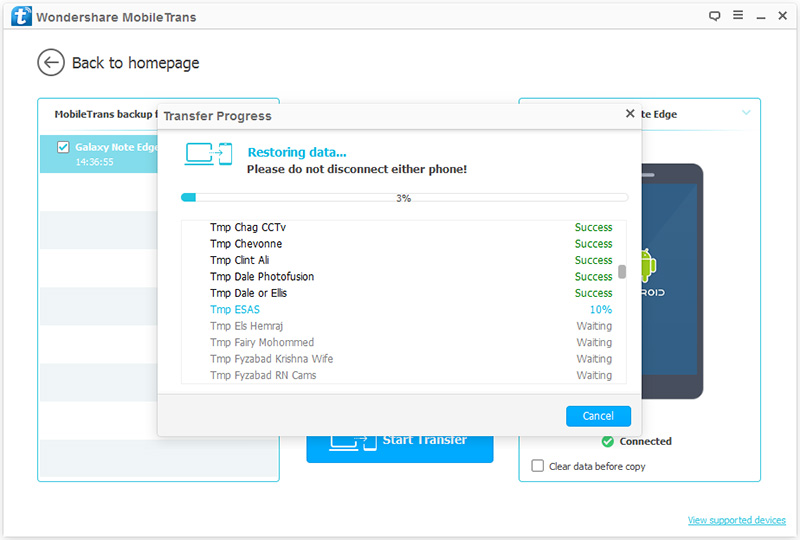
Note: Please do not disconnect your phone during transmission to avoid transmission interruption.
The above two parts are related tutorials of transmitting your phone data, however, when you unfortunately delete or lose some important data on your Samsung Galaxy A73/A53/A33 5G, only the professional recovery software can solve this problem. Next, I will introduce this recovery software to you in detail.
Samsung Data Recovery an user-friendly data & system recovery software that mainly recovers deleted and lost files including audio, photos, videos, call logs, contacts, WhatsApp messages, text messages, documents and more from any Samsung Galaxy phones/SD cards/Galaxy Tab. Now, please click the corresponding button according to your computer system to download the software to your computer. After installation, follow the specific steps of Part 3 to begin restoring your data on Samsung Galaxy A73/A53/A33 5G.
Part 3 Directly Recover Data from Samsung Galaxy A73/A53/A33 5G without Backup
Step 1: Run the recovery software on the computer, and then click the “Android Data Recovery” module.

Step 2: Connect your Samsung Galaxy A73/A53/A33 5G to the computer with a USB cable, and the computer will automatically detect your mobile phone. After enabling the USB debugging mode, click “OK” to continue.

Step 3: Once your phone is detected, you will be asked to check the file types as your need, then tap on “Next”.

Tip: Please follow the on screen prompts to install the root tool “FoneGo” as required to authorize the application to access your mobile phone.
Step 4: After successful scanning, you can preview all the lost data in detail. Select the required files and click the “Recover” button to start restoring data to your Samsung Galaxy A73/A53/A33 5G.

“Android Data Backup & Restore” function It is another important and practical function that allows you to backup and restore your phone data in a click. After installation, using this function to restore data from backup to Samsung Galaxy A73/A53/A33 5G according to the specific steps of Part 4.
Part 4 Restore Data from Backup to Samsung Galaxy A73/A53/A33 5G
Step 1: Return to the homepage of the recovery software and click “Android Data Backup & Restore” button.
Step 2: Connect your Samsung Galaxy A73/A53/A33 5G to your computer using a USB cable and wait for the program to detect the phone.
Step 3: Once identified, select the “Device Data Restore” or “One-click Restore” button in the page as your needs.

Step 4: Now, select the backup files you want to restore from the list and click the “Start” button to begin extracting all recoverable files from the selected backup files.

Step 5: After extracting, select the required files and click the “Restore to Device” button to begin restoring data to your Samsung Galaxy A73/A53/A33 5G, or click the “Restore to PC” button to save the data back to your computer. You can view the restoration progress on the page. When the transfer progress reaches 100%, the restoration is complete.
