Summary: Looking for a simple way to transfer all data from an Android or iPhone device to Realme 9i/9 Pro/9 Pro Plus? How to recover deleted and lost files on Realme 9i/9 Pro/9 Pro Plus? After reading this article, you will get a satisfactory answer.
Realme, as an emerging brand, provides high-quality smart phones with leapfrog performance and trend design for young users around the world. Recently, Realme introduced three smartphones with high cost performance to the market, namely Realme 9i, Realme 9 Pro and Realme 9 Pro Plus. Next, let’s take a brief look at these three mobile phones:
Obviously, you have been captured by their performance. Next, we will talk about how to transfer data to your new Realme 9i/9 Pro/9 Pro Plus and how to recover lost data on your Realme 9i/9 Pro/9 Pro Plus in five points.
Whether you used Android phone or iPhone before, as long as you need to transfer data between different phones, you can’t miss Mobile Transfer.
Mobile Transfer can one click to directly transfer all data including contacts, photos, videos, music, call logs, text messages, calendar, reminder, notes, apps, and more from any Android/iPhone to Realme 9i/9 Pro/9 Pro Plus.


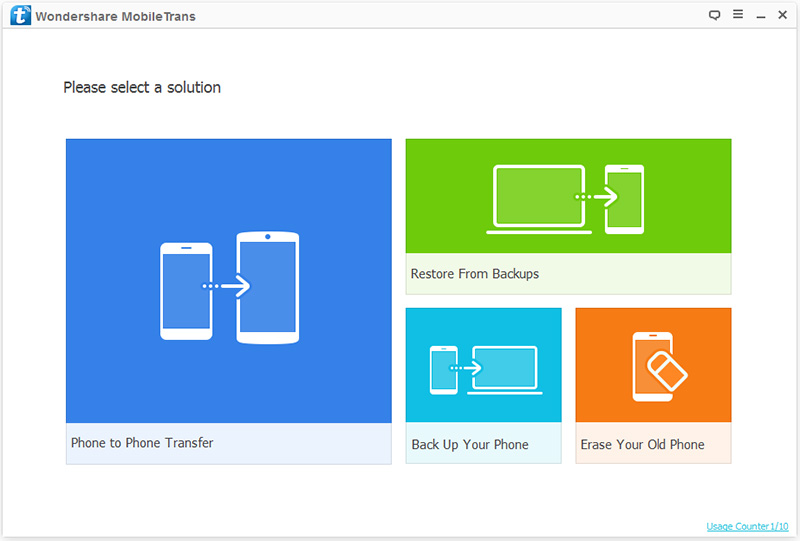
Step 1. Download, install and run Mobile Transfer on your computer, then click on “Phone to Phone Transfer” and press “Start”.
Step 2. Connect both of your old Android/iPhone and Realme 9i/9 Pro/9 Pro Plus to the same computer via their USB cable.

Step 3. Wait for your devices are detected, check the file types that you want to transfer, then tap on “Start Transfer” to sync them to your Realme 9i/9 Pro/9 Pro Plus.

Backup and recovery are also the special features of this software. If you have used it to back up your mobile phone data before, you can follow the following steps to extract and recover the required data from the backup file.
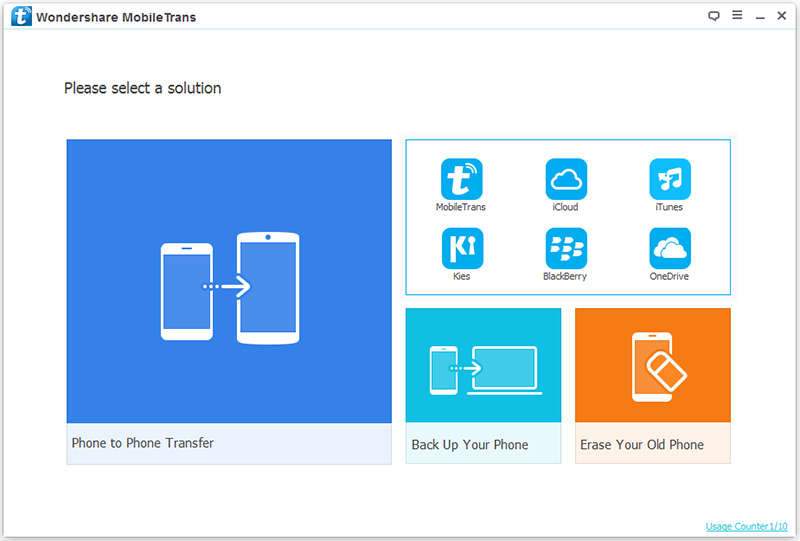
Step 1. Return to the homepage of the Mobile Transfer software, then click on “Restore from Backups” and select “MobileTrans”.
Step 2. Choose a backup file from the list and coneect your Realme 9i/9 Pro/9 Pro Plus to computer via a USB cable.
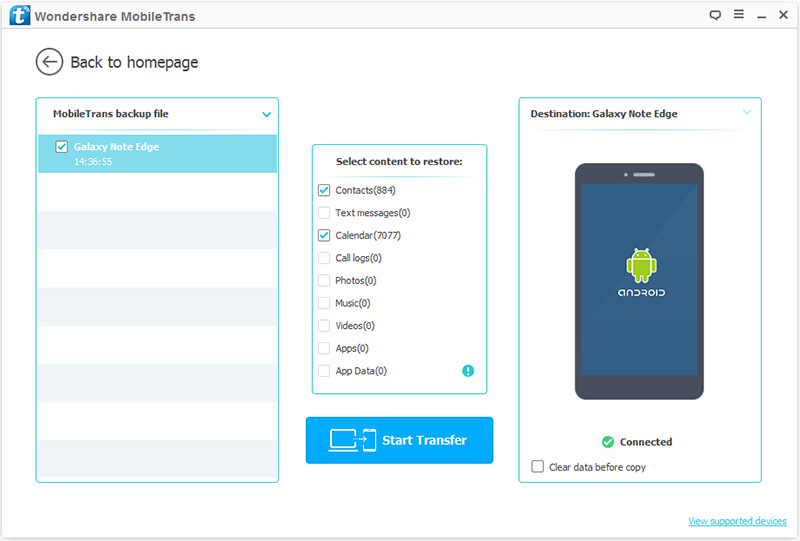
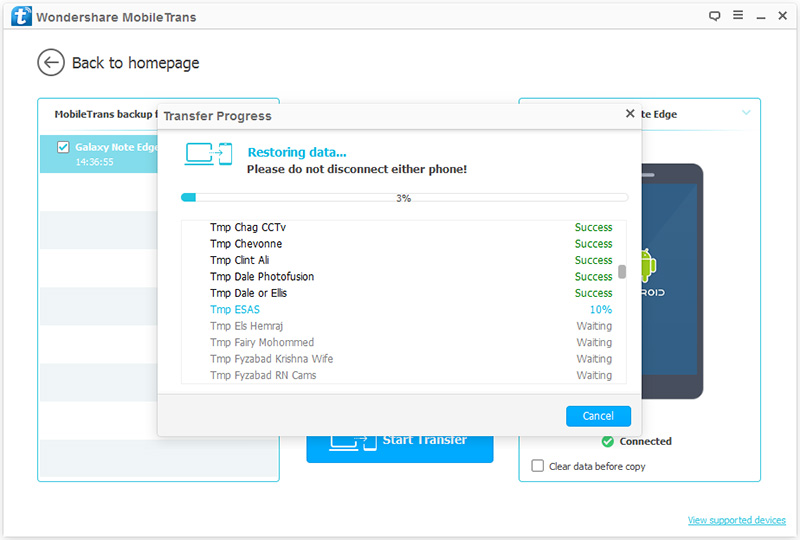
Step 3. Choose the file types that you want to restore and click on “Start Transfer”.
In the process of using the mobile phone, you may encounter some unexpected situations that lead to data loss of the mobile phone, such as accidental deletion, factory reset, SD card damage, system crash and so on. If you have the habit of regularly backing up your mobile phone data, then you can recover lost data through backup. If there is no backup, then you can choose some reliable data recovery tools, such as Realme Data Recovery.
Realme Data Recovery allows you directly to recover deleted and lost data including contacts, text messages, photos, videos, audio, WhatsApp messages, call logs, documents and more from any Realme smartphone.
Step 1. Download, install and run the Realme Data Recovery on your computer, then click on “Android Data Recovery”.

Step 2. Connect your Realme 9i/9 Pro/9 Pro Plus to computer, and enable the USB debugging mode on your phone’s screen.

Step 3. Select the file types that you want to scan, then click on “Next” to begin scanning your phone for the lost contents.

Step 4. Wait for the scan to complete, select the files that you want to recover, then click on “Recover” to save them back.

Realme Data Recovery also allows you to backup and restore your phone data, if you’ve ever backed up your phone data, you can follow the following steps to extract and recover the required data from the backup file.
Step 1. Return to the homepage of the software, then click on “Android Data Backup & Restore”.
Step 2. Connect your Realme 9i/9 Pro/9 Pro Plus to computer using its USB cable, and tap on “Device Data Restore”.

Step 3. Choose the backup file from the list and click on “Start” to begin extracting all the data that can be restored.

Step 4. Wait for the extraction to finish, select the files as you need, then click on “Restore to Device” or “Restore to PC” to save them all back.

Best Data Recovery is another reliable data recovery software that allows you to directly recover deleted and lost photos, videos, audio, documents, email and more from your Realme 9i/9 Pro/9 Pro Plus.
Step 1. Download, install and run the Best Data Recovery on your computer, then connect your Realme 9i/9 Pro/9 Pro Plus to computer using its USB cable.
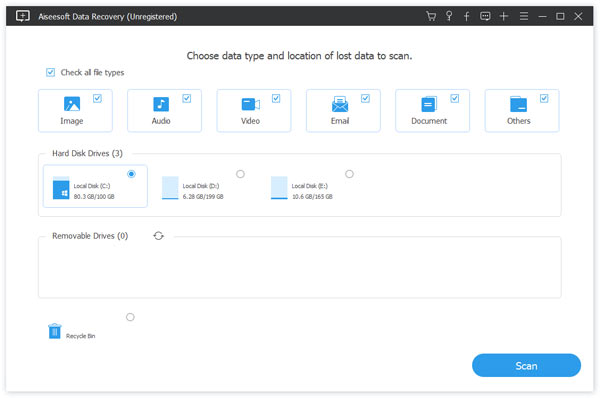
Step 2. Select the file types that you want to scan, and choose the disk name of your device, then click on “Scan” to begin scanning your phone for the lost data.
Step 3. Wait for the scan to finish, all the scan result will be listed. After selecting the required file, click “Recover” to save it back to the computer.

Note: If you cannot find the file you need, you can click “Deep Scan” to scan more files.