Summary: Now that we have entered the short video era, I believe that many people will have a lot of self-made or favorite videos on their phones. This article is about the best ways to recover deleted and lost videos on Samsung Galaxy Note 20 Ultra.
The Samsung Galaxy Note 20 Ultra mobile phone is equipped with a 6.9-inch QHD+ Super AMOLED display. This display has been greatly improved, such as supporting 120Hz refresh rate, 3088×1440 resolution, pixel density up to 496ppi, and providing HDR10+ support. The hole-punched screen in the middle is equipped with a 10-megapixel selfie camera. Compared with the Samsung Galaxy S20, the Galaxy Note 20 Ultra is equipped with a similar camera system, with a 108-megapixel rear main camera, a 12-megapixel telephoto sensor camera, and a 12-megapixel ultra-wide-angle sensor camera. This system can provide up to 50x hybrid zoom. In order to solve the autofocus problem that plagues the Galaxy S20 Ultra, Samsung has implemented a laser AF system focusing on the Note 20 Ultra. In terms of battery life, it is equipped with a 4500mAh battery and a dual-cell design. It supports up to 25W fast charge and can charge 50% in 30 minutes.
As we all know, video is the most memory consuming. So in order to run the mobile phone fast, everyone will delete the video regularly, but it will definitely be moved to a new place before deleting. In case you forget to transfer, the video will be cleaned up like this. If we need to restore it, the quickest way is to use the software that restores the data. Among software with different functions, I think Android Data Recovery is a very cost-effective software.
The reasons why Android Data Recovery is cost-effective are as follows. First of all, it is highly compatible and suitable for a variety of Android phone brands. In addition, it can recover many types of data, not only videos but also contacts, call logs, messages, memos, pictures, audios, WhatsApp Messages, etc. Moreover, it can be used on six devices, and there is no upper limit for the same device.


Step 1: Connect mobile phone and computer
Download, install and run the software on your computer, then click “Android Data Recovery”. At the same time, use a USB cable to connect Samsung Galaxy Note 20 Ultra to your computer, and the connection progress bar will appear on the main interface.

Step 2: Turn on the USB debugging of Samsung Galaxy Note 20 Ultra

After entering the program completely, it will automatically detect your Android version. You need to turn on USB debugging according to the steps provided by the program, and then click “OK”.
Step 3: Select the data type to scan
At this point, the main interface displays the directory where the data can be recovered, check the “Media” option, and then select the “Videos” in the project, and click “Next” after confirmation. Then the program will scan your phone.

Note: Here, the program needs permission to scan for deleted and lost data. If your device pops up a window, remember to click the device’s “Allow” to make sure the request is remembered. If your device does not pop up such a window, please click “Retry” to try again.

Step 4: Preview and recover the selected videos
After the scan is successful, all the found videos will be displayed on the main interface as a list, select those what you need, and then click “Recover”. All the videos that need to be recovered will be saved on your computer. Please be patient, the length of time required for recovery is directly proportional to the amount of recovered data.

Step 1: Run the program on the computer, and then click “Android Data Backup & Restore”.
Step 2: Now, please connect Samsung Galaxy Note 20 Ultra to PC by using its USB cable.
Step 3: There will be “Device Data Restore” and “One-click Restore” options on the main interface, just choose one.

Step 4: Select the desired backup from the backup list, and then click “Start”.

Step 5: Select the required videos, and then click “Restore to Device” to save them to your Samsung Galaxy Note 20 Ultra.

This method is used if you have backed up your videos with Samsung Kies before the videos are lost. By the way, regularly backing up data is a good habit!
Step 1: Launch Samsung Kies on the computer, then using a USB cable to connect your Samsung Galaxy Note 20 Ultra to the computer.
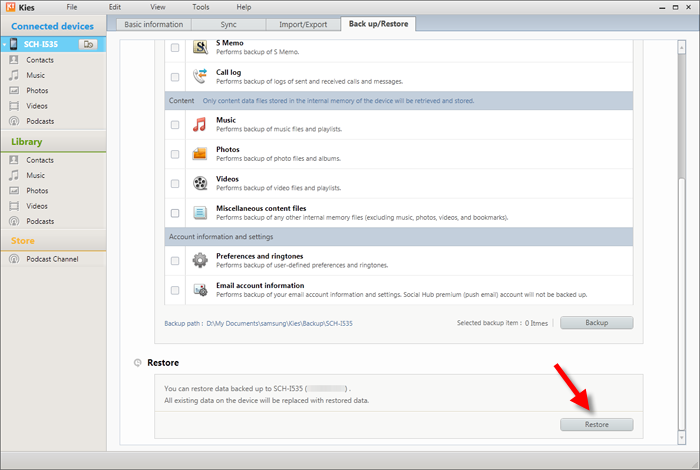
Step 2: Choose “Back up/Restore” from the menu at the top of the page, and then click “Restore” in the lower right corner to proceed to the next step.
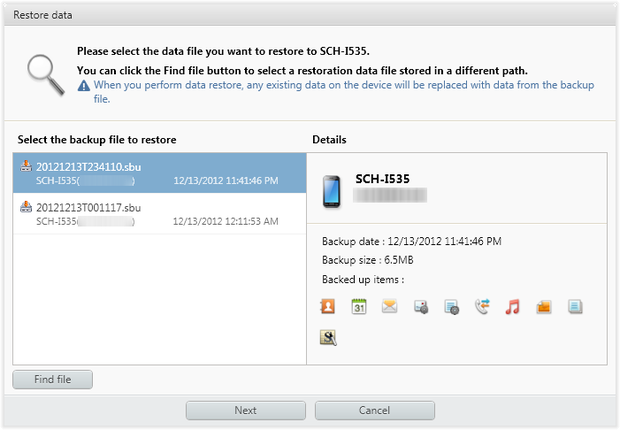
Step 3: Select the Kies backup file you created earlier, and then click “Next” to go on.
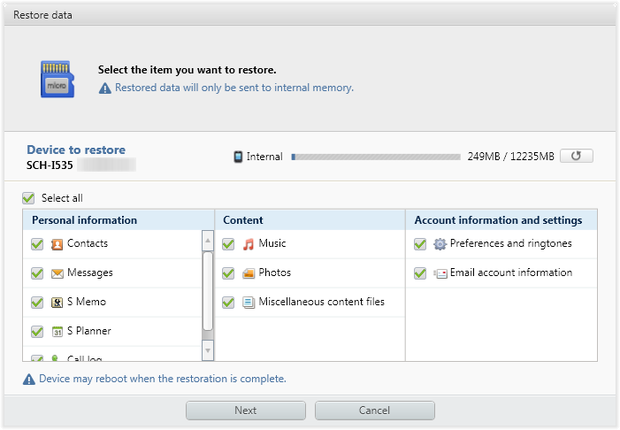
Step 4: Select the file type (if you just want to recover videos, just select “Videos”) you need and press “Next”.
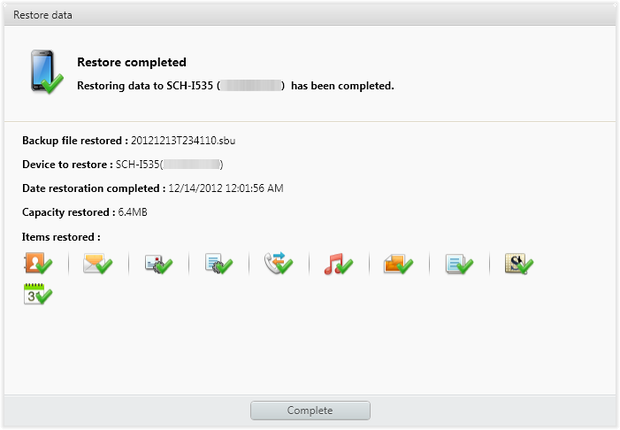
Step 5: Once your Samsung Galaxy Note 20 Ultra is recognized, you can restore all the videos to your device with one click.
Step 1: Click the below button to free download a trial version of Best Data Recovery to your computer.
Then install and run this software on your computer. Then connect your Samsung Galaxy Note 20 Ultra to the computer via a USB cable.
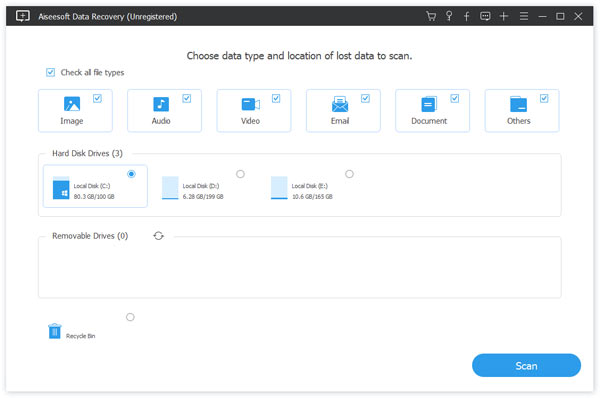
Step 2. Best Data Recovery enables you to recover any popular file type like photos, pictures, videos, image, document and more. When you enter the main interface, you should choose the data type(s) you want to recover first.

When your Samsung Galaxy Note 20 Ultra is recognized, please choose your device from the removable devices option bar.
Step 3. As you can see, there are two scanning ways to be offered, “Quick Scan” and “Deep Scan”. Clicking “Scan” button will give you a quick scan on your Samsung Galaxy Note 20 Ultra.

Step 4: After the scanning is completed, you will find that the scanned result are divided into different formats. Click the file as needed to see the details of a specific item, and then select them. You can use the “Filter” feature to quickly locate the files you want to recover. After selecting, click “Recover” on the page to save the videos to be recovered to the computer.
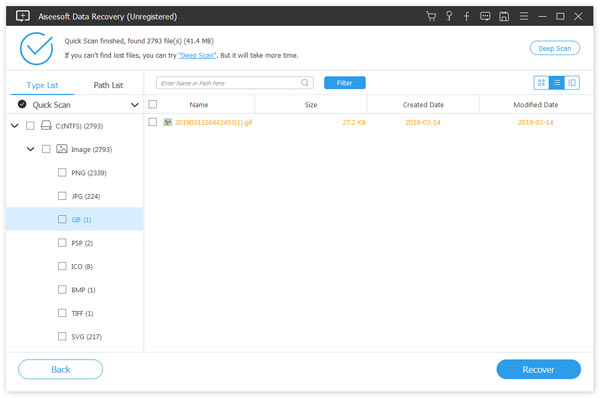
Note: If you can’t find the videos you need, just pressing the “Deep Scan” button which is in the upper right corner of the interface to scan it again.