“I was so angry that my boy deleted all photos and videos from my Galaxy A8 when I wasn’t at home. I haven’t back up recently photos on my phone. These photos are all of him, but he always want to delete them because he thought the photos were so stupid and ugly. Since he was born, I always record his growth by pictures and videos. I am so cherish these photos.However, when he grows up, he does not like taking photos. I can forgive him because of his adolescence. Oh, I must try to recover the deleted photos and videos!”
Well, you does not have to be such angry and rush, because the deleted photos and videos you want are recoverable. We sincerely recommend Samsung Galaxy Recovery to you. With the helps of Samsung Galaxy Recovery, you can recover deleted photos at ease. To Samsung Galaxy Recovery, lost data is not lost because it can easily recover deleted data, such as contacts, photos, massages, videos and more others. In a word, data recovery is a piece of cake to it. You might worry about compatibility or this software does not fit your phone. That’s out of the question. Samsung Galaxy Recovery supports not only Samsung, but HTC, LG, Sony, Google and more other Android brands.
Now, Let’s see how Dr Fone recover deleted photos and videos from your phone.


Download, install properly and run the program on your computer. And then, connect your Galaxy A8/A9 to the computer with USB cable.

Tips: Please close any other apps on your device and enable the USB debugging. If your device is recognized orderly, you can skip the step of enabling USB debugging.

Select files you want to scan. Select “Photos” and “Videos”, and then type “Next” to go on next step.

At first, select a corresponding scanning mode to your device. “Standard Mode” is the common choice because it works fast, so we always advise users choose it first. But if you find the base root fails, please select the “Advanced Mode”.

After that, press “Start” button to begin analyzing and scanning your device.
There are something you should pay attention to during the scanning:
1. If a Superuser authorization appearing on your device, just type “Allow” to confirm it.
2. Make the battery power of your device more than 20%.

When the scanning completes, you can check all deleted photos and videos from your device .
Select the items that you want and press “Recover” button to keep them on the computer.

Notes: If you want to avoid existing messages, you can turn on the button of “Display deleted files only” to separate them. Moreover, you can use the search function on the top right to search what you need in the scan result.
What’s the way to prevent data loss in Android Moible Phones?
To prevent data loss in Android phones in the future, please follow the tips below.
Please keep a backup of important Android data such as contact list, SMS, photos, videos, music files, etc. You can use a PC or other device to save backup data.
There are too many Android photo sharing apps You can use cloud services like Google drive to save photos.
If the battery backup of Android smartphone is insufficient, please do not take screenshots or videos.
Before deleting or formatting Android devices, please confirm whether to delete the data you want. In addition, using the “prevent writing” function of the memory card can prevent error deletion or formatting. In addition, you can also use various applications on the Internet that provide “prevent use” on memory cards.

Please install high quality antivirus software on Android devices. In addition, please do not connect to other systems infected with the virus.
Please do not remove or remove the memory card improperly in Android devices. And do not insert a damaged memory card or virus infected memory card into an Android device.
If data loss continues to occur, Android devices have solutions to repair data. Moreover, it is an Android data repair service provided by professional repair providers!
In today’s digital world, the loss of mobile contacts seems to be a trivial problem, but it will not disappear. With all the focus on data consumption, camera quality and social media features, it’s easy to forget that contact lists are one of the most valuable features of mobile phones. It’s painful to have all the contacts missing from your family, friends and work, so we’ve created a dedicated, comprehensive post that tells you how to recover them when needed.
How did this happen?
The most common reason for losing contacts is to upgrade the operating system of mobile devices. Whether your phone runs on iOS, Android or Nokia Symbian, manufacturers send intermittent software updates to refresh the phone with the latest features. Unfortunately, this can sometimes lead to the loss of your contacts, depending on where they are stored. Or, you may accidentally delete or delete contacts when synchronizing with new applications.
Recover Deleted/Lost Contacts from Android
Method 1: Recover androic contacts with Address Book application
Don’t worry! Your contacts may still be on your mobile phone.
If you are using an Android Samsung/Huawei/Sony/Vivo/Oppo/ZTE/THC/Xiaomi/LG/Meizu/Google/Nokia… device, the system sometimes hides your contacts and makes them look like they have been deleted.
Fortunately, there is a simple way to check if this is the case:
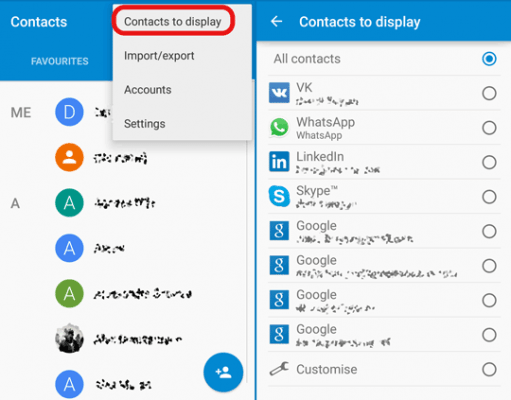
*Open the Address Book application.
*Press the menu in the upper right corner (three vertical points).
*Select Contacts to Display.
*If not, please click “All Contacts”.
*If “all contacts” are not selected, the problem should be solved.
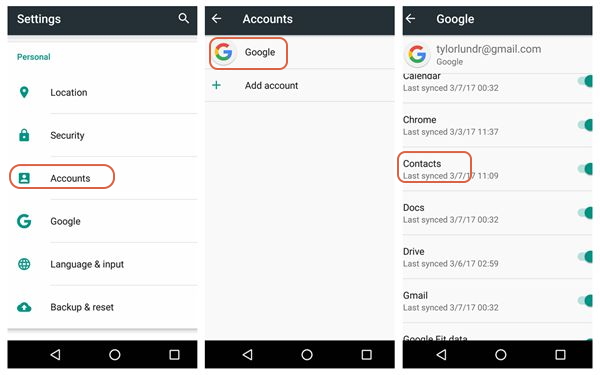
Method 2: Recover android contacts from Google
If you are an Android user, you should first check the Google account that has been linked to the mobile device. When you first create an account on your mobile phone, you may automatically accept the transfer of your contacts. If you do, the good news is that you can restore all contacts directly to your mobile phone.
To do this, go to your inbox and select Contacts from the drop-down menu.
If you can see your contacts, click More, and then click Restore Contacts.
You can also take some measures to prevent this from happening again.
*Start your contacts, and then select the menu/more buttons.
*Then navigate to Settings > Address Book > Import/Export Contacts > Export to Device Storage
*Select the contact you want to transfer from the list, and click Finish.
*Then delete the current SIM card and insert another SIM card into the device.
*Then navigate to Settings > Address Book > Import/Export Contacts > Export to SIM Card.
*Select contacts and confirm that they are copied to your other SIM cards
Your contacts are now backed up to other SIM cards
Method 3: Recover android contacts with Gmail
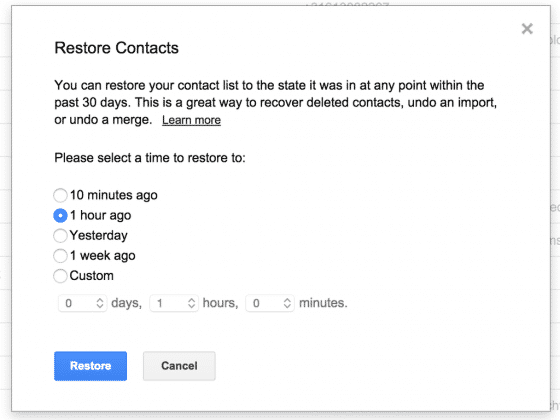
If your Android device is synchronized with your Google account, the chances of restoring lost contacts will certainly be in your favor. Gmail provides a great feature that allows you to restore backups of all contacts, which can be traced back up to 30 days at most. After doing this, you can resynchronize the device with the Google account and restore all contacts.
Side note: If your contacts appear in Gmail but not on your mobile phone, please refer to the above steps and/or try to completely resynchronize your Google account.
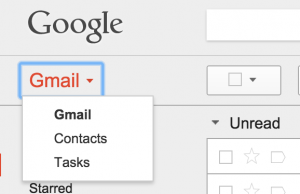
To restore the backup of Gmail contacts, go to your inbox and select Contacts from the drop-down menu on the left.
Once you see the contact list (or not), click More to enter the drop-down menu, where you need to select the “Restore Contacts…” option.
Frequent problems in SD card
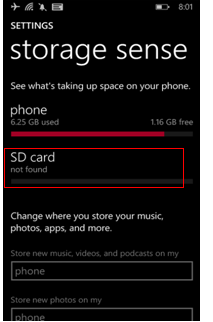
1 Android mobile SD card can not be detected
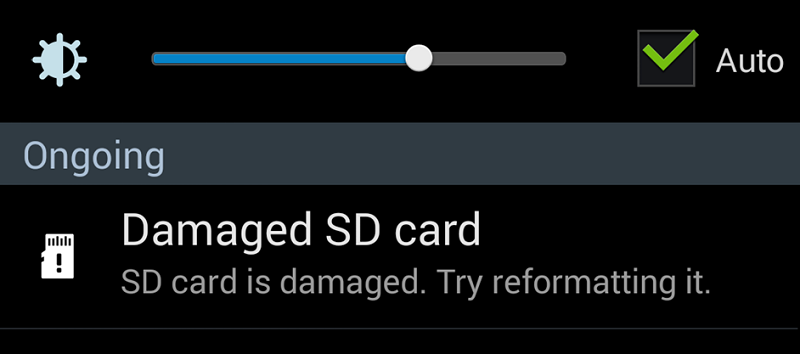
2 The SD card is damaged. Try reformatting it
3 Unexpected deletion of SD card
4 Blank SD Card
1 Android mobile SD card can not be detected
Method 1: Update memory or SD card driver
* Connect SD card to PC
* Right-click my computer and select “Manage”
* In the taskbar, click “Device Manager” and then click the “+” icon next to “USB Serial Bus Controller”. Yellow exclamation marks will appear.
* Right-click and select Update Driver Software, then press “Auto Search Update Driver Software”
* Wait patiently and allow the driver to install and restart it
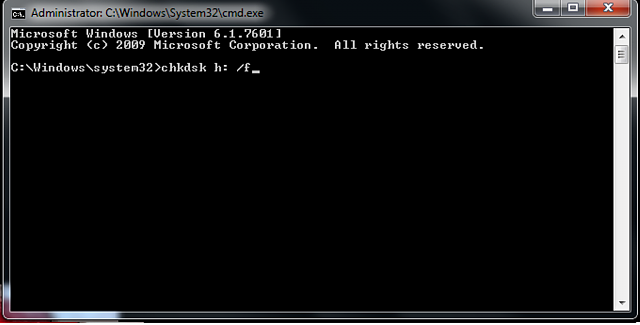
Method 2: Repair “undetected SD card” using CHKDSK command
First, right-click My Computer > Select Management > Disk Management, and then look up the device in the Drive Viewer to see if the PC can recognize the memory card.
If no card is detected, press Win + R > type: cmd, and then press Enter.
If an SD card is detected, enter CHKDSK D:/ F and press Enter. Or you can type CHKDSK D:/f/offline scanandfix and press Enter. (Remember that D is a drive letter)
2 The SD card is damaged. Try reformatting it
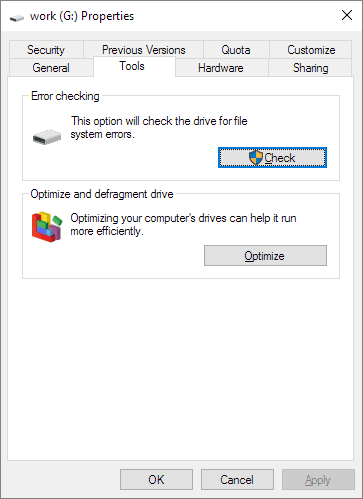
Method 1: Scanning and repairing SD cards
The best way to solve the problem is to right-click the SD card and choose to fix the error from the properties menu.
First, connect the SD card to the computer, then go to my computer > SD card. Now right-click the SD card and open the properties. Click the Tools tab > Check button. Now allow the scanning process to complete and then close it. Finally, right-click the USB flash disk and click “pop-up” and take out the SD card.
Method 2: Solving problems using CMD commands
Using the CHKDSK command can help fix any type of SD card problem, and it can help you access files from Android devices.
Step 1: Connect SD card to computer using card reader
Step 2: Now go to the Start menu, type “cmd”>click “input”, and you will get “cmd.exe”
Step 3: Then click “cmd. exe” and you will see the following commands
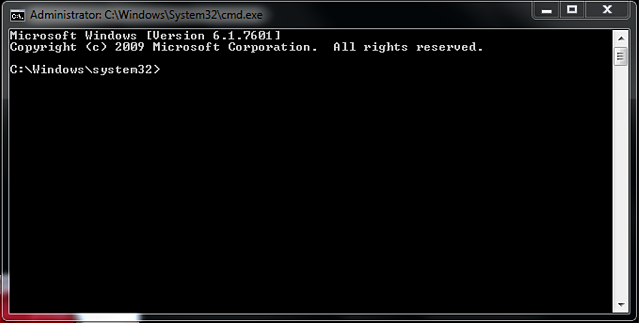
Step 4: Enter chkdsk/X/f [sd card letter]: “or” CHKDSK [sd card letter]:/ f“
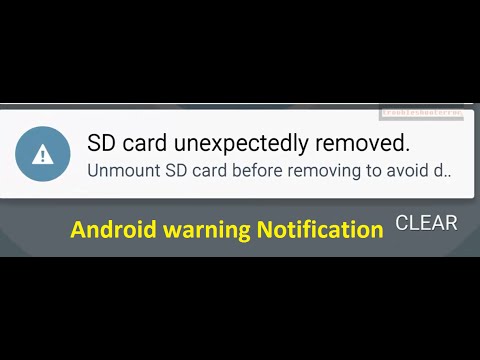
3 Unexpected deletion of SD card
Method 1: Check whether the SD card is damaged
Such errors occur when SD cards are damaged or damaged. Therefore, you should check by removing the card from your mobile phone and putting it on another system or device. When you are still unable to access the card, transfer data immediately and get a new SD card.
Method 2: SD Card Infected by Virus
Many times, SD cards can be infected with viruses, so you may encounter such errors. Therefore, in this case, you need to recover the data as soon as possible and run anti-virus software to scan the SD card.
Method 3: SD Card Unformatted
When SD cards are formatted for a long time, there may be an “accidental deletion of SD cards” error. So the best solution is to format the SD card once and check if the problem has been solved.
4 Blank SD Card
Method 1: Try to restart the phone
Whenever you see a “blank SD card” error on your mobile phone, you need to do something to solve the problem. But don’t think about formatting the card, just restart it. This will help you solve the problem and your card may start working again.
Method 2: Reinsert SD Card
Another thing you can do is take the SD card out of your phone and insert it again. This is a simple way to fix such problems immediately./p>
Method 3: View hidden files on SD cards
Most of the time, files are hidden form, you will receive a message “blank SD card”. In this case, you should follow the following steps to display the hidden file.
Step 1: First, connect the blank SD card to the computer using a card reader
Step 2: Now run the control folder to get the File Explorer option
Step 3: Then open the View tab
Step 4: Finally, select Show Hidden Files, Folders and Drives and make changes
Restore photos and videos
If you delete an item and delete it, check your trash can to see if it is there.
On an Android phone or tablet, open the Google Album application for photos.
In the upper left corner, click on the menu in turn, and then click on the wastebasket.
Touch and hold the photo or video to be restored.
At the bottom, click “Restore”. Photos or videos will be returned:
Application of Graphic Library in Mobile Phone
In your Google Album Library
In any of its albums
If the project is not in your garbage can, it may be permanently deleted.
Can’t see photos or videos?
If the deleted photos or videos are not in the garbage can, they cannot be restored.
If the following situation occurs, you will not be able to restore the photos:
You moved it to the dustbin more than 60 days ago.
You move it to the garbage can and empty your garbage.
You have permanently removed it from the garbage can.
You have permanently deleted the device from its library application without backing it up first.
To find and restore photos easily, enable backup and synchronization.
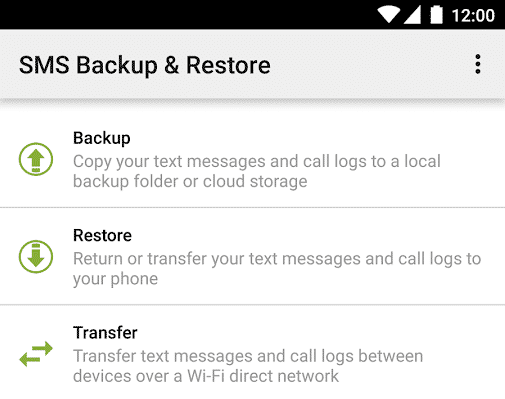
The app won 4.5 star ratings in Play Store. It is completely free to download and provides many functions.
Text messages are in XML format. It also saves your data in the cloud and local storage. To save data in the cloud, you must install additional applications in your application. It will automatically save your message.Related Articles