Summary: This article will tells the best way for you to restore the deleted and lost data including DOC/DOCX, XLS/XLSX, PPT/PPTX, PDF, CWK, HTML/HTM, INDD, EPS and so on from your computer, hard drive, flash drive, memory card, etc.
With the development of technology and the advancement of society, personal computers are becoming more and more popular. Almost everyone now has their own laptop, which people can use to work and learn, as well as some data and files. Documents and documents are very common in our daily lives. When people edit a document, they are usually saved at any time, but it is inevitable that there will be negligence. Recently, my friend suddenly crashed while editing the document. When he restarted the computer, he found that his document was missing. The importance of the documentation is self-evident. What should you do if you encounter this problem?
Best Data Recovery is a powerful and secure data recovery software. As the name implies, this is a soft arm that focuses on data recovery. It can help you recover almost all deleted/lost files such as photos, files, emails, audio, videos, etc. Computers, hard drives, flash cards, memory cards, digital cameras, etc. Windows and Mac. Whether you’re losing data because of deleted, formatted partitions, hard drive problems, raw hard drives, crashed computers, or other reasons, this file recovery software is always your best choice.
Supported Documents: DOC/DOCX, XLS/XLSX, PPT/PPTX, PDF, CWK, HTML/HTM, INDD, EPS, etc.


If you are using this software for the first time, please read the following carefully to help you get familiar with it faster.
Just like you use other software, you must first download and install Best Data Recovery on your computer. Run it when you are ready.
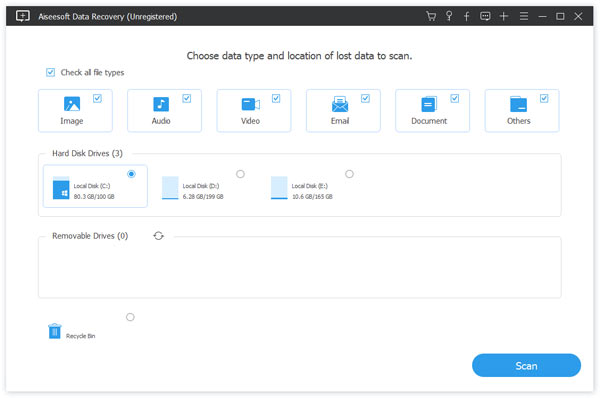
When you enter the main interface of the software, you can see various types of file. For example, image, document, video, audio, etc. These are all recoverable items. If you just want to recover document, select it. Then select the disk and click “Scan”.

Note: There are two scan modes available, “Quick Scan” and “Deep Scan”. Clicking “Scan” button will give you a quick scan on the chose disk drive.
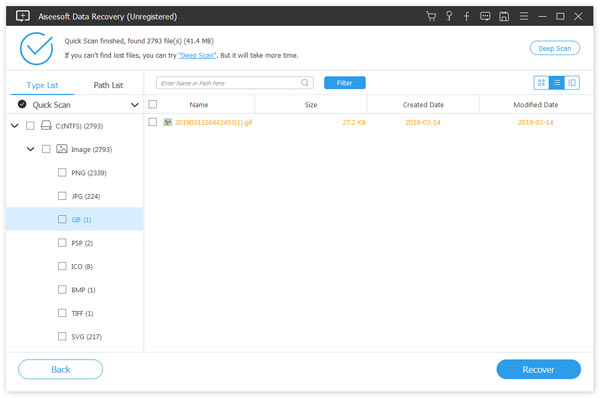
After the scan is complete, all data that can be recovered is listed. You can use the “Filter feature” to quickly locate the document you want to recover. If you can’t find the data you need, start the “Deep Scan” again. It will offer you all possible results which can be restored.

Once you have made your selection, click the “Recover” button and you will be able to easily bring all selected document back to your computer.
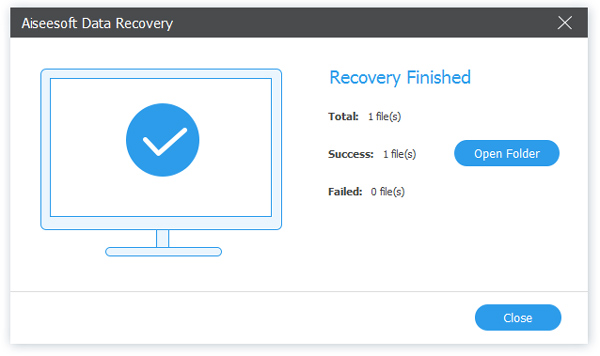
Wait until the recovery process is finish, you can click “Open Folder” to view the restored data from the corresponding save path.
Related Tutorials: