Summary: Looking for a simple way to transfer all data from an Android phone or iPhone to brand new vivo X60/vivo X60 Pro/X60 Pro+? Don’t know how to safely recover the deleted and lost data from your vivo X60/vivo X60 Pro/X60 Pro+ during daily use process? If you have the above question, congratulations, you have come to the right place, this article will tells your some useful solutions to transfer and recover your data on vivo X60/vivo X60 Pro/X60 Pro+.
The vivo X60 series is known as the brand new flagship mobile phone for professional imaging. The vivo X60 series will provide four versions, including vivo X60 straight-screen version, vivo X60 curved screen version, and vivo X60 Pro and vivo X60 Pro+. The vivo X60 series has a very big selling point. Except for vivo X60 Pro+, which will be equipped with the Snapdragon 888 flagship processor, the rest of the models are equipped with Samsung’s Exynos 1080 flagship processor. In addition, the vivo X60 series will also be equipped with an imaging system jointly developed by Zeiss, as well as using a new second-generation micro-head technology.
No matter it is the stylish design of the mobile phone, or the performance and technical content of the mobile phone, it is undoubtedly very attractive, so you also join the group of the vivo X60 series. Maybe you have been a loyal fan of vivo before, or maybe you used to be a user of other Android phones, or even an iPhone user, no matter what reason you abandoned your old device and chose the vivo X60 series, after you getting your phone, the first thing you have to do is to transfer data from your old phone. In the process of using it, you may lose some precious data due to various reasons, so you need to master how to effectively recover data. With these questions, let’s take a look at the detailed tutorial below.
Note: This method is only applicable to the Android smartphones and tablets that support an external SD card.
vivo Cloud service is specially developed by vivo for its users for file backup, data synchronization, and search for mobile phones, etc. You can manage important data such as photos, videos, contacts, text messages, notes, etc. online, and you can also locate and lock your phone online. If your old phone is a vivo phone, and you’ve ever synced your contacts and SMS to vivo Cloud, then you can easily restore to the new vivo X60/X60 Pro/X60 Pro+.
Tips: This method is only applicable to vivo mobile phone users. Before using this method, please make sure that you have logged in the vivo account previously used for backup on your vivo X60/X60 Pro/X60 Pro+.
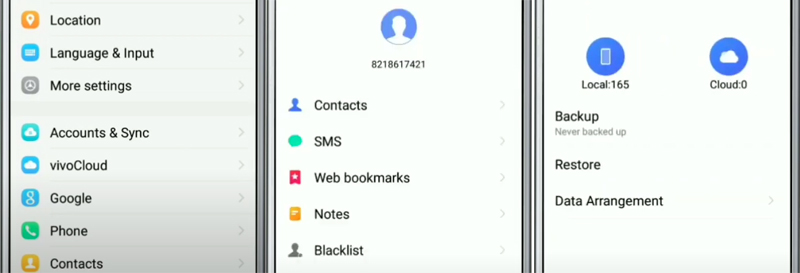
Tips: If necessary, you can also restore the web bookmarks, notes, blacklist back to your vivo X60/X60 Pro/X60 Pro+.
No matter you wanting to transfer data from an Android or iOS device, you just need the Mobile Transfer software, which can one click to transfer all data from phone to phone.
Mobile Transfer is a well-known yet multi-purpose mobile phone data manager. With the help of this software, you can directly transfer all data including contacts, text messages, calendar, music, call logs, photos, videos, Apps, App data, documents and more from any Android phone and any iPhones to vivo X60/X60 Pro/X60 Pro+. Now, let’s show you how to do so.


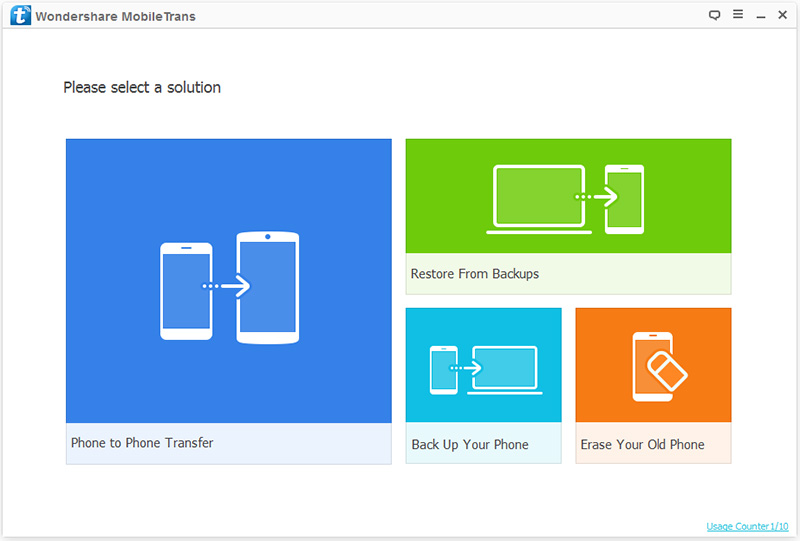
Step 1. Download, install and run Mobile Transfer on your computer, then click on “Phone to Phone Transfer” and press “Start”.
Step 2. Connect your old Android/iPhone device and vivo X60/X60 Pro/X60 Pro+ to computer by using their USB cables, the program will detect them soon, and they will be displayed on both sides of the interface after recognization. Please use the “Flip” button to adjust the position of your source and target devices.

Step 3. After that, all the transferable files of your old Android/iPhone device will be listed, just choose whose whatever you needed, then click on “Start Transfer” to sync them to your vivo X60/X60 Pro/X60 Pro+.

Tips: If you want to erase all data on your vivo X60/X60 Pro/X60 Pro+, you can check the “Clear data before copy” option to do so.
Mobile Transfer also allows user to back up and restore phone data, no matter what types of smartphone you were used before, as long as you get a backup file that supported by Mobile Transfer, then you can easily transfer data from backup to the vivo X60/X60 Pro/X60 Pro+.
If your old phone is an Android phone, and you’ve ever backed up your phone with Mobile Transfer or Samsung Kies, then please follow the steps below:
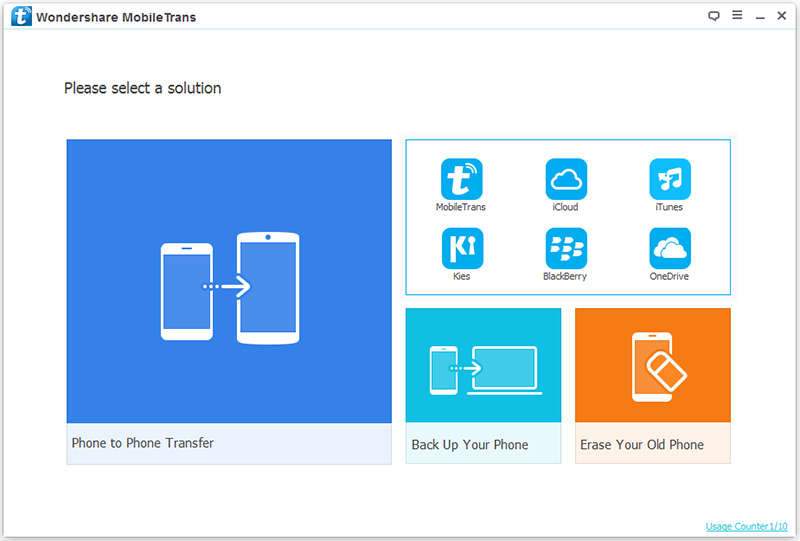
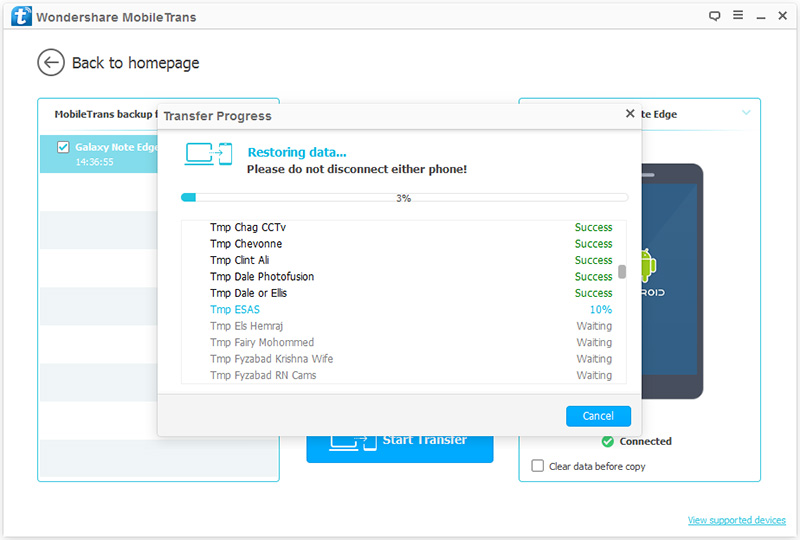
Step 1. Run Mobile Transfer, then click on “Restore From Backups” and select “MobileTrans” or “Kies”.
Step 2. Select a backup file from the list and connect your vivo X60/X60 Pro/X60 Pro+ to computer via a USB cable.
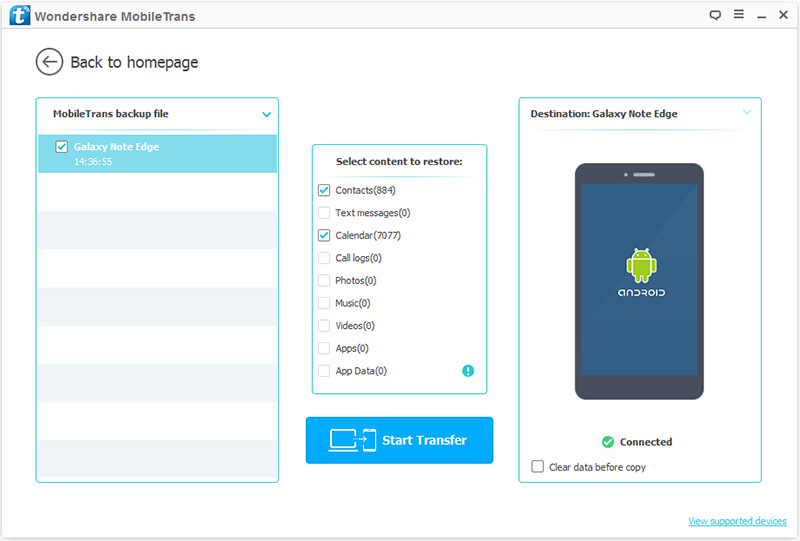
Step 3. Select the files you need, then tap on “Start Transfer” to sync them to your vivo X60/X60 Pro/X60 Pro+.
If your old phone is an iPhone or iPad, and you’ve ever synced your device with iTunes, then please follow the steps below:
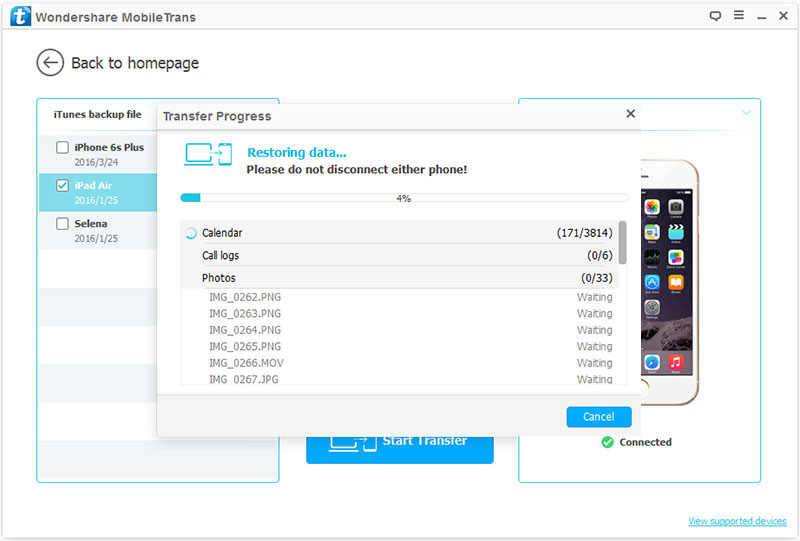
Step 1. Run Mobile Transfer, then click on “Restore From Backups” and select “iTunes”.
Step 2. Select a backup file from the list and connect your vivo X60/X60 Pro/X60 Pro+ to computer via a USB cable.
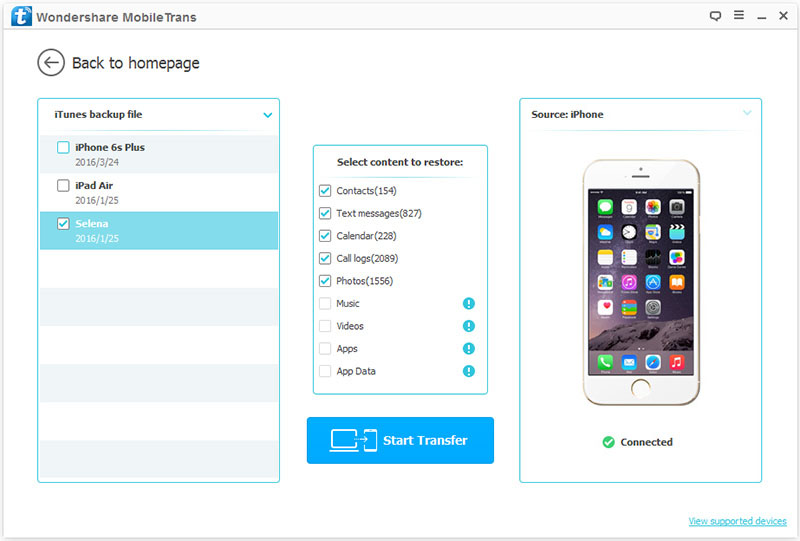
Step 3. Select the files you need, then tap on “Start Transfer” to sync them to your vivo X60/X60 Pro/X60 Pro+.
If your old phone is an iPhone or iPad, and you’ve ever synced your device with iCloud, then please follow the steps below:
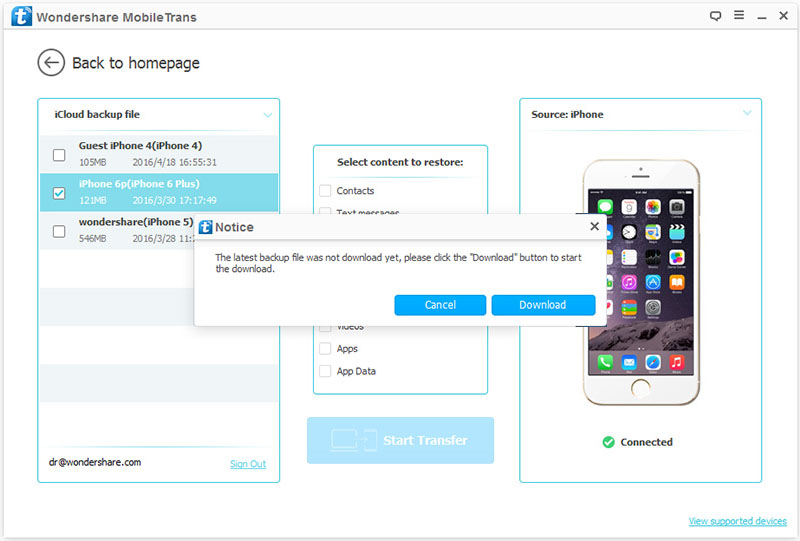
Step 1. Run Mobile Transfer, then click on “Restore From Backups” and select “iCloud”.
Step 2. Sign in your iCloud account and connect your vivo X60/X60 Pro/X60 Pro+ to computer via a USB cable.
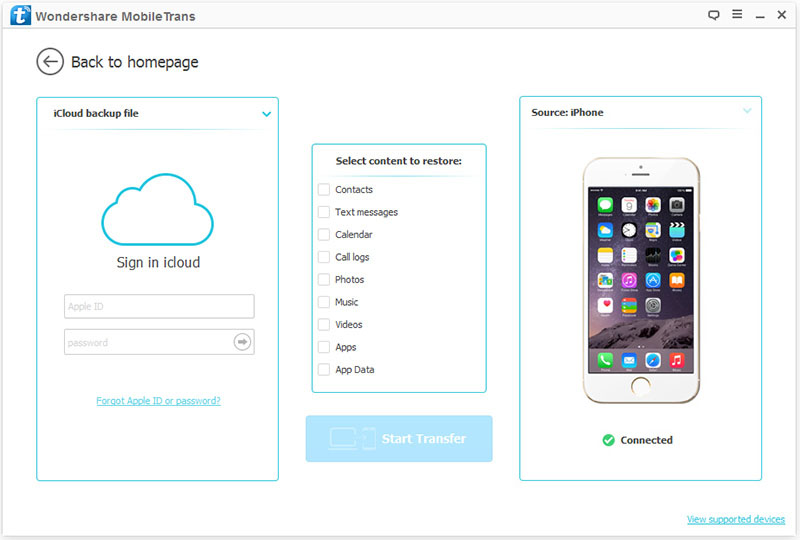
Step 3. Select a backup file from the list and download it to your computer.
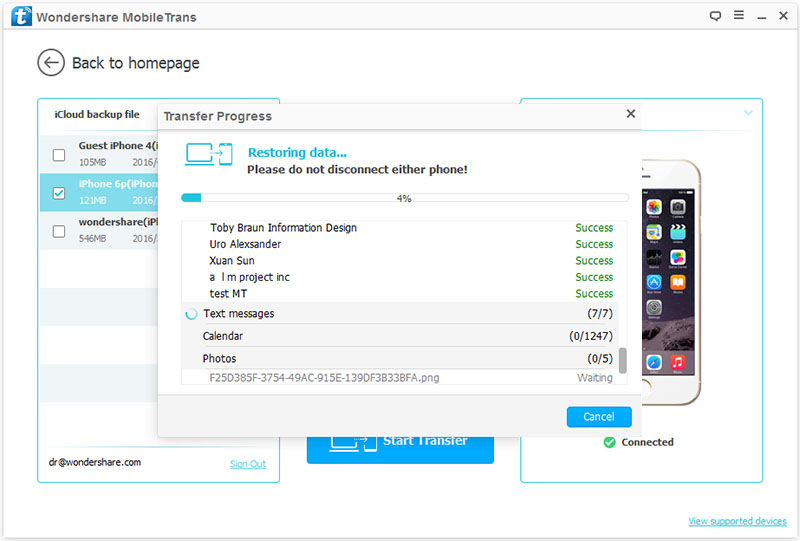
Step 4. Select the files you need, then tap on “Start Transfer” to sync them to your vivo X60/X60 Pro/X60 Pro+.
Whenever data loss occurs, many users realize the importance of backup, and time cannot go back. Fortunately, you can still recover lost data through third-party data recovery software, even if you do not have a backup.
Android Data Recovery is the leader among many third-party data recovery software. Its powerful compatibility and data recovery capabilities are beyond your expectations. With the help of this program, you can directly recover data including contacts, WhatsApp messages, text messages, photos, videos, audio, call logs, documents and more from any Android smartphones and tablets, of course including your vivo X60, vivo X60 Pro and vivo X60 Pro+. Next, let us witness its strength.
Step 1. Download, install and run the software, then click on “Android Data Recovery” on its homepage.

Step 2. Connect your vivo X60/X60 Pro/X60 Pro+ to computer via its USB cable. Generally speaking, the program will quickly detect your device, if not, don’t worry, the program will provide you with a series of help, you just need to follow the prompts to complete the relevant operations.

Tips: Please ensure that you’ve enabled the USB debugging on your phone’s screen, if done, tap on “OK” to go on.
Step 3. Wait for the connection is successful, the program will ask you to select the file types that you want to scan and recover, you can choose all or some of them, then click on “Scan” to begin the standard scanning mode.

In order to scan more deleted and lost data from your device, the program needs your permission to install the corresponding tools and obtain the relevant permissions during the scanning process. Please follow the prompts to complete these requests.

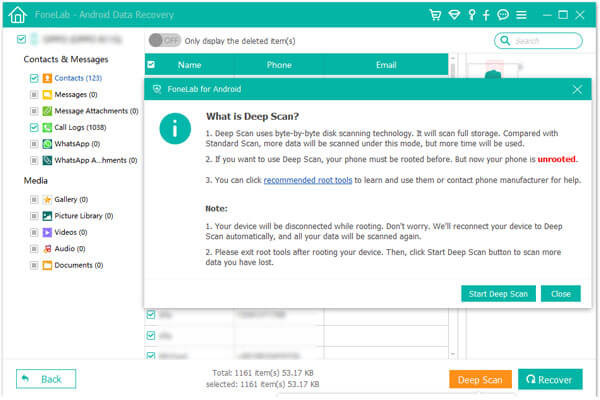
Step 4. Once the scan is finish, all the scanning result will be displayed, you can click to preview them one by one, after selecting the files you need, click on “Recover” to save them back to your vivo X60/X60 Pro/X60 Pro+.

Tips: If the standard scan can not find your data, you need to use the deep scan mode to re-scan your device and repeat the fourth step. Please be patient, it may take longer time to scan.
If you have a backup file available, then data recovery will become much simpler and easier.
Step 1. Run the software and click on “Android Data Backup & Restore”.
Step 2. Connect your vivo X60/X60 Pro/X60 Pro+ to computer by using a USB cable. After that, choose a restore mode as you like, either “Device Data Restore” or “One-click Restore”. We recommend you to choose the “Device Data Restore” mode here, which will take less time and take up less phone memory.

Step 3. Choose a backup from the list and press “Start” to extract all the recoverable file from the selected backup file.

Wait for all the contents have been extracted, select the files you need, then tap on “Restore to Device” or “Restore to PC” to recover them.
