When it comes to the iphone SE, many people would say it’s a failed product, but there’s no denying that SE has a lot of fans who love small screen phones. There’s been a lot of news lately about the new SE phone. The appearance of the new SE phone is very pretty,apart from the narrow top of the screen, the whole thing is the touch screen. It is configured with a 4g-run memory plus 64 gb of storage. In this configuration, the new version of the SE phone can be updated several times with ios, without any concern that apple will fix the iphone’s glitzy bugs. The camera has also grown from a single camera to a dual camera, with 12 million hd pixels. It can alao help you shoot the perfect 4K video. It has all the features of the iPhone 8, though the new version of the SE screen has been upgraded to 4.7 inches and named SE plus. Do you want to know more about the iPhone SE Plus? If so, keep track of its news.
Nowadays, more and more people like using iPhone due to its advanced configurations. However, iPhone is different from Android, thus, some people are apt at dealing with the problems in Android, but unfamiliar in iPhone. For example, how to recover deleted or lost data from iPhone availably? Actually, that is why I wrote this article. I just tend to help those people solve this problem. Do you also have this problem? Do you know the best solution? Now please let me give you a good suggestion. In fact, the suggestion is to make use of an admirable and thoughtfully designed software – iPhone Data Recovery.
iPhone Data Recovery is the best tool of recovering lost data I figure. It’s also an all-in-one data recovery software. Not only can data be recovered from the iOS devices, it can also be accessed from iTunes Backup File and iCloud Backup File. It fully compatible with the latest iOS 11 and iPhone X/iPhone 8/iPhone 8 Plus. What’s more it also highly supports a variety of files, incorporating contacts, calendar, reminder, text messages, imessages, call history, notes, APP photos, APP videos, Whatsapp and so forth. Over and over, it has a higher recovery rate. Just with your a few clicks and within a few minutes, your deleted data will be restored without any lost. Furthermore, this software will give you some guides to operate it. Thus, it’s obvious that it doesn’t require any specialized knowledge, everyone just need to follow its instructions. It’s so time-saving and convenient, do you think so? In addition to these, there are more humanized features to explore.
So to say that the iPhone Data Recovery is efficient and practical. Likewise, maybe someone have heard of the Android Data Recovery, it’s similiar with iPhone Data Recovery. If you need to restore lost data from Android, you can take it into consideration. Having known so much, do you want to konw how to operate it? You can download it grastis temporarily and follow my instructions. Please let me take the iPhone SE Plus as an example to show you how to recover deleted and lost data from iPhone SE Plus.


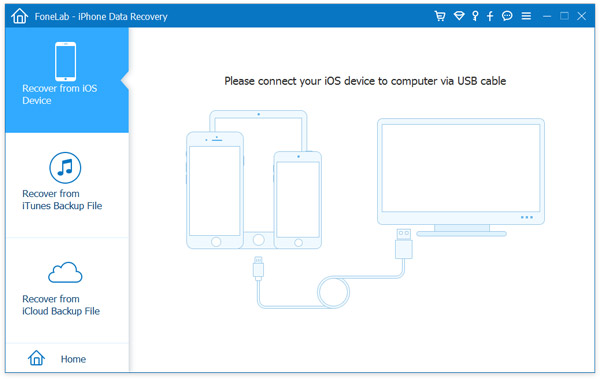
In the first place, please download and run this software on your computer. Then you can catch sight of three options on the primary interface, choose “Recover from iOS Device”. Besides, the software meed to scan your phone, so you ought to link your iPhone SE Plus with computer via its USB cable and press “Trust” button on your device to grant the permission to the connection. After connection, the software will show your iPhone name and other information.
Note: The program require the latest iTunes version to nomally scan your device, so please ensure that you’ve installed the latest iTunes version on your computer before recovering your deleted data.
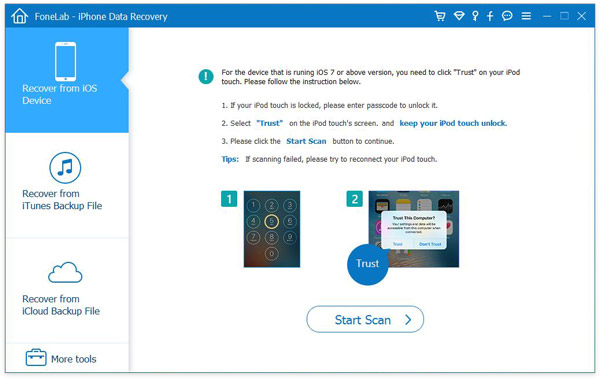
When the program has detected your iPhone, you can click on the “Start Scan” button to let the software scan your device for all the data. The scanning process may last a few minutes, which hinges on the amount of data on your device. However, it’s worth waiting for something meaningful, isn’t it?
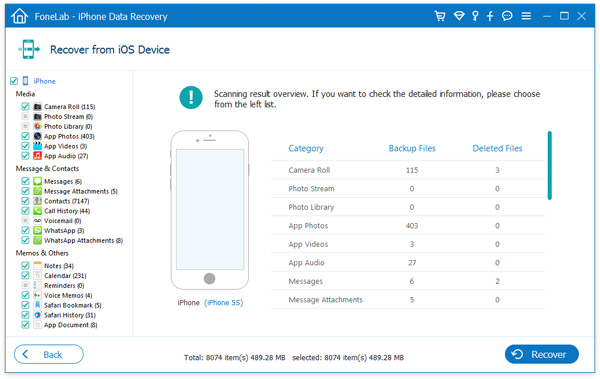
Data both lost and existing on your iPhone SE Plus will be displayed in categories at the instant of the scan is completed. Then select the categories those related to data you need, and preview the details on the right. After choosing, click on the “Recover” button to save the selected content back to your computer. Please be patient, the whole process won’t take you too long to wait. By the way, please ensure that your iPhone SE Plus and computer are connected well through the whole process, or else it’ll be not smoothly and keep you waiting for a long time.
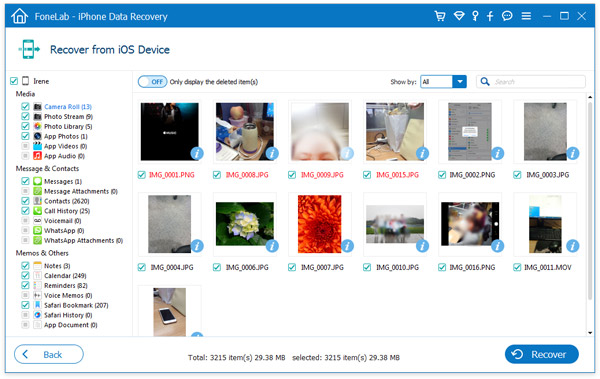
Tips: To save your time, you can press the “Only display the deleted item(s)” button to hide the existing data.
In addition to directly restore your data from iPhone SE Plus, this iPhone Data Recovery also allow you extracting to restore data from the iTunes or iCloud backup file: