Regularly backuping your phone data to prevent data loss effectively. As we all know, iTunes can backup your data from iPhone, as well as iPad and iPod. To backup your iPhone data with iTunes, you just need to install the latest version of iTunes on your computer > connect your iPhone with iTunes > choose the file your need to backup > choose devices > click Backup Now to start. The iTunes will automaticall backup your iPhone data with ease. After that, you can restore your data from iTunes backup whenever you lost or accidently deleted your files from iPhone. Connect iPhone > Choose File > Devices > Restore from Back up, that’s all. However, if you just want some of your data back, not all the data, such as several important text messages, contacts, and so on. Is it possible to extract lost data from iTunes backups and easily to restore it?
Everything is possible since using Data Recovery for iPhone. iOS Data Recovery is a magical and practical data recovery program, which not only enables iPhone users to directly restore lost iPhone data, but also allows to extract and recover data from iTunes/iCloud backup. Easily get back your data with a click, no matter contacts, text messages, videos, photos, WhatsApp messages, call history, Safari bookmarks and so forth. Now, please download a trail version and follow the below steps to retrieve your lost or deleted data from iTunes backup files.


Note: Don’t sync your iPhone with iTunes when you realize that you’ve lost data, or the iTunes backup file will be updated after the sync.
Step 1.Install and run the Data Recovery for iPhone
Step 2. Choose the recovery mode and extract your backup file
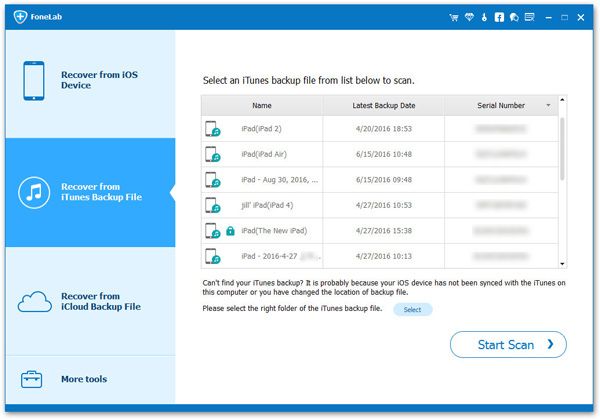
When the primary window pop up, choose the “Recover from iTunes Backup File” mode at the top column, then all the previous iTunes backup files on this computer will being displayed. According to your need, choose the one and click “Start Scan” to extract it.
Step 3.Connect iPhone to PC and restore your data
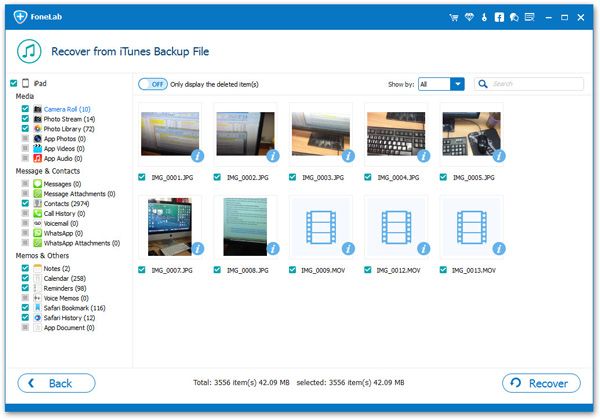
When the scanning is finished, you can see all the extracted result in the left sidebar. You ought to connect your iPhone to computer now. If done, tap to preview the detail information in the window on the right, mark those what you want, and click ““Recover to Device” or “Recover to Computer”” to directly restore them back to your iPhone.