Summary: This article will introduce you three methods to help you use the most efficient method to retrieve lost or deleted data on Nokia X10/X20, such as Contacts, Messages, Photos and Videos, etc. If you need these methods, then browse this article.
In the core configuration, both Nokia X10 and Nokia X20 use the Snapdragon 480 5G chipset and support 5G. In the storage configuration, Nokia X20 has 6/128GB and 8/128GB configurations, and Nokia X10 also has 6/128GB options. In terms of screens, both Nokia X10 and Nokia X20 are equipped with a 6.67-inch LCD with a resolution of 1080 x 2400 px. In the camera section, the rear camera module of the Nokia X20 has a 64-megapixel main camera, a 5-megapixel ultra-wide-angle camera, a 2-megapixel macro camera and a 2-megapixel depth sensor. Not only that, the X20 is also equipped with ZEISS optics, as well as tools for color grading photos. The front camera of the Nokia X20 uses a 32-megapixel sensor, while the main camera of the Nokia X20 is based on a 48-megapixel sensor, which has also been blessed by ZEISS. The remaining three cameras are the same on the back, including a 5-megapixel ultra-wide angle. The front camera of the Nokia X10 is an 8-megapixel sensor. In terms of battery life, both phones use the same 4470 mAh battery and support 18W chargers.
When using a mobile phone, we always store a lot of important data in the mobile phone, such as Contacts, Messages, Photos and Videos. I believe you will do the same when using Nokia X10/X20. But there are always accidents in life. Our mobile phone will lose important data in the mobile phone for some reason. To make matters worse, these lost data have not yet been backed up. When important data stored in Nokia X10/X20 is accidentally lost, how should you retrieve the data? If you don’t know how to retrieve lost or deleted data in Nokia X10/X20, you can read this article. This article introduces three methods to help you recover lost data on Nokia X10/X20. In addition, I will show you how to quickly back up data to your computer in the last part of this article. Now let us take a look at these methods together.
This method will show you how to recover lost or deleted data in Nokia X10/X20 without a backup. Using this method, Nokia Data Recovery is your best tool.
Nokia Data Recovery is a professional data recovery software. With its help, many users have successfully retrieved the lost or deleted data from the device. First of all, this software can be compatible with many devices, including Nokia, Huawei, Samsung, OPPO, vivo, Meizu, Xiaomi, China Unicom, LG, Google, oneplus, etc. Nokia Data Recovery can help you recover almost all the lost data in Nokia X10/X20, including important Contacts, Messages, Photos and Videos, Audio, WhatsApp Chat History, etc. in the device. Not only that, the safety factor of this software is also very high. Use it to complete data recovery, you don’t have to worry about any leakage of your data.


Step 1: Download and install Nokia Data Recovery on your computer, and run it. Then select “Android Data Recovery” on the software’s page.

Step 2: Use a USB cable to connect your Nokia X10/X20 to the computer. Then enable the USB debugging on the device. If you don’t know how to enable USB debugging on Nokia X10/X20, you can follow the instructions of Nokia Data Recovery to complete this operation. The software will automatically detect your phone to provide you with the corresponding steps. If done, tap “OK”.

Step 3: When the program successfully detects your Nokia X10/X20, you can view all recoverable file types on the page. Select the types of data you need to recover, and then click “Next” to begin to scan your device for the lost data under the Standard Scan mode.

Tip: You can also click on the “Deep Scan” button to directly scan you device under the deeper scan mode, which will spend more scan time, but will find more lost contents.
Step 4: After scanning, you can preview all specific items of scanned data on the page of the software. Select the data that needs to be restored to your phone, and then click “Recover” to start restoring your data to Nokia X10/X20.

To use this method, you also need the help of Nokia Data Recovery, as long as you have used this software to back up your phone data.
Step 1: Run the installed Nokia Data Recovery on the computer, and then select the “Android Data Backup & Restore” mode on the page.
Step 2: Use a USB cable to connect your Nokia X10/X20 to the computer, the program will detects it soon.
Step 3: When the connection between your phone and the program have been established, tap on the “Device Data Restore” mode on the page to go on.

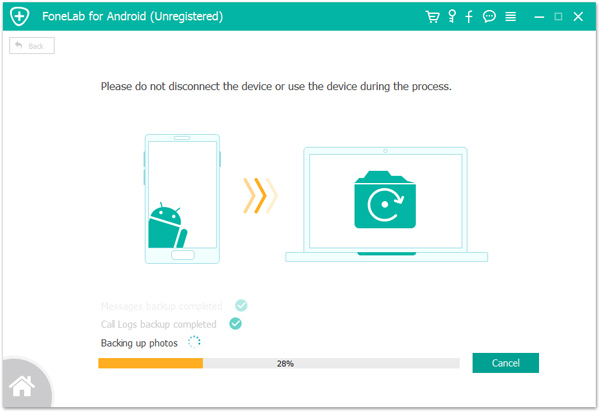
Step 4: Now, you can see all the backup files on the page. Please select the desired backup file from the list and click the “Start” button to restore the data to begin extracting the restoreable files from the selected backup.

If done, select the files you need to recover, then tap on “Restore to Device” to save them back to your Nokia X10/X20, or tap on “Restore to PC” to save them to your computer.

Best Data Recovery is a simple and convenient recovery software. With the help of it, you can quickly restore lost and deleted Emails, Photos, Videos, Audio, Documents and so on from almost all mobile phone, computer, and other external storage equipment, etc.
Step 1: Download and install Best Data Recovery on your computer, and run it.
Step 2: Use a USB cable to connect your Nokia X10/X20 to the computer.
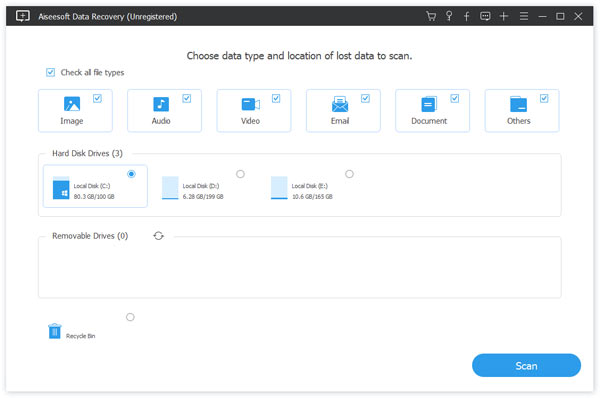
Step 3: Select the file type you need to recover on the software’s page, and then click “Scan” to scan.

Step 4: After scanning, you can preview all recoverable data on the page. Select the data you need to recover, and then click “Recover” to recover the lost or deleted data to the Nokia X10/X20.
Backup files can help us solve some unnecessary troubles. Therefore, it is necessary to back up your data regularly. Now, with the help of Nokia Data Recovery, I will show you how to quickly backup your data to your computer.
Step 1: Run Nokia Data Recovery, and then select “Android Data Backup & Restore” mode on the main page.
Step 2: Use a USB cable to connect your Nokia X10/X20 to the computer.
Step 3: Select the “Device Data Backup” or “One-click Backup” option on the page according to your needs.
Step 4: Now, you can select the data you need to back up on the page. After selecting, you can change the save path of your backup file. Finally, click “Start” to back up the Nokia X10/X20 data to the computer.