Summary: Apple Mobile recently released the lowest-priced mobile phone in history-the iPhone 9. Nowadays, people change their phones more and more frequently, and they will encounter various problems. This article mainly solves the problem of transferring data from old iPhone to iPhone 9.
iPhone 9 is equipped with Apple A13 processor, 3GB memory, 64GB and 128GB storage versions. This configuration is basically the same as the iPhone 11 series, and it will still be the flagship of performance in the new year. The design language of the iPhone 9 is almost the same as that of the iPhone 8. The 4.7-inch LCD screen, the design of the large forehead and chin is incompatible with the minimalist and comprehensive screen design now. The return of Touch ID on the front is still a familiar formula or familiar taste on the back of the fuselage. The overall design is the same as the iPhone 8. The camera in the upper left corner and the Apple logo in the middle of the fuselage are still so familiar. Probably the biggest difference is that the iPhone 9 exposes many new color schemes, including champagne gold, purple, yellow, red, and so on. It seems that Apple likes to use more colors on relatively low-priced products.
The low price of the iPhone 9 has definitely attracted many Apple fans, and certainly many people have started this phone. However, all kinds of problems will be encountered when changing phones. The most headache is how to transfer data from old phones to new phones. But there are many ways in the market to help users transfer, how do we choose? This article will introduce users to the world’s easiest and most effective way to help users transfer data in iPhone. To use this method, you need the help of Mobile Transfer.
Mobile Transfer is a very popular data transfer software today, and its functions are very powerful. Among them, the main functions are as follows: First, the operation of transmitting data is simple and fast. Secondly, it can transfer multiple types of data including contacts, text messages, photos, videos, audio, music, call logs, applications, etc. Third, its compatibility is very good, not only compatible with all versions of iPhone, but also compatible with Samsung, Xiaomi, Huawei, Google, LG, ZTE and other Android phones. Last but not least, it has a very high security factor, and it will neither leak your information nor cause any harm to your phone during data transmission.


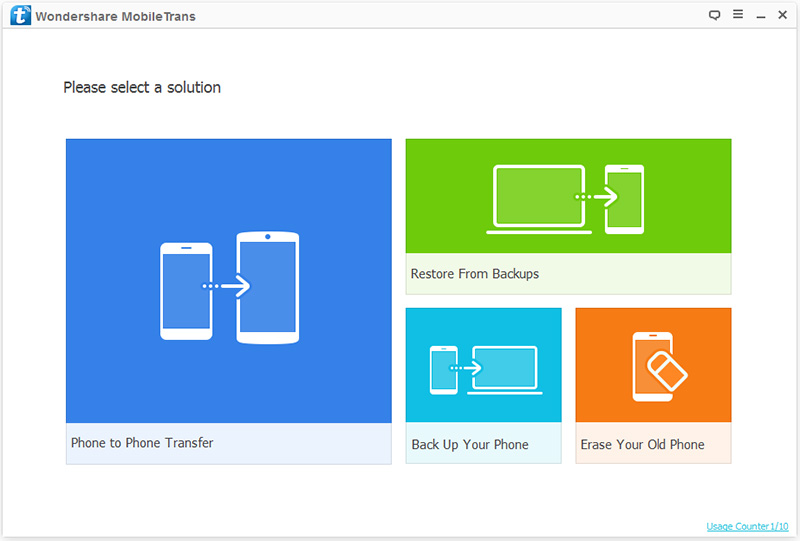
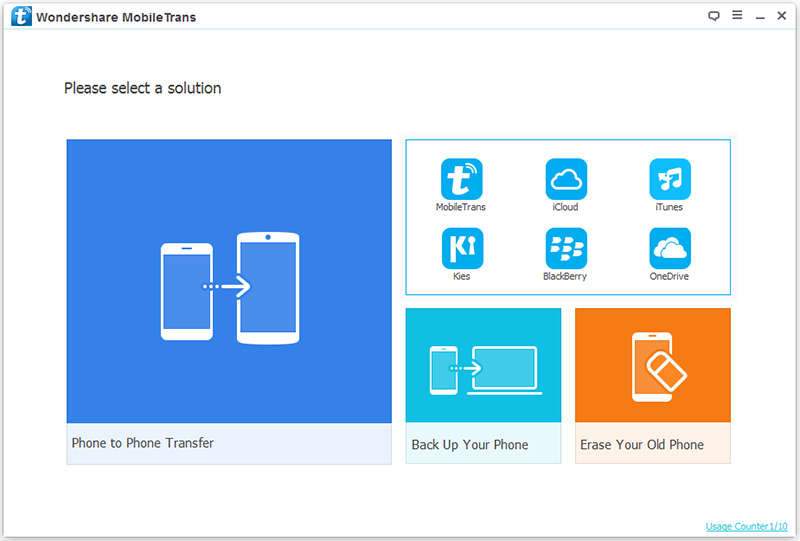
Step 1: First download, install and run “Mobile Transfer” on your computer. Please click the “Phone To Phone Transfer” button on the main interface, and then click “Start”.
Step 2: Please connect the iPhone and iPhone 9 to the computer with USB respectively. The right side of the panel should show your iPhone 9. If this is not the case, you need to click the “Flip” button to swap the positions of the two phones to ensure that the next steps can be completed.
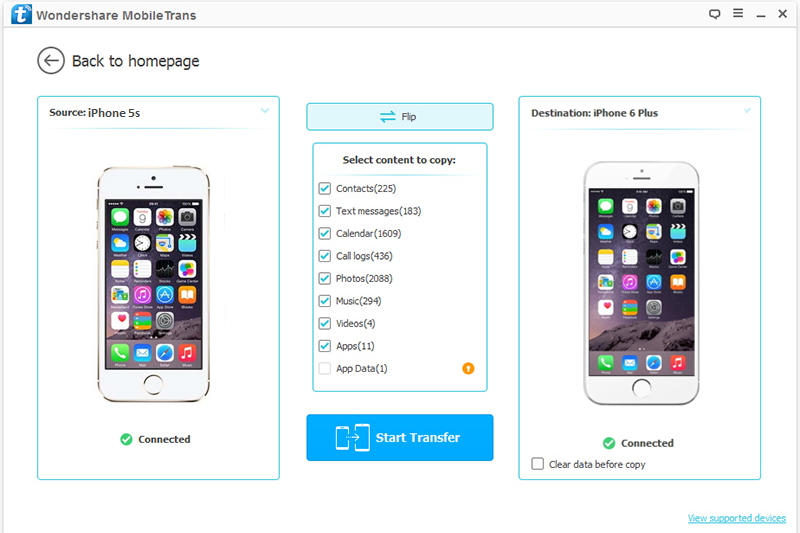
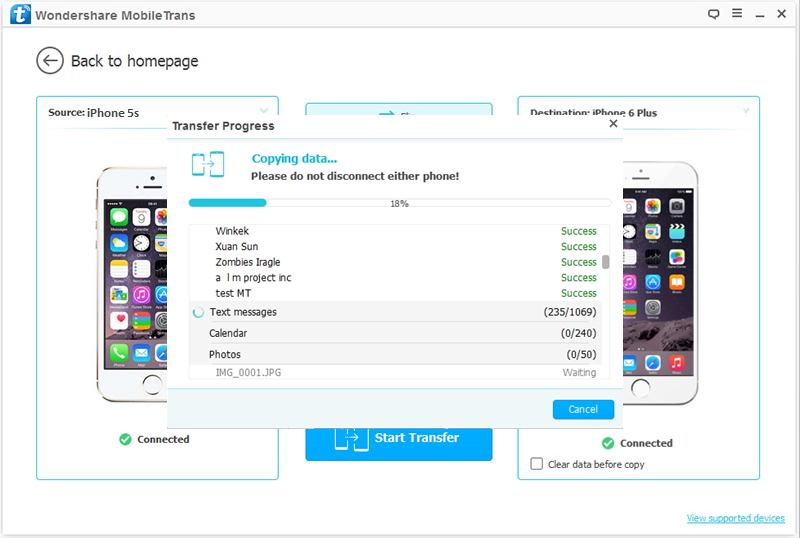
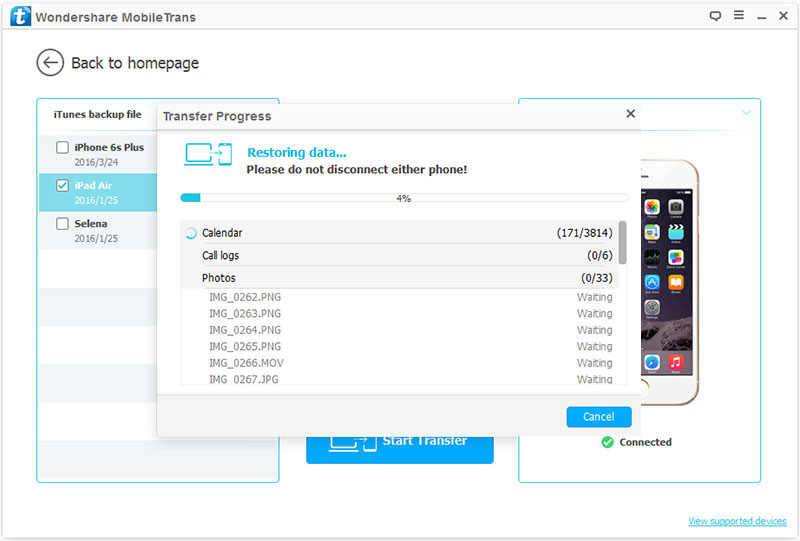
Step 3: At this time, the data type directory appears on the main interface. Please check the data you want to transfer, preview and confirm, and then click “Start Transfer” to transfer the data to your iPhone 9. At this time, you can see the progress bar of the transfer on the main interface. Please be patient, the speed of transmission depends on the amount of data.
Note: Please keep the mobile phone and computer well connected during the transfer process. If you want to delete the existing data of iPhone 9 before transferring, you can select the “Clear data before copy” button.
Step 1: Launch the Mobile Transfer on your computer, as you can see there are four modes on the main interface, please select “Restore from Backups” and then click “iTunes”.
Note: The premise of selecting “iTunes” is that you have used this Mobile Transfer software to back up data from your old iPhone. Of course, the program also supports other backup files such as Kies backup, MobileTrans backup, iCloud backup, etc. If you get any kind of backup file, you can also choose it.
Step 2: Now you need to connect your iPhone 9 to your computer with USB.
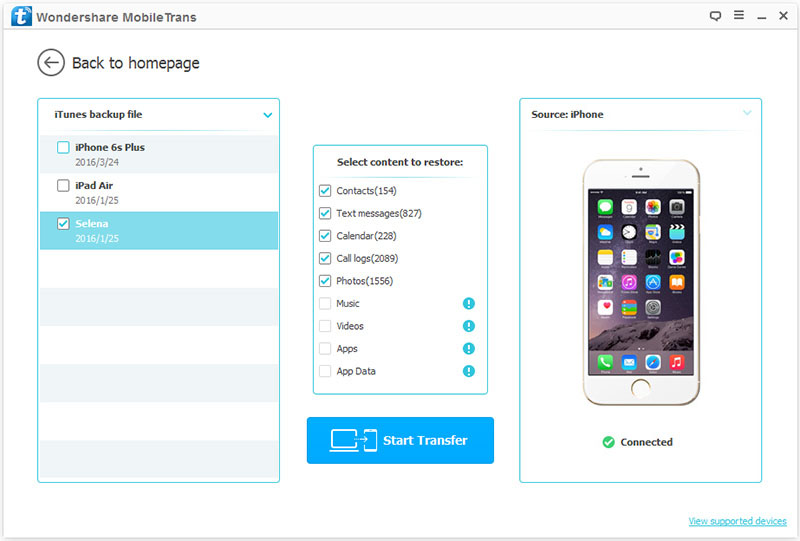
Step 3: All backup files are displayed on the left panel, please select one according to your needs. The software will extract all transferable files from the selected backup file and display them to you. Please select the file type you want to transfer. After the computer detects your device, click “Start Transfer” to sync to your iPhone 9. At this time, you can see the progress bar of the transfer on the main interface. Please be patient, the speed of transmission depends on the amount of data.
Step 1: Run the Mobile Transfer on your computer, then click on “Restore from Backups” on the page, and finally select its “iCloud” option.
Step 2: Sign in to your iCloud account and connect your iPhone 9 to your computer.
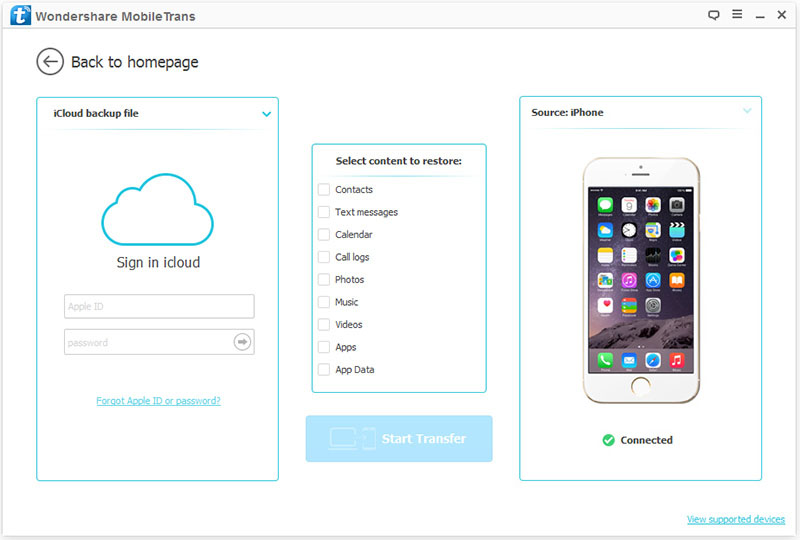
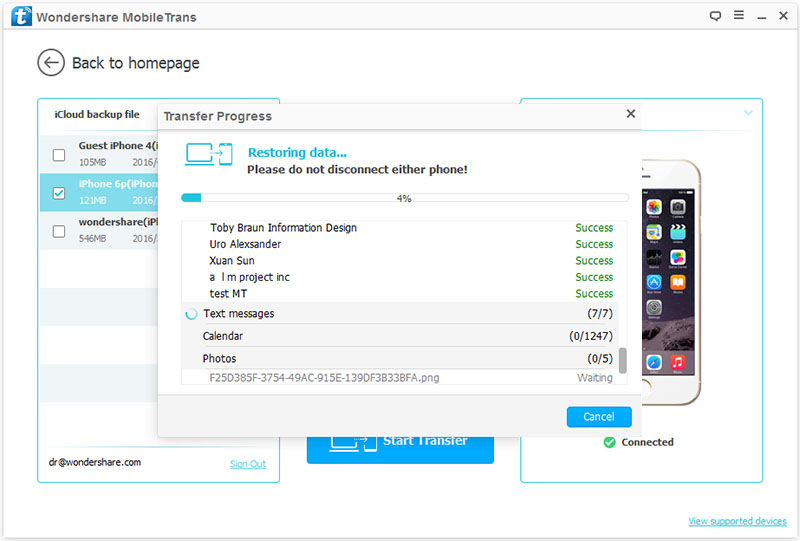
Step 3: Tick an iCloud backup file as needed, then click “Download” to download it to your computer.
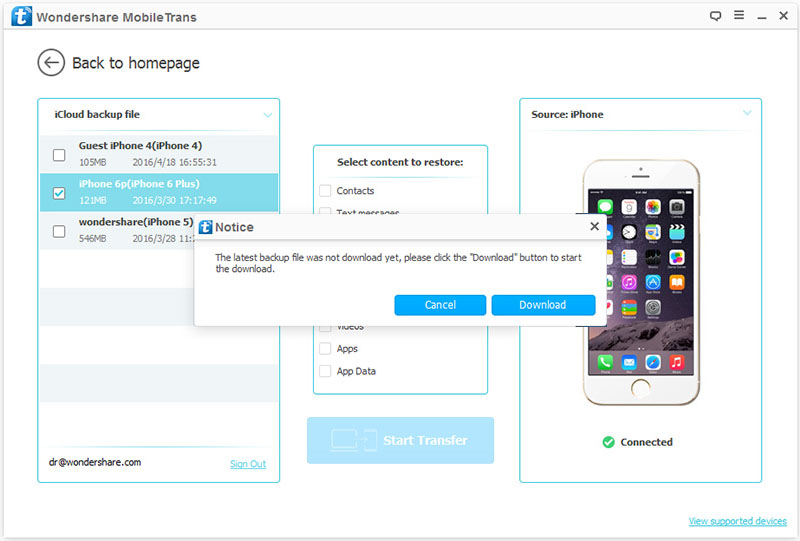
Step 4: After the download is complete, all the transferable file types on the select backup will be listed, select the types of file you want to transfer and click “Start Transfer” to click to sync it to iPhone 9.