To cope with the unexpected situation that may arise, such as files, data loss or damage, transferring the data to a mass storage device like computer, external storage devices or cloud and so on, that is data backup. This is an era of inflation data, termly backing up data can effectively reduce the risk of data loss. However, in recent years, we still continue to received lots of emails which are asking for help to restore lost or deleted data from their iPhone or iPad. As the matter of fact, with the continuous development of iOS devices, users can easily back up data from iPhone or iPad without spending too much of time and energy. So, to let us feel incomprehensible that people would rather spend a lot of time and energy to seek methods to restore lost data from iPhone or iPad, also don’t willing to spend one minute to back up iPhone iPad data.
Both overly dependenting on data recovery softwares and ignoring the importance of data backup are inadvisable, even if so many professional iOS data recovery tools can effectively restore the lost data from iPhone iPad, but for the lost data that have been overwritten by the new data, even the most powerful data recovery tool can not get the lost data back. Besides, iDevice damaged, stolen, and missing are the main reasons of data loss, so, if you have no any backup files, all of you data including the important data storing on the iPhone or iPad are gone forever. Is this what you want it to happened? Obviously, the answer is no. Therefore, in this article, we will show you the reliable way to backup data from iPhone iPad, and restore the backup file to iPhone iPad.
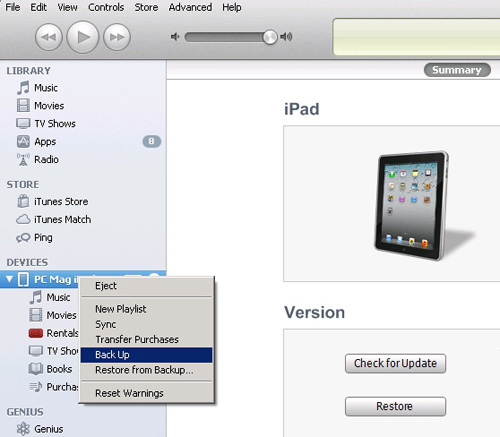
1. Open iTunes and connect your device to your computer.
2. Make sure iCloud is turned off on your iPhone or iPad. You can’t create backups using iTunes when iCloud is enabled. Go to Settings > iCloud > Storage & Backup and turn off the iCloud Backup switch.
3. In iTunes, right-click (or Ctrl-click) on your device, which appears in the leftmost pane under Devices.
4. Click on “Back Up” option to create a backup file.
1. Connect your iPhone or iPad to a Wi-Fi network.
2. Sign in iCloud account on your iOS device.
3. Back up data from your iPhone or iPad:
Back up automatically
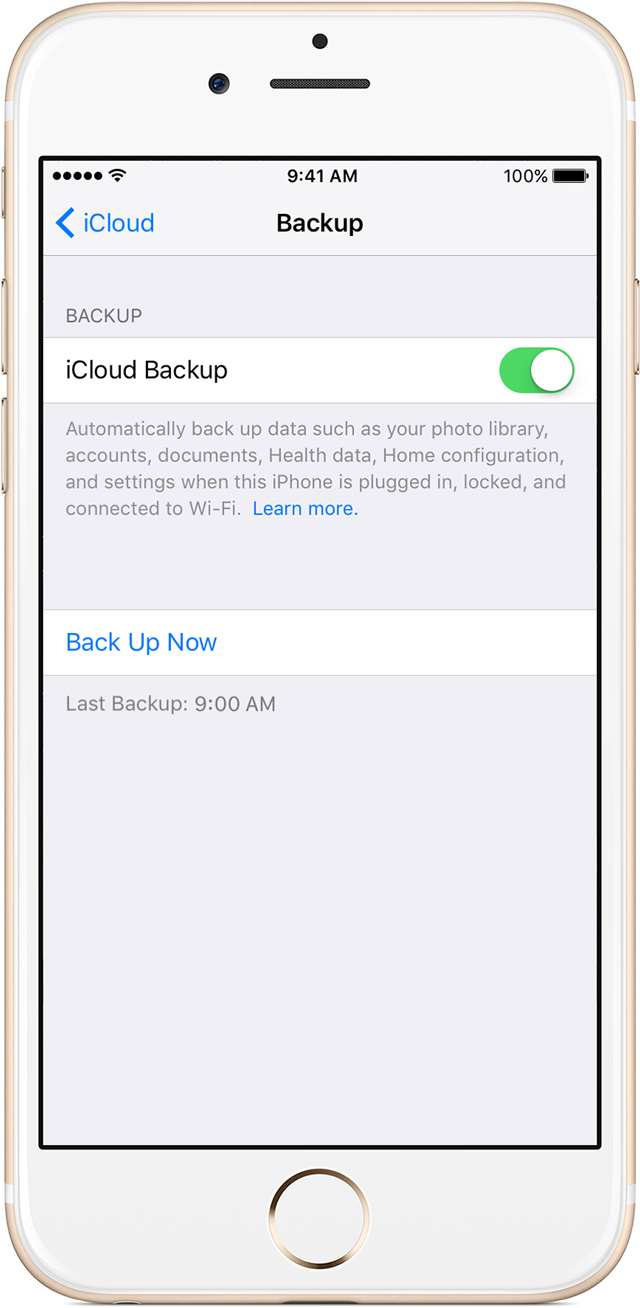
On your iOS 9 or iOS 8 device: Go to Settings > iCloud > Backup, then turn on iCloud Backup.
On your iOS 7 device: Go to Settings > iCloud > Storage & Backup, then turn on iCloud Backup.
Back up manually
On your iOS 9 or iOS 8 device: Go to Settings > iCloud > Backup, then tap Back Up Now.
On your iOS 7 device: Go to Settings > iCloud > Storage & Backup, then tap Back Up Now.
Mobile Transfer can not only transfer data from phone to phone, but also transfer contents from iPhone iPad to computer for backup, and restore this backup to any supported devices, not just iPhone and iPad.


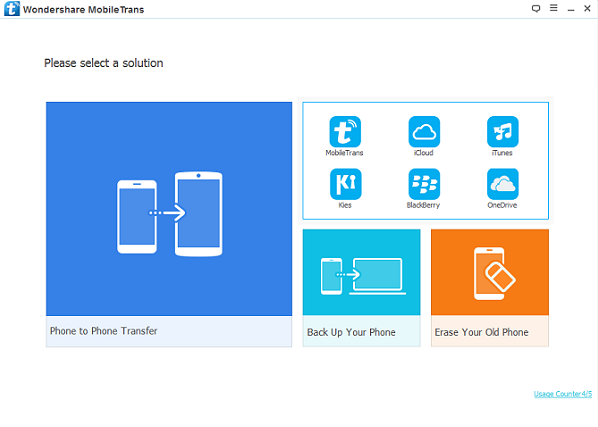
1. Download, install and run the Mobile Transfer on your computer.

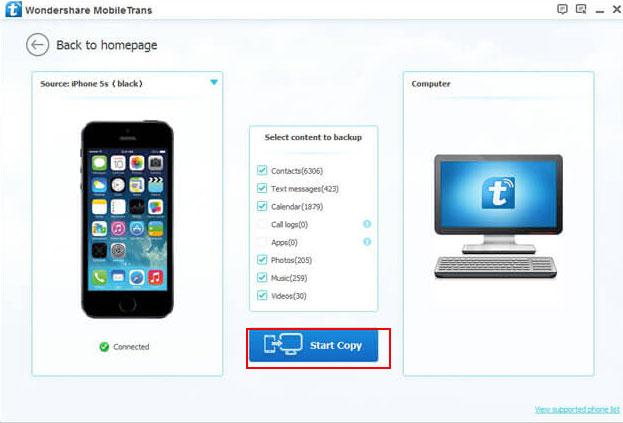
2. Click “Back up your Phone” in the homepage and connect your iPhone to iPad to the computer.
Note: You can click to change the saved location of your backup folder as you wanted.

3. When your device is recognized, you can see all the transferable data on your device are displayed. Check those what you wanted, and click on “Start Copy” to sync them to your computer.
Once you have backed up your iPhone or iPad with iTunes, iCloud or Mobile Transfer tool, you can easily to extract and restore data from backup to your iPhone iPad or any other supported device with the help of Mobile Transfer.
1. Launch the Mobile Transfer and connect your iPhone iPad to the program.
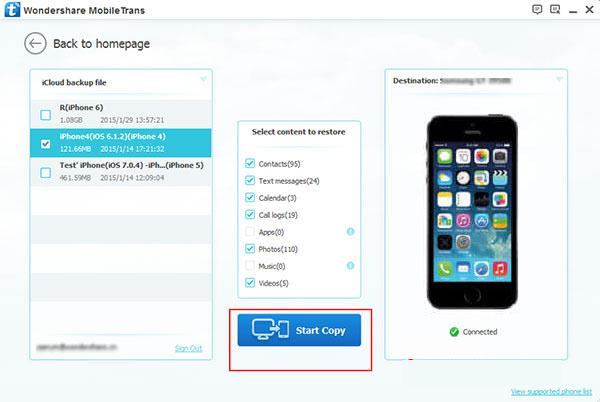
2. Choose “Restore From Backups” in the homepage, and press “MobileTrans”, “iTunes” or “iCloud” which you have been backed up your data to.
3. Select the backup file you would like to transfer files from.
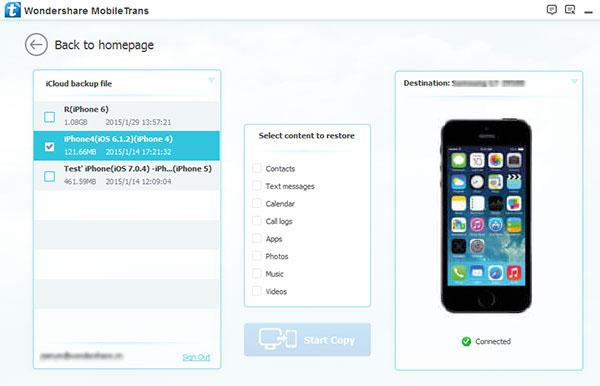
Note: If you select “iCloud” in the previous step, you need to sign in your iCloud account and download the backup file.

4. Select the data you wanted, tick the check boxes in front of them, and click on “Start Cpoy” to transfer to your device.