Summary: Do you know how to quickly synchronize data from the old Android and Sony phone to Sony Xperia 1 III? Want to get the most efficient method for Sony Xperia 1 III data recovery? This article introduces you in detail about Sony Xperia 1 III data transfer and data recovery. If you want to get these methods,please read this article.
The exterior design of Sony Xperia 1 III is very unique: symmetrical non-shaped full screen, straight frame body. In terms of screen, Sony Xperia 1 III uses a 6.5-inch OLED screen with a resolution of 3840×1644 and supports 4K120Hz. At the same time, it is also the world’s first mobile phone equipped with a 4K120Hz screen. In terms of taking pictures, the main camera of Sony Xperia 1 III uses a lens with an equivalent focal length of 24mm, the sensor size is 1/1.7 inches, the aperture is f/1.7, and it supports optical image stabilization. Ultra-wide-angle lens sensor size is 1/2.6 inch, aperture f/2.2, with periscope variable telephoto lens, sensor size is 1/2.9 inch. Not only that, it is also equipped with a 3D ToF sensor and a new variable telephoto lens. Outstanding software algorithms and powerful hardware configuration make Sony Xperia 1 III’s comprehensive shooting capabilities no less than that of professional cameras. In terms of processor, Sony Xperia 1 III uses the Snapdragon 888 processor. In terms of battery life, its battery capacity is 4500mAh, which supports 30W fast charging, wireless charging and reverse wireless charging.
First, I will show you how to sync data to Sony Xperia 1 III. As we all know, when we buy a new device, we often need to transfer the data in the old mobile phone or the data in the backup to the new mobile phone. Therefore, when we get the Sony Xperia 1 III, we also need to synchronize the data to the new device so that we can better use this new phone. So far, there are many ways to help you complete data transfer on the market. But please choose these methods carefully. Because these methods may steal part of your data in the process of transferring data. At the same time, the operations of these methods for completing data transmission may be very complicated. In order to provide you with the safest and most convenient way to complete data transfer in the world, I will introduce you how to complete data transfer on Sony Xperia 1 III with the help of Mobile Transfer.
Mobile Transfer is a very powerful data transfer software. With its help, you can not only use the easiest way to transfer data from Sony/Android phone to Sony Xperia 1 III, and vice versa, but also quickly synchronize the data from different backup files to Sony Xperia 1 III. The types of data that Mobile Transfer can transfer are very rich, including contacts, photos, videos, audio, SMS, message attachments, call logs, App data, Apps, etc. Not only that, the compatibility of the software is also very good, it can be compatible with almost all popular smartphone and tablet brands on the market, including Sony, Huawei, Samsung, OPPO, Meizu, Lenovo, vivo, OnePlus, OPPO, Xiaomi, Redmi, Honor, Realme, Lenovo and so on. The most important thing is that in the process of data transmission, this software will not only not leak any of your data, but it will also protect your data from being stolen by other software.


Next, please learn how to use this multi-functional data management software through Part 1 and Part 2.
Regardless of whether you have a backup file, you can choose this most direct method to transfer your data directly to your new Sony Xperia 1 III.
Step 1: Choose the appropriate Mobile Transfer version according to your computer’s system, download it and install it on your PC. After the installation is successful, launch the Mobile Transfer on the computer.
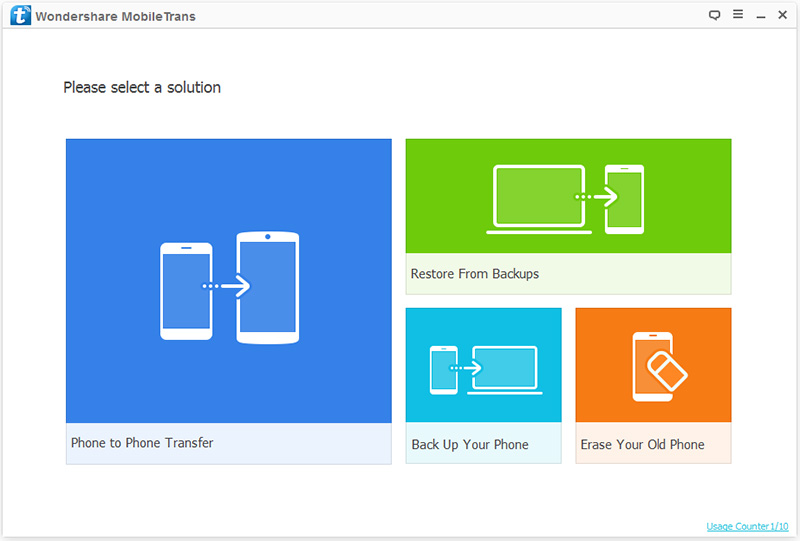
Step 2: After entering the homepage of Mobile Transfer, you can view all the transfer modes on the page. Please select “Phone to Phone Transfer” among these transfer modes and tap on “Start”.
Step 3: Use the USB cables to connect both of your old Sony/Android phone and the Sony Xperia 1 III to the the same computer.

Note: In order to successfully transfer data from old Sony/Android phone to Sony Xperia 1 III, please check the display of “Source” (Sony/Android) and “Destination” (Sony Xperia 1 III) on the page. If the page is displayed in the reverse order, please click “Flip”.
Step 4: After successfully connecting the devices, you can view all the data that can be transferred to Sony Xperia 1 III on the page. According to your needs, select the required data and click “Start Transfer” to transfer the selected files from old Sony/Android phone to Sony Xperia 1 III.

Tip: If you want to wipe all data in your Sony Xperia 1 III beftore transferring data, you just need to check the “Clear data before copy” option.
If your old phone is not around, or it has been damaged, don’t worry, as long as you have an available backup file, it can also easily transfer your backup files to the new Sony Xperia 1 III.
Step 1: Return to the primary interface of the Mobile Transfer on your computer, then select the “Restore from Backup” mode and choose a backup file type from the list according to the backup file type you have.
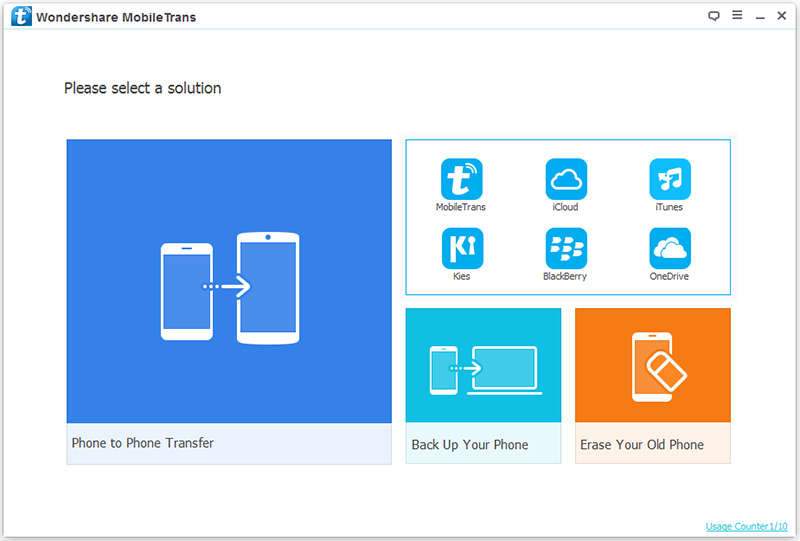
Tip: The program support many backup file types, including MobileTrans, Kies, iTunes, iCloud, OneDrive, BlackBerry, but on this part, we just take choosing the “MobileTrans” item as an example.
Step 2: Use a USB cable to connect your Sony Xperia 1 III to the computer, the program will detects it soon.
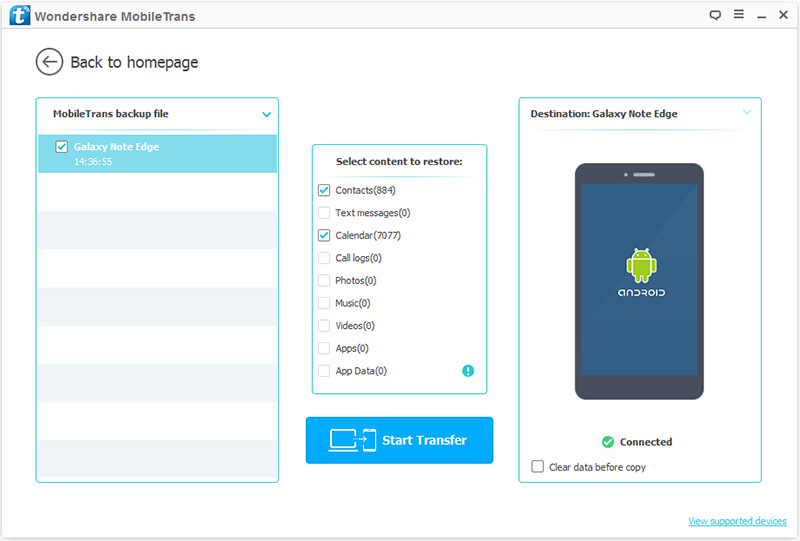
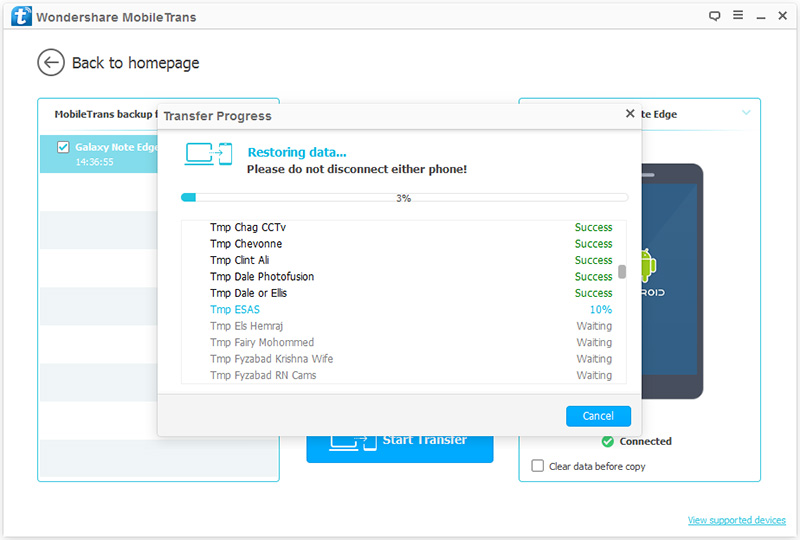
Step 3: After the software successfully detects your device, it will display all the backup files on the page. Select the backup file and file types to be transferred, and then click “Start Transfer” to synchronize the selected files from the backup to your Sony Xperia 1 III.
Tip: As the same, to erase all data in your Sony Xperia 1 III beftore moving your data, you just need to check the “Clear data before copy” option.
Now, I will show you how to quickly retrieve lost or deleted data in Sony Xperia 1 III. In the process of using mobile phones, data in the device will always be lost due to some reasons. These reasons may be virus attacks, formatted data, water in the screen, or accidental data deletion. If you have lost data in your device due to these reasons, and you don’t know how to retrieve the lost data in Sony Xperia 1 III. Then you can choose the following methods to recover the lost or deleted data in your device according to your needs. Before choosing these methods, please allow me to introduce Sony Data Recovery to you. Because Sony Data Recovery is the best tool to help you recover data in Sony Xperia 1 III.
Sony Data Recovery is a very professional data recovery software. Whether you have backed up files or not, the software can easily help you restore lost or deleted data from Sony Xperia 1 III. There are many types of data that Sony Data Recovery can recover, such as contacts, call history, photos, videos, audio, text messages, WhatsApp chat history, WhatsApp attachments, documents, etc. In addition, you don’t have to worry about whether the software is compatible with your device. Because Sony Data Recovery is compatible with more than 7000 models of devices on the market. Last but not least, the data recovered by Sony Data Recovery is the source data you need. And in the process of data recovery, the software will ensure your privacy. It is worth mentioning that the page of this software is very simple. You don’t have to worry about clicking ads and entering other pages in the process of data recovery.
Step 1: Download the appropriate Sony Data Recovery version, and then follow the prompts to install it on your computer. After the installation is successful, run the software.

Step 2: After entering the homepage of the software, select the “Android Data Recovery” mode. Then connect the Sony Xperia 1 III to the computer with a USB cable.
Step 3: In order to better recover the data you need, you need to enable USB debugging on Sony Xperia 1 III. The debugging steps are as follows:

Tips: If you still don’t know how to operate, you can follow the instructions of Sony Data Recovery to complete the corresponding operation.
Step 4: You can now select the file types that need to be restored to Sony Xperia 1 III on the page. After selecting, click “Next” to begin to scan the lost contents on your device under the standard scanning mode.

Tip: If you want to find more lost data, you can also directly click the “Deep Scan” button on the right bottom corner to get more lost data.
Step 5: After the scan is completed, you can view the data specific items of all scanned file types on the page. Select the specific items of data you need to recover to Sony Xperia 1 III, and then click “Recover” to recover the selected data to your Sony Xperia 1 III.

In addition to directly recovering the lost data, you can also rescue your phone by restoring the backup file. If you have previously used this software to back up your phone data, then you can follow the steps below to restore the lost data back to your Sony Xperia 1 III.
Step 1: Run Sony Data Recovery, and then select “Android Data Backup & Restore” mode on the page.
Step 2: Use a USB cable to connect Sony Xperia 1 III to the computer.
Step 3: After the device is successfully connected to the computer, select “Device Data Restore” or “One-click Restore” mode on the page. Unless your phone is restored to factory settings, or we suggest you choose the “Device Data Restore” option, which will save you more recovery time and storage space.

Step 4: After that, you can view all your backup files on the page. Select the backup file you need to restore, and tap on “Start” to begin to extract all the restoreable files from the selected backup file.

Wait for it is finish, then select the files you need and click on “Restore to Device” to restore the selected data back to your Sony Xperia 1 III.
