Summary: With the acceleration of mobile phone update speed, many more powerful mobile phones will come into the market, just like your Samsung Galaxy A32 and Samsung Galaxy A31, therefore, users will also be exposed to more different models of smartphones. How to quickly transfer data from the old phone to the new one, and how to effectively recover the lost and deleted data? This article will tell you one by one.
Samsung Galaxy A32 5G mobile phone is equipped with a 6.5-inch water drop LCD screen, which supports 720p resolution, 4G, 6G and 8G operating memory, built-in 5000mAh capacity battery, and supports 15W charging function, which effectively guarantees the endurance. In terms of camera, the front camera is 8 million pixels, and the rear camera adopts four camera design, including a 48 million pixel main camera, an 8 million pixel main camera, and two 5 million pixel auxiliary lenses. Samsung Galaxy A31 will be equipped with rear four camera combination, built-in 5000mAh battery, water drop screen design, a 6.4-inch super AMOLED screen, resolution of 1080×2400, fingerprint identification under the screen and 15W fast charging.
As Samsung’s most cost-effective 5G mobile phone, Samsung Galaxy A32 is definitely the darling of many users. Similarly, Samsung Galaxy A31 is deeply loved by users. No matter which of them you end up with, the first thing you need to do is to transfer your phone data, so how to quickly transfer all user data between different phones? We strongly recommend that you use Mobile Transfer.
Mobile Transfer is an indispensable mobile assistant that specially developed for data transmission. It is professional, safe and efficient. It can support data transmission between mobile phones of different systems and different data types. With help of this software, you can directly sync all data like photos, contacts, music, videos, text messages, call logs, calendar, Apps, App data and more from any Android/Samsung/iPhone device to Samsung Galaxy A32/A31, and restore data from backup to Samsung Galaxy A32/A31. As long as you follow the steps described, it will meet your needs.


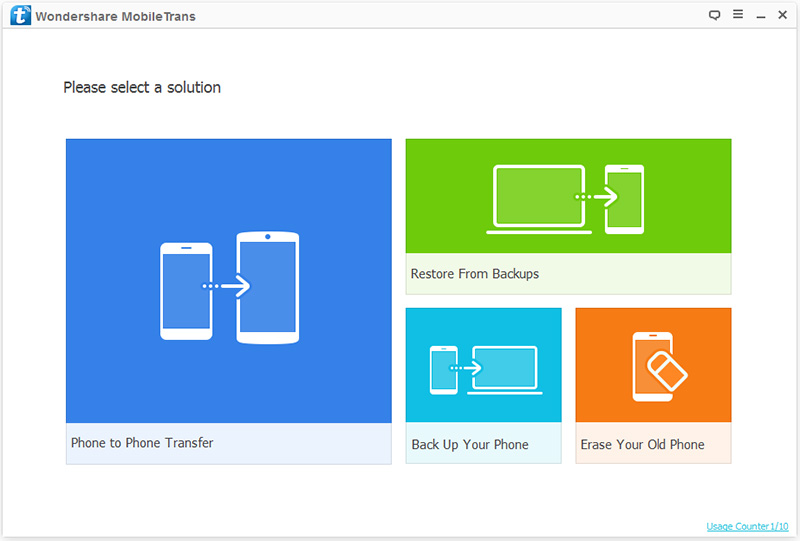
Step 1: Download and install Mobile Transfer and run it on your computer. Select the “Phone to Phone Transfer” option on the main page, and then click “Start” to go on.
Step 2: Connect your old Android/Samsung/iPhone device and Samsung Galaxy A32/A31 to the computer with USB cables. After completion, you will find your old phone on the left side of the screen and your Samsung Galaxy A32/A31 on the right side of the screen. If you find that the order is not the same, please click “Flip” to adjust their correct position.

Step 3: After the program identifies your devices, you will see a list of data that can be transferred on the middle panel. Select the data you want to transfer, and click “Start Transfer” to transfer them to your Samsung Galaxy A32/A31. If you want to delete the existing data on Samsung Galaxy A32/A31 before transmission, you can tick the checkbox near the “Clear Data Before Copy” option.

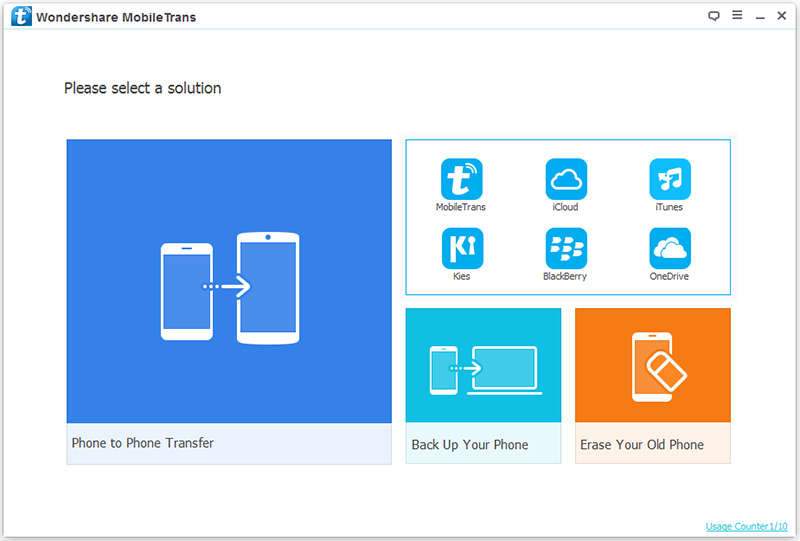
Step 1: Launch Mobile Transfer, select “Restore From Backups” option, and select a backup file type on the panel, what the type you choose depond on the backup file you have, different backup file types are only due to the different tool that used for backup, here we just take “Mobiletrans” as an example.
Step 2: Connect your Samsung Galaxy A32/A31 to your computer with USB cable, and choose a backup file from the list according to your need.
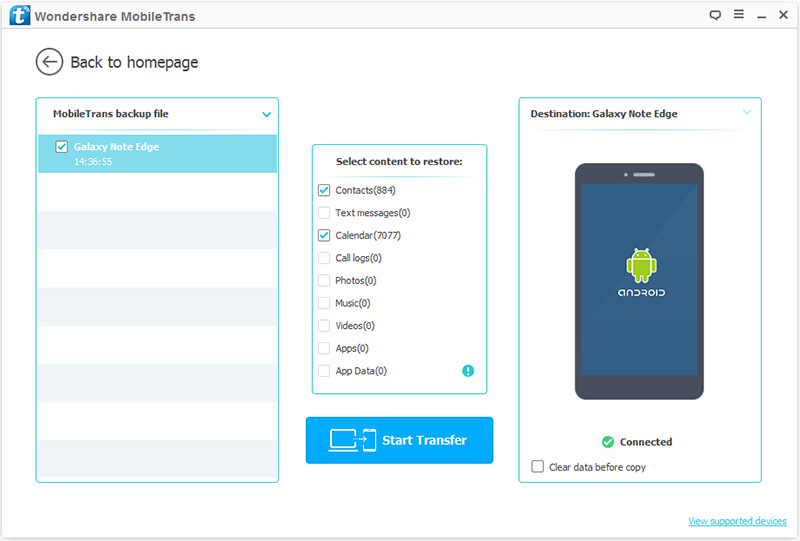
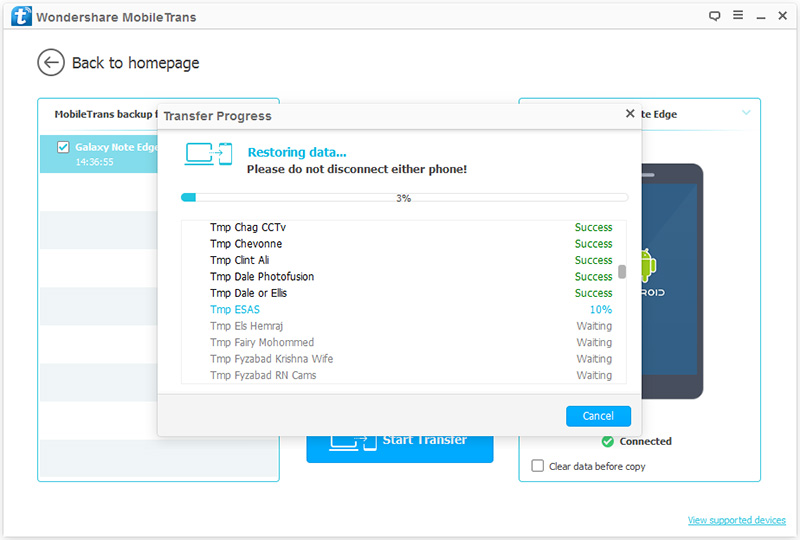
Step 3: Select the files you want to transfer from the backup files displayed on the middle panel, after checking, click “Start Transfer” to transfer them to your Samsung Galaxy A32/A31.
Compared with data transfer, data recovery seems more urgent. For the recovery of lost and deleted data, we also have corresponding professional software to meet the needs of customers. Samsung Data Recovery is a reliable data recovery software for Samsung users to recover deleted and lost data.
In fact, Samsung Data Recovery is an all-round mobile phone data management expert. In addition to recovering lost mobile phone data, it also supports data backup and repairing abnormal system errors. So, with help of this software, you can directly recover deleted/lost data like contacts, call logs, text messages, message attachments, WhatsApp chat history, WhatsApp attachments, photos, videos, audio and more from your Samsung Galaxy A32/A31, no matter with or without backup.
Step 1: Download and install Samsung Data Recovery and run it. Select “Android Data Recovery” mode on the main page.

Step 2: Connect your Samsung Galaxy A32/A31 to the computer with USB cable, then operate according to a series of prompts on the computer, and turn on the USB debugging mode on your phone.

Step 3: When the program has successful detects your phone, you need to choose the file types that you want to recover, and click the “Next” button.

During the program analysis and scanning of your phone, please complete the relevant operation according to its prompts.

Step 4: Once the scan is completed, all the found files will be listed by different categories. After previewing the files you want to recover, select them, and then click “Recover” to save them to your computer.

Note: If you can not find the file you want to recover, please click the “Deep Scan” button to try it again, which will find more data on your device.
Step 1: Run Samsung Data Recovery, select “Android Data Backup & Restore” on the main page, and connect your Samsung Galaxy A32/A31 to your computer through USB cable.
Step 2: Skip to the next screen, there are two sections on this interface including four options to choose from. If your phone have restored to the factory settings, please select “One-click Restore”. Otherwise, we recommend you to choose the “Device Data Restore” option, which will save more of your time.

Step 3: After that, select the backup file in the list displayed on the computer, click “Start” to extract all the files that can be restored from the selected backup file.

After the extraction is complete, select the file to be restored, click on “Restore to Device” to save them to your device, or click on “Restore to PC” to save them to your computer.
