Summary: The replacement of mobile phones is fast, and the Redmi Note 9 (Pro) recently released by Redmi has also attracted much attention. The Redmi Note 9 (Pro) released this time by Redmi, which has been focusing on low-end devices, is also popular among users. This article mainly describes how to transfer Android data to Redmi Note 9 (Pro) and how to recover deleted and lost data from Redmi Note 9 (Pro).
In terms of performance, Redmi Note 9 is equipped with a Dimensity 800U processor, and the optimization of MIUI12 can ensure the smoothness of daily operations, while running large mainstream games without pressure. The camera uses 48 million ultra-clear three-shots, 48 ??million ultra-clear main camera + 8 million ultra-wide-angle camera + 2 million macro lens. Redmi Note 9 is equipped with a 5000 mAh large-capacity battery and supports 18W fast charging. Redmi Note 9 Pro uses a 6.67-inch perforated screen, equipped with Qualcomm Snapdragon 720G, its front is equipped with a 16-megapixel camera, and the rear uses a four-camera system, each with a 48-megapixel main camera and an 8-megapixel ultra-wide-angle lens, A 5-megapixel macro lens, a 2-megapixel depth-of-field lens, supports up to 10x digital zoom, supports studio light effects, night scene mode, AI scene detection, intelligent ultra-wide-angle mode, AI beautification, custom watermark, professional Mode, portrait mode and other functions. Redmi Note 9 Pro is equipped with a large 5020mAh battery and comes with an 18W fast charger.
Redmi Note 9(Pro) is a very good mobile phone, so a good mobile phone must be equipped with a good third-party software to transfer and restore data. In terms of transfer, I mainly recommend Mobile Transfer. In terms of recovery, Android Data Recovery is a very good choice. Next, we will show you how to use these two software in detail.
Mobile Transfer is your first choice when syncing data from phone to phone. There are many transfer software on the market. The reasons for choosing Mobile Transfer are as follows: First, the software has rich functions. It can not only transfer data from any Android/iOS devices to Redmi Note 9 (Pro), but also back up data from Redmi Note 9 (Pro) and restore data from backup to Redmi Note 9 (Pro). Second, Mobile Transfer can transfer most of the data types in mobile phones, such as contacts, call logs, text messages, voice memos, photos, videos, audios, applications, etc. Third, its compatibility is very good, not only can transfer between various Android, but also between iOS, and also between Android and iOS. The most important thing is that it has reliable security and will not leak your messages during the transmission process, let alone harm your mobile phone. Next, the first and second parts are how to use it.


Step 1: Select the transmission mode
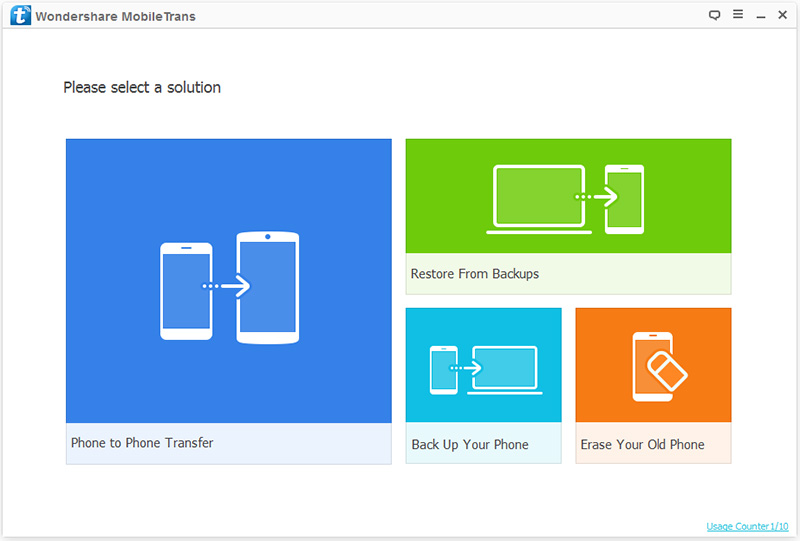
First download, install and run Mobile Transfer on your computer. After entering the program, four modes will appear on the main interface. Please select the “Phone To Phone Transfer” mode, and then click “Start”.
Step 2: Connect your device to the computer
Now, please connect the old Android phone and Redmi Note 9(Pro) to the computer with USB cables. Immediately after that, Android will be displayed on the left side of the interface, and Redmi Note 9 (Pro) will be displayed on the right.

Note: If the positions of the two mobile phones are not correct, to ensure that the next steps can be carried out, you need to click the “Flip” button to exchange the positions of the two mobile phones.
Step 3: Select the type of data to be transmitted
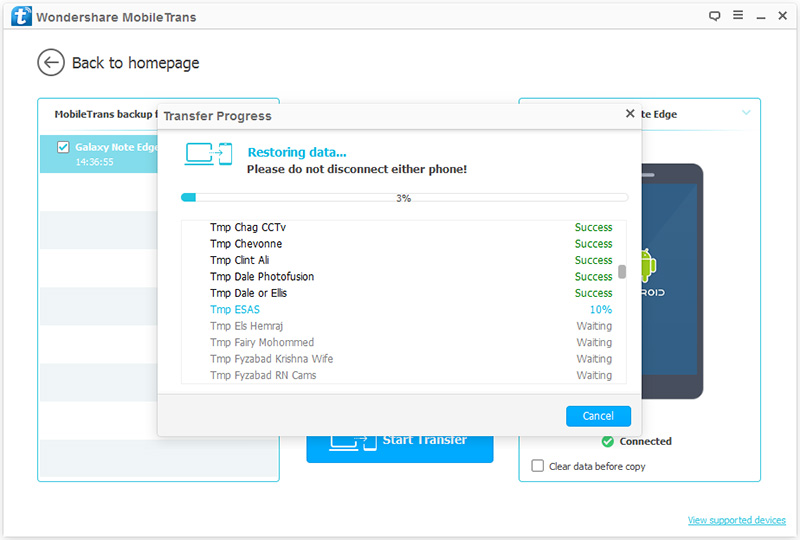
Now, you can select the data you need to transfer in the data type list on the main interface, and click “Start Transfer” after the preview is confirmed to transfer the data to your Redmi Note 9(Pro). At this time, you can see the transfer progress bar on the main interface.

Note: If you want to delete the existing data of Redmi Note 9(Pro) before transferring, you can select the “Clear data before copy” button. Please do not interrupt the connection between the phone and the computer during the transfer.
Step 1: Run Mobile Transfer on the computer. After entering the software, you can see that there are four modes in the main interface. Please select “Restore from Backups”, and then click “MobileTrans” among all the projects.
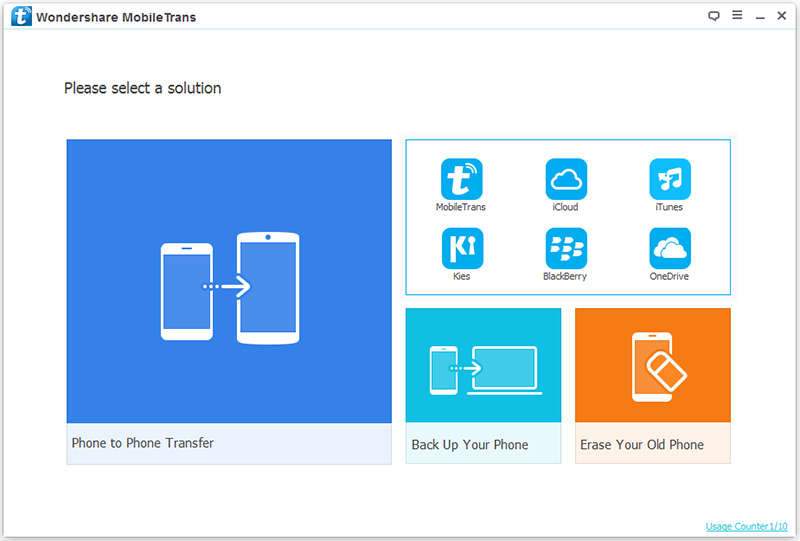
Note: The premise of choosing “MobileTrans” is that you have used this Mobile Transfer software to back up data from your old Android phone. Of course, the program also supports other backup files, such as Kies backup, iCloud backup, iTunes backup, etc. If you get any kind of backup file, you can also choose it.
Step 2: Now, use a USB cable to connect your Redmi Note 9(Pro) to your computer.
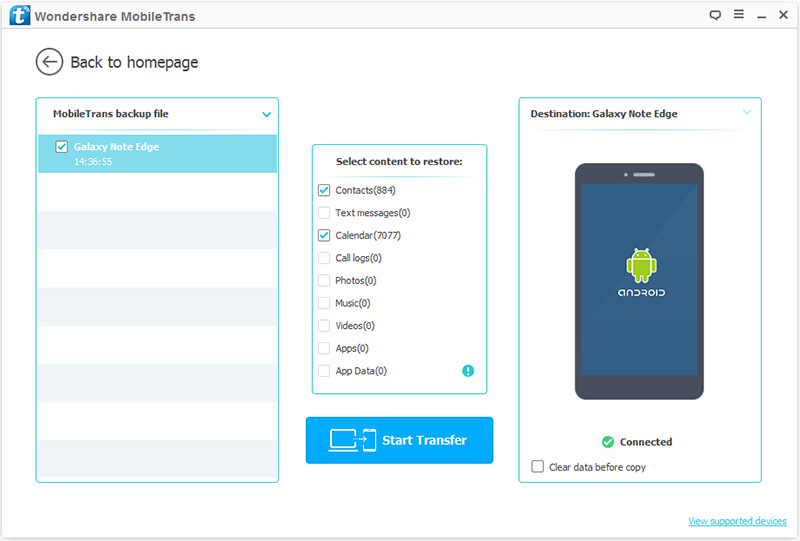
Step 3: All backup files are listed on the left panel, please choose one according to your needs. Immediately after that, the program will extract all transferable files from the selected backup file and display them. Please select the file type to be transferred. After the computer detects your device, you can click “Start Transfer” and the data will be synchronized to your Redmi Note 9(Pro). At this time, the transfer progress bar will appear on the main interface. Please be patient, the transmission speed depends on the amount of data.
The operation description of the transmission is finished, and now it is about the recovery, you must be interested in how to get back your deleted and lost data on Redmi Note 9(Pro), please keep reading.
Android Data Recovery is a tool specially developed for recovering data. Its biggest feature is that it can easily help you restore data regardless of whether you have a backup file. Now, its function will be explained in detail. The first is that it can recover many types of data, such as contacts, call logs, text messages, pictures, documents, videos, WhatsApp messages, etc. Secondly, its compatibility is very good, not only for Redmi, but also widely used in all Android phones, such as Huawei, Honor, OPPO, vivo, Xiaomi, Samsung, etc. And its security is very high, it will not cause any harm to your mobile phone during the transmission process, and it also guarantees zero loss. The following is its specific operation method.
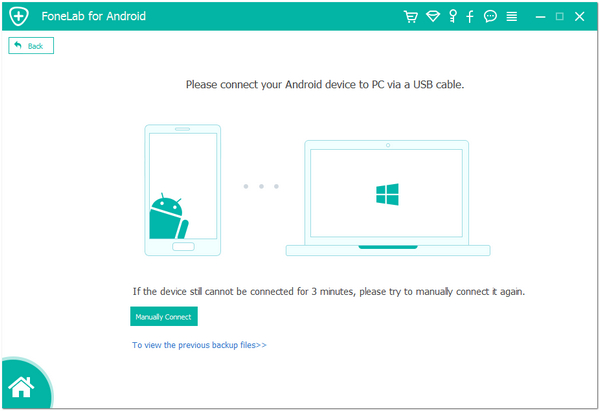
Step 1: Connect your phone to computer
First download, install and run the program on your computer. Then click the “Android Data Recovery” mode on the main interface. Finally, connect Redmi Note 9 (Pro) to your computer via USB cable. Then, the connection progress bar appears on the main interface.

Note:
Step 2: Turn on the USB debugging of Redmi Note 9(Pro)
After entering the program completely, it will automatically detect your Android version. You need to turn on USB debugging according to the steps provided by the program, and then click “OK”.

Step 3: Select the data to be recovered
Now, the list of recoverable data appears on the interface, please check the type of data you need to recover, and click “Next” after confirmation. Then the program will scan your phone.

Note: The program needs permission to scan for deleted and lost data. If your device pops up a window, you need to click on the device’s “Allow” to ensure that the request is remembered. If your device does not pop up such a window, please click “Retry” to try again.

Step 4: Preview and recover the selected files
After the scan is successful, the main interface displays the type of data that can be recovered. Please preview and confirm the data type, and then click “Recover”. All data that needs to be recovered will be saved on your computer. Please be patient, the length of time required for recovery is directly proportional to the amount of recovered data.

If you ever used the Android Data Recovery to backed up your phone data, or you get a feasible backup file, then you can easily restore data from backup to Redmi Note 9(Pro) by using this data recovery program as well. The operation is shown below.
Step 1: Run the program on the computer, and then click “Android Data Backup & Restore” on the main interface.
Step 2: Now please connect Redmi Note 9(Pro) to the computer using USB cable and enable the USB debugging on your phone’s screen.
Step 3: Now, two options of “Device Data Restore” and “One-click Restore” appear on the main interface, just click one as you like.

Step 4: Now, select the desired backup from the backup list, and then select the desired data from the selected backup. After selecting, click “Start” to preview all recoverable file types in the selected backup.

Select the required data, and then click “Restore to Device” or “Restore to PC” to save them all back.

Tips: During the data recovery process, please keep the connection between the phone and the computer.
From the above tutorial, you can easily find that as long as you have a backup file, whether you want to transfer or restore data, this is obviously a breeze. Therefore, we strongly recommend that you back up your phone data regularly. It just so happens that the two software introduced above can fully meet your data backup needs. Now, let’s show you how to do.
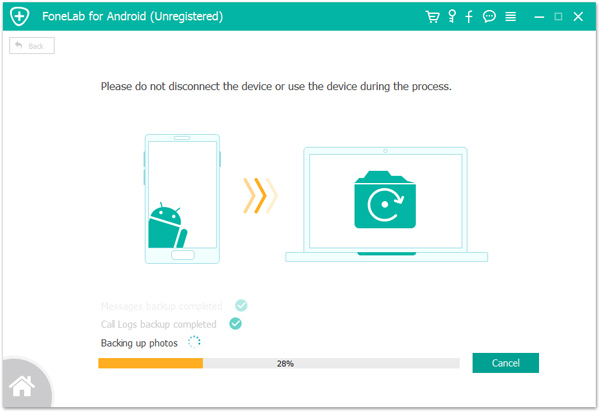
Step 1. Tap “Back Up Your Phone” on the homepage of Mobile Transfer
Step 2. Connect your Redmi Note 9 or Redmi Note 9 Pro to computer via its USB cable.
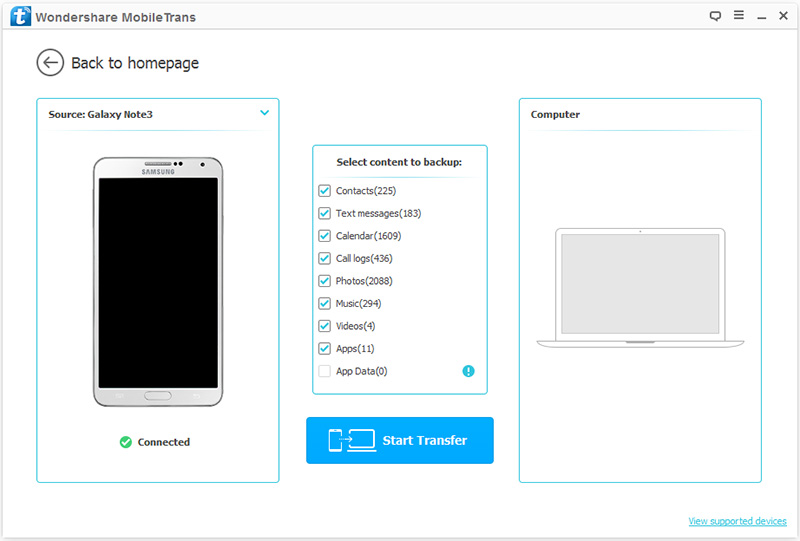
Step 3. Choose the data you want to transfer and tap “Start Transfer” to sync them to your computer.
Step 1. Tab “Android Data Backup & Restore” on the main interface of Android Data Recovery.
Step 2. Connect your Redmi Note 9 or Redmi Note 9 Pro to computer via its USB cable.
Step 3. Tap “Device Data Backup” or “One-click Backup” to go on. If you choose “Device Data Backup”, you will be asked to select the files that you want to backup. If you choose “One-click Backup”, you will gain a complete backup of your phone data, but which will spend much more time.
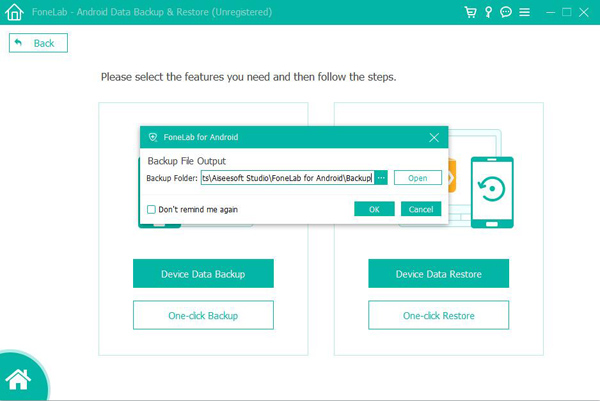
Step 4. If you have made your choice, please click “Start” to start your backup.