Summary: When we change a new Redmi K40 or Redmi K40 Pro, we often need to transfer the data from the old mobile phone to the new one. At the same time, due to the frequent use of the Redmi K40 or Redmi K40 Pro, there is also the risk of data loss, so this article will teach you how to transfer important data and recover the lost data of the Redmi K40 and Redmi K40 Pro. Please follow my steps below, you will successfully transfer data and recover the lost data, Because the operation is simple, you can learn it well.
The biggest change of Redmi K40(Pro) compared with snapdragon 865 is to increase the main frequency to 3.2ghz, and the overall performance will also be improved. The screen will support 90/120Hz refresh rate, The 4500mAh battery supports 33W fast charging, the top version is expected to add wireless charging, support IP68 dustproof and waterproof, the camera is 64 megapixel imx686, has ultra wide angle, long focus and other cameras, supports dual OIS optical anti shake, and is expected to be sent to DxO, the photo taking function is good. At the same time, it is equipped with two speakers, which is much higher than the previous generation.
Obviously, whether it is design or performance parameters, the Redmi K40 series is your ideal choice. Without further ado, we will describe the specific usage methods according to the three parts of data transfer, data recovery and data backup.
Part 1 Redmi K40/K40 Pro Data Transfer
Part 2 Redmi K40/K40 Pro Data Recovery
Part 3 Back Up Redmi K40/K40 Pro Data
Mi Cloud is a cloud service platform specially designed by Xiaomi for its users to back up and restore data. It supports users to upload photos, videos, synchronize contacts, etc., and data security can also be guaranteed. Therefore, many users can safely use it to back up important data, if you have ever used Mi Cloud to backed up your phone data, then you can use this method to transfer data to your Redmi K40 (Pro).
Step 1: Firstly, unlock your Redmi K40(Pro) and connect your phone to a stable, safe and available WiFi network.
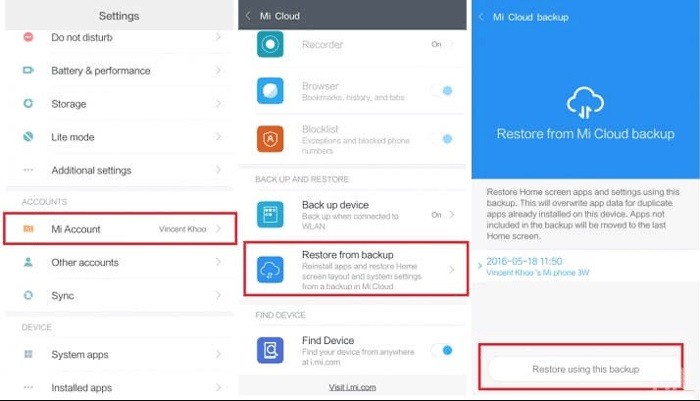
Step 2: Open the Settings in your phone, slide down the screen, find Mi cloud, click it and log in to your personal Mi account
Step 3: Please click “Restore from Backup”, and then select the latest backup file to start the recovery.
Step 4: Now you can click “Restore using this backup” to restore the data in the backup file to your Redmi K40(Pro)
If you have ever backed up the important files to Google cloud from your phone, you can use this method to restore your data to your Redmi K40(Pro).
Step 1: Open “Settings”, find “Accounts”, click “Add Account” and log in to your Google account.
Step 2: Follow the instructions on the screen, and then select the backup device to be restored on the “Display Backup”.
Step 3: If you want to restore all the backup files in Google cloud, first click “Restore”, and then click “Restore All”. Otherwise, click the “Arrow” icon next to “Restore All” to restore selectively.
If you don’t back up the files in your old mobile phone, you can use professional data transmission software to transfer the data to your Redmi K40(pro).
Mobile Transfer is a more commonly used transmission software that is loved and praised by many users. It is not only easy to operate, but also has high security. It can transfer different files, such as SMS, photos, videos, contacts, call history, music, calendars, Apps, App data etc., from one phone to another. So, with the help of this software, you can directly transfer all data from any Android devices and iPhones to Redmi K40/K40 Pro with ease.


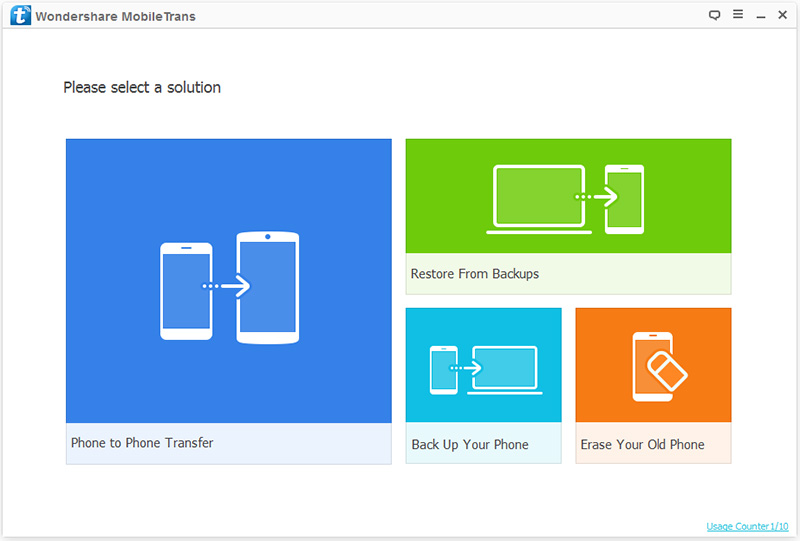
Step 1: Download, install and run Mobile Transfer on your computer. If everything goes well, please select “Phone to Phone Transfer” mode on the home page, and then click on “Start”.
Step 2: Connect your Redmi K40/K40 Pro and the old Android device or iPhone/iPad to the computer with USB cables. After successful connection, you will see that the old device will be displayed on the left side of the screen, and your Redmi K40/K40 Pro will be displayed on the right side of the screen. This order is correct. If not, please click “Filp” to exchange the order of the two phones.

Step 3: When everything is ready, please preview and select the data to be transmitted, and then click “Start Transfer” to transmit the data to your Redmi K40/K40 Pro. It takes your patience to complete the transmission.

Transfer Data from MobileTrans/Kies Backup to Redmi K40(Pro)
If you have ever backed up your phone with Mobile Transfer, or have ever backed up your Samsung device with Samsung Kies, then you can use this method to have a try.
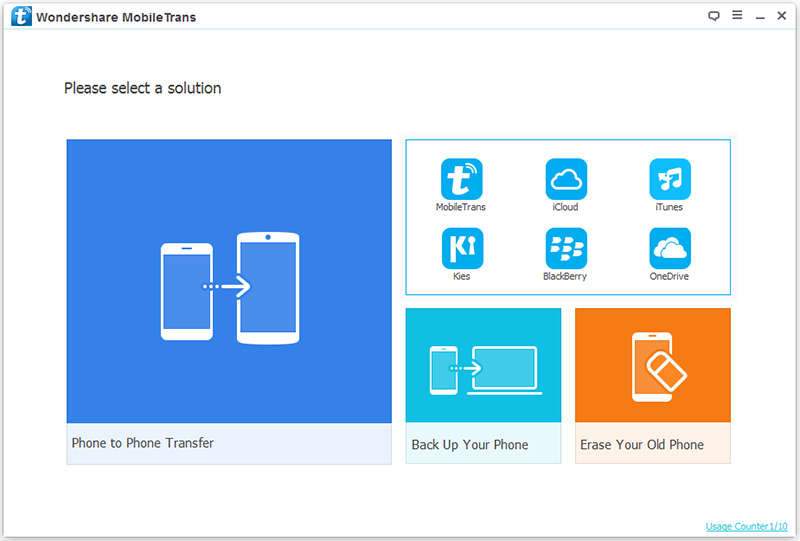
Step 1: Run Mobile Transfer, then click on “Restore from Backups” and choose “MobileTrans” or “Kies”.
Step 2: Select a backup file from the list and connect your Redmi K40(Pro) to computer with a USB cable.
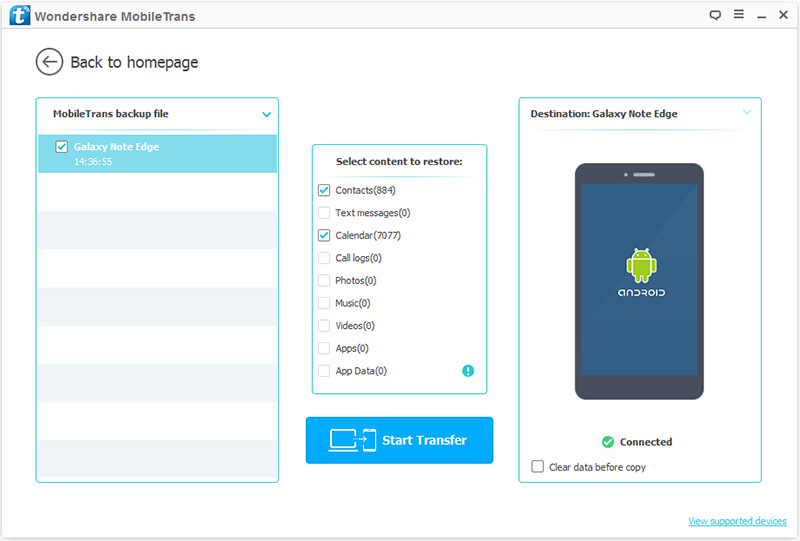
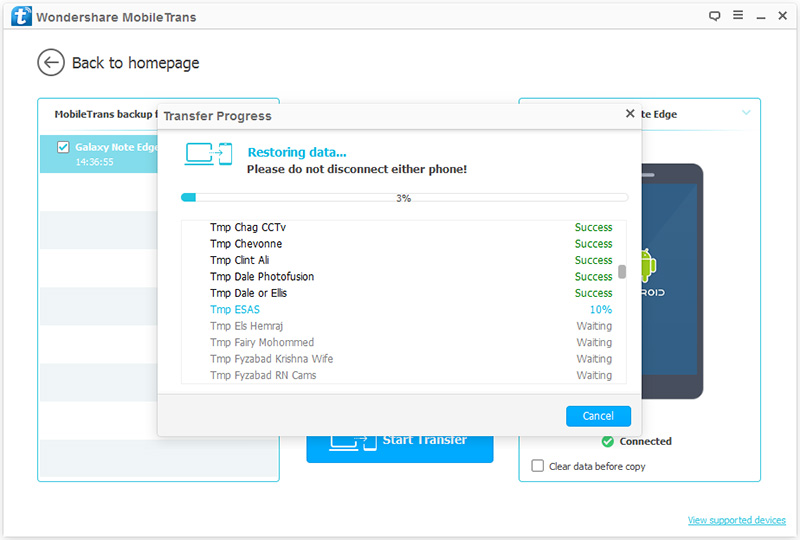
Step 3: After choosing the file types that you wish to transfer, click on “Start Transfer” to sync them to your Redmi K40/K40 Pro.
Transfer Data from iTunes to Redmi K40(Pro)
If you’ve ever backed up or synced your iPhone/iPad with iTunes, or get an available iTunes backup file, then you can use Mobile Transfer software to restore data from these backup to Redmi K40(Pro).
Step 1: Run the Mobile Transfer software, select the “Restore from Backups” mode, and click “iTunes” in the optional items.
Step 2: Please connect your Redmi K40 or Redmi K40 Pro to the computer with a USB cable.
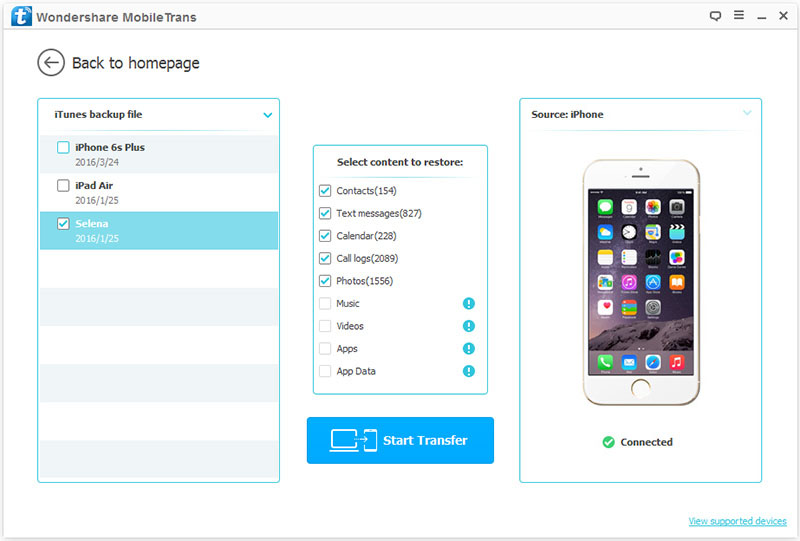
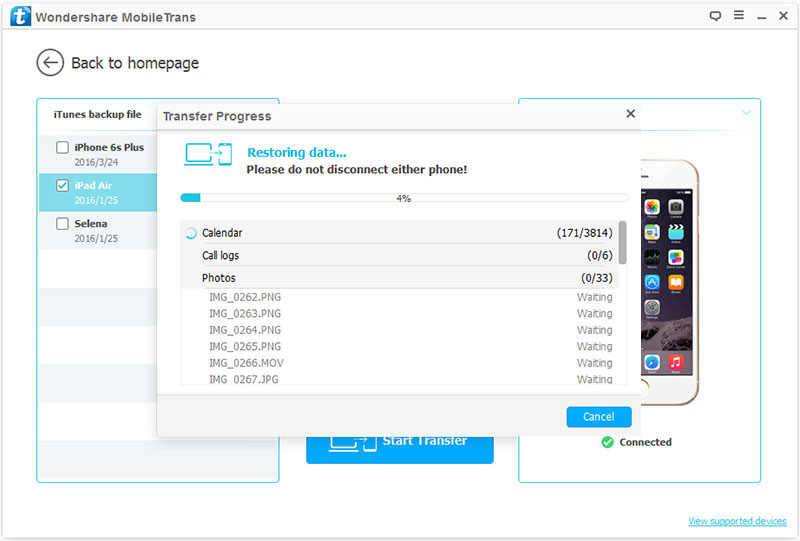
Step 3: All the backup files will be displayed on the left panel. Select according to your needs. The program will extract the files that can be transferred from your selected backup and display them in the center of the panel. You need to select from the central interface. When the computer has detected your device, you can click “Start Transfer”. The computer will transfer your selected data to your Redmi K40(Pro), and the transmission progress bar will appear. Just wait patiently.
Transfer Data from iCloud to Redmi K40(Pro)
Step 1: Launch Mobile Transfer software, select “Restore from Backups” mode, and click “iCloud” among all the projects.
Step 2: Log in to your iCloud account and connect your Redmi K40(Pro) to your computer via a USB cable.
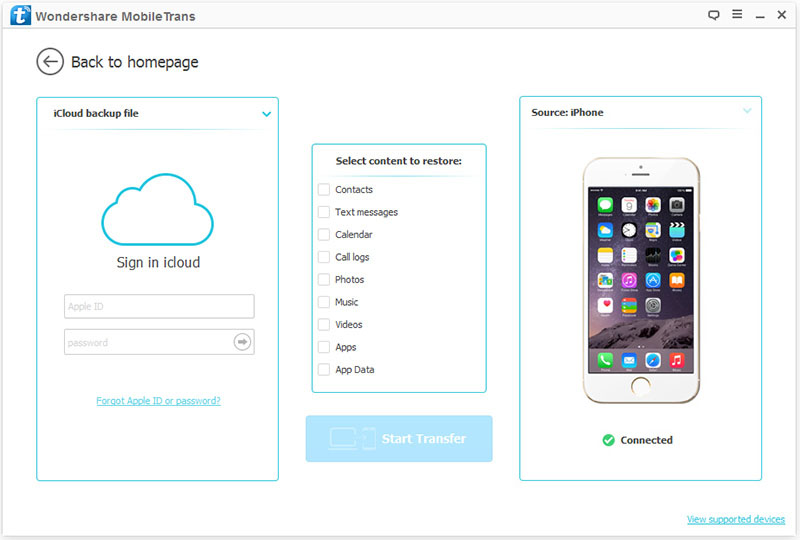
Step 3: Select the files you want and click on “Download” to download it to your computer.
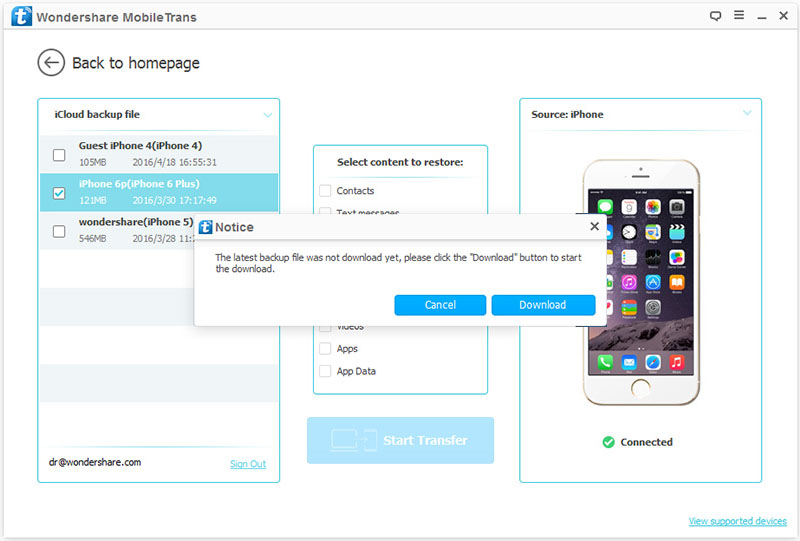
Note:You should be sure to download the backup files to your computer, otherwise you can’t do the next operations.
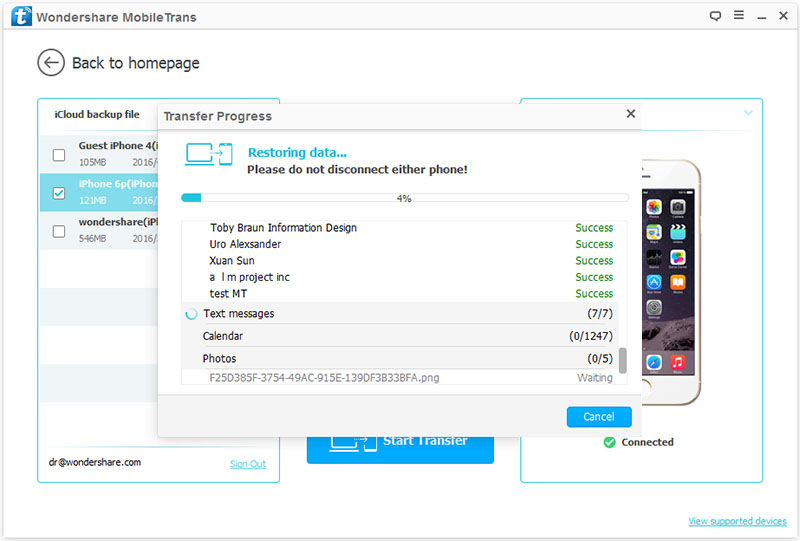
Step 4: After downloading, select the content to be transferred, and then click “Start Transfer” to synchronize the file to your Redmi K40(Pro). In the same process, just wait patiently.
After the data in the old mobile phone is transferred, you will frequently use the data in Redmi K40(Pro), which means that there may be the risk of accidental loss of data. It is not enough to only transfer data between two mobile phones. You also need to learn how to deal with the loss of data. It is particularly important to master the method of recovering the lost data.
In the case of no backup file, the recovery of data needs a special data recovery software. Here we have to mention a software, which is the Android Data Recovery software.
This Android Data Recovery software meets the needs of the majority of users to restore data, it can quickly restore deleted or lost data, efficient and safe, such as contacts, SMS, call logs, photos, videos, audio, WhatsApp messages, documents and more can be restored, the operation is also very simple. Next, let’s show you how to recover deleted and more data from Redmi K40/K40 Pro by using this software.
Step 1: Download, install Android Data Recovery and run it on your computer. Then select “Android Data Recovery” mode, connect your Redmi K40(Pro) to your computer with a USB cable, and the computer will display the connection progress bar.

Step 2: After the connection is completed, the computer will automatically detect your device. You just need to open the USB debugging mode according to the steps provided, and then click “OK”.

Step 3: When you see that all recoverable data are displayed, please check it according to your needs, and click “Next” after confirming, then your mobile phone will be scanned. In this process, you need to authorize the program to scan the deleted or lost data. When a window pops up on your device, remember to click the “Allow” button on the mobile phone screen. If it doesn’t pop up, please click “Retry” to try again.

Step 4: After the scan is successful, the data types that can be recovered will be displayed on the home page. Please click “Recover” to save the data to your computer. The recovery time depends on the amount of data you want to recover. Please wait patiently.

If you already have an available backup files, you can also use Android Data Recovery to extract recoverable files from backup files and restore them to your Redmi K40(Pro).
Step 1: Run Android Data Recovery software and select “Android Data Backup & Restore” mode on the homepage.
Step 2: Connect your Redmi K40 or Redmi K40 Pro to your computer via a USB cable.
Step 3: Select one of the restored mode, either the “Device Data Restore” or “One Click Restore” mode.

Step 4: Select the file to be restored in the displayed list, and click “Start” to restore the data to your Redmi K40(Pro). If you select “One-Click Restore”, the program will automatically restore the selected file to your Redmi K40(Pro). If you select “Device Data Restore”, at this time, the program will extract the file that can be recovered from your backup files. After you select the required files, please click on “Restore to Device” to save the file to your Redmi K40 or Redmi K40 Pro.

Another effective data recovery software is called Best Data Recovery, which is as powerful as Android data recovery. It can recover various types of data between different mobile phone types, including photos, videos, email, audio, documents and so on.
Step 1: Download, install Best Data Recovery, then run it on your computer, and then connect your Redmi K40(Pro) to your computer with a USB cable.
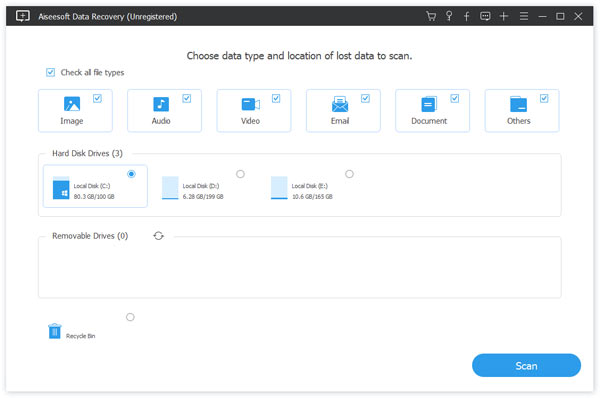
Step 2: After the computer detects your phone, it will display many data types and disk options. Please select the data you want and the disk name of your phone, and then click “Scan” to scan the lost data. If the scan fails, please click on “Deep Scan” button to scan your phone again.

Step 3: After scanning, the program will classify the data. You can click the file to get its details. Click “Filter” to quickly find the file to be recovered. After filtering, click “Recover” to save the file to your computer.
If your phone data has been completely wiped, even if you use the most powerful data recovery software, you cannot recover the erased data. What’s worse is that you don’t even have a usable backup file. At this time, if your old phone is still around and some data you need is stored in it, then you can use Mobile Transfer or Mi Mover to transfer the data from the old phone.
Mi Mover is a file transfer and data migration application developed by Xiaomi. It connects to each other through portable hotspots, and can transfer files such as contacts, photos, videos or audio from other brands of smartphones to Xiaomi phones. Next, we will show you how to use Mi Mover to restore data from Android/iPhone phone to Redmi K40(Pro).
Step 1. Download, install and launch the Mi Mover app on both of your old Android/iPhone phone and the Redmi K40(Pro).
Step 2. Please click“I m a sender” on your old Android/iPhone phone, and tap “I m a receiver” on your Redmi K40(Pro) .
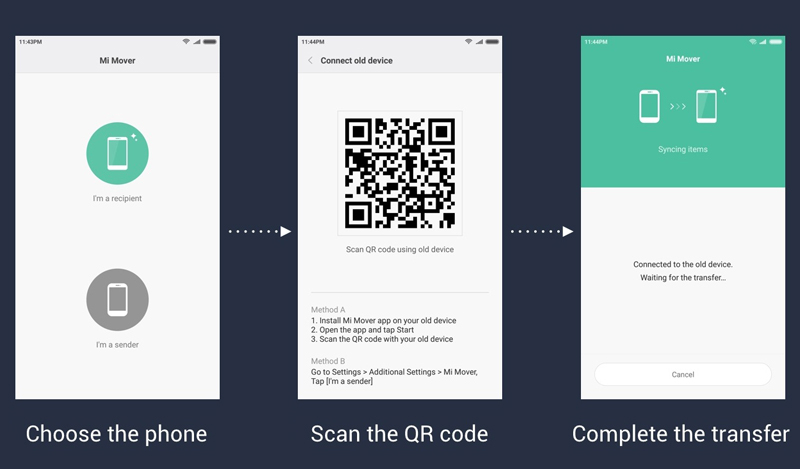
Step 3. Hold your old Android/iPhone phone to scan the QR code that has appeared on the Redmi K40(Pro).
Step 4. Wait for the connection between your phones to be established successfully, select the apps and other data that you would like to transfer to the Redmi K40(Pro). If done, press “Send” to begin syncing your data.
Step 5. When the whole process has finished, please click on “Finish” and exit the application.
From the methods of data transmission and data recovery described above, it can be seen that if there are backup files, it will be more convenient to operate. So, we strongly recommended you to back up your Redmi K40/K40 Pro regularly. Next, several methods of backing up files will be introduced.
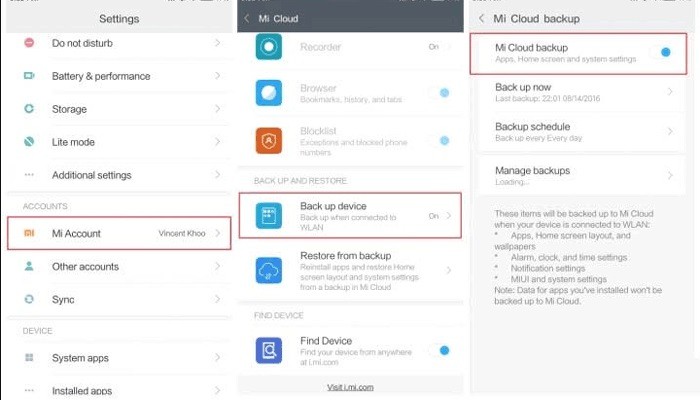
Step 1: Open “Settings” in your Redmi K40(Pro), slide down the screen, find “Mi Account” and click it, and remember to log in to your Mi account.
Step 2: Go to the “Backup Device” feature and enable the “Mi Cloud Backup” feature.
Step 3: You can tap on the “Back up now” option to begin backing up your Redmi K40/K40 Pro right now, or you can tap on the “Backup schedule” option to set up the backup time for your device.
Step 1: Run Mobile Transfer software and select “Back Up Your Phone” mode.
Step 2: Connect your Redmi K40(Pro) with your computer by using a USB cable.
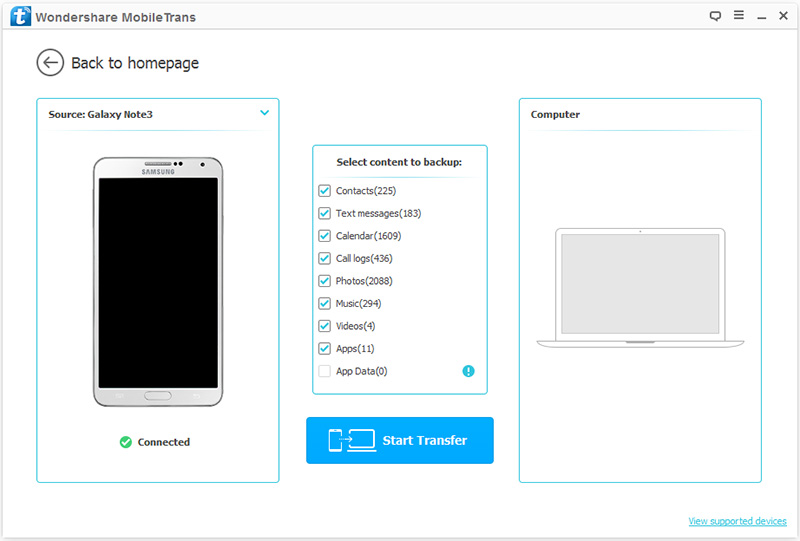
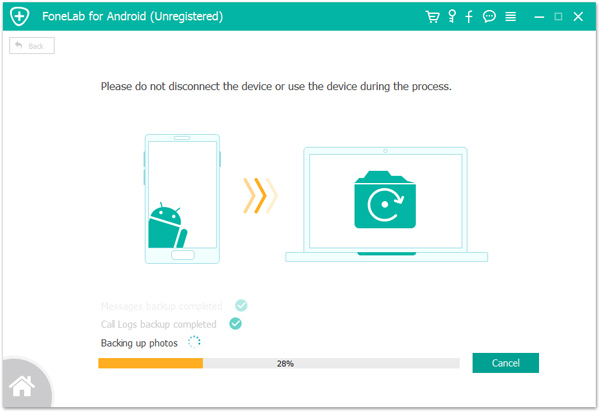
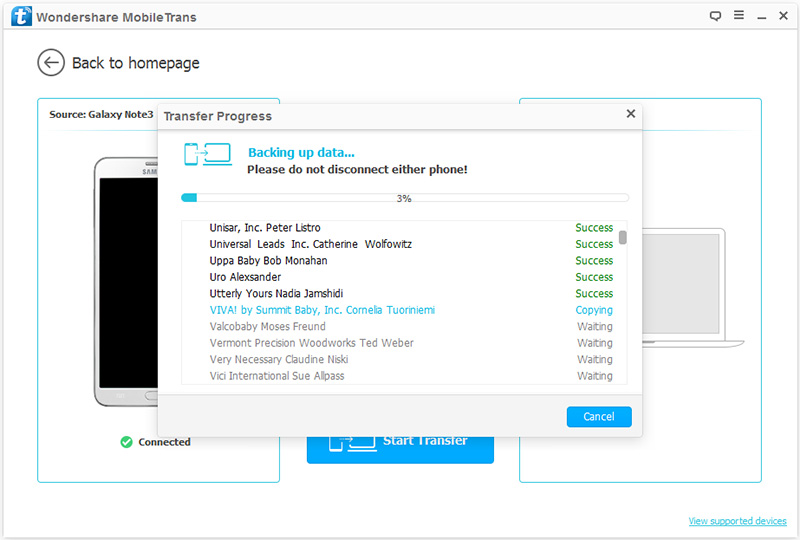
Step 3: When the computer detects your device, select the file to be backed up, and then click “Strat Transfer” to back up the data from your Redmi K40(Pro) to your computer.
Android Data Recovery not only has the function of recovering data, but also has the function of backing up data, which can be used to back up data on Redmi K40(Pro).
Step 1: Select “Android Data Backup & Restore” on the homepage of the Android Data Recovery software.
Step 2: Use the USB cable to connect your Redmi K40(Pro) to computer, if your device is connected but not be detected, please follow the prompts to establish the connection between your phone and computer.
Step 3: Select one of the two backup modes of “Device Data Backup” or “One Click Backup” to go on.
Step 4: Select the files to be backed up and click “Start” to back them up to your computer.