Summary: This article mainly provides users with the best way to transfer data from old Android/iPhone to OnePlus Nord N20 5G and how to recover deleted and lost data from OnePlus Nord N20 5G whether have backup file or not.
On the outside, the OnePlus Nord N20 5G offers a 6.43-inch AMOLED panel with a triple camera solution with the rear camera module located at the top left corner of the device. In terms of performance, the OnePlus Nord N20 5G is equipped with a 4,500mAh battery with 33W fast charging support.
OnePlus Nord N20 5G has a large number of users and good reviews in the market due to its excellent performance and device. If you want to buy this device, then what follows is worth reading in detail. What follows will show you the two best solutions on how to transfer data from your old Android/iPhone to OnePlus Nord N20 5G using Mobile Transfer software.
Mobile Transfer is the best tool to help OnePlus Nord N20 5G with data transfer in several ways. First of all, Mobile Transfer is compatible with almost all smartphones on the market. Secondly, the software can transfer up to 17 types of data types, not limited to contacts, messages, music, etc. Finally, Mobile Transfer is very easy to use and allows for one-click transfers.
Now, please click the corresponding button according to your computer system to download the software to your computer. After installation,using this function according to the specific steps of Part 1-2.


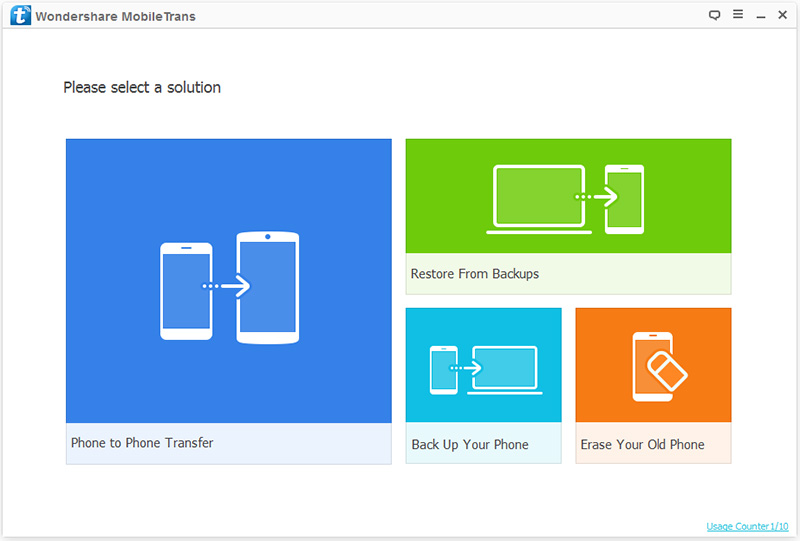
Step 1: Run the Mobile Transfer software, select the “Phone To Phone Transfer” module, and press the “Start” button.
Step 2: Use two USB cables to connect your old Android/iPhone and OnePlus Nord N20 5G to the same computer.
Tip: Please ensure that old Android/iPhone is connected to the left board and OnePlus Nord N20 5G is connected to the right panel. If the connection is opposite, click “Flip” to convert Data will be transferred from the source smartphone to the destination smartphone.

Step 3: All the transferrable file types of your old phone will be listed, after selecting the file types as you need, then click on “Start Transfer” to sync them to your OnePlus Nord N20 5G.
Step 4: Click the task box to view the transmission progress. At this time, you can check whether the selected file has been transferred to OnePlus Nord N20 5G.

Step 1: Return to the homepage of Mobile Transfer software, select the “Restore From Backups” module, and press the “MobileTrans” button.
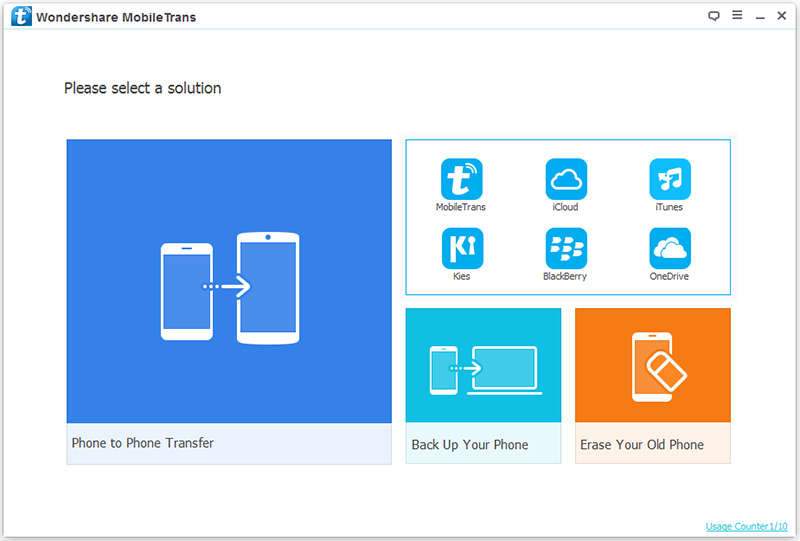
Note: The prerequisite for choosing the “MobileTrans” option is that you have previously used this Mobile Transfer software to back up your mobile phone data. If you get other backup file like Kie backup, iTunes backup, iCloud backup, you can also choose them according to your needs.
Step 2: Please connect the OnePlus Nord N20 5G to your computer using a USB cable, and choose a required backup file from the list.
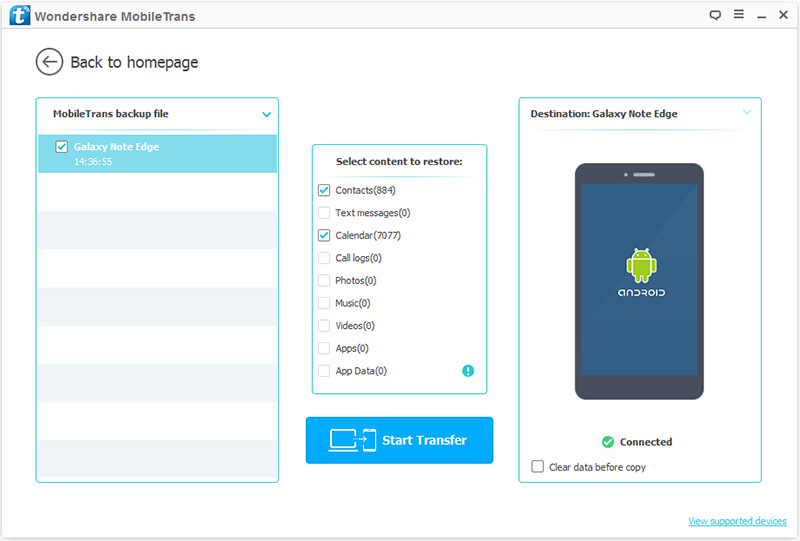
Step 3: After the mobile phone is detected, the mobile transfer will display all the restoreable file types. Select the files as needs, and click the “Start Transfer” button to complete the data transmission.
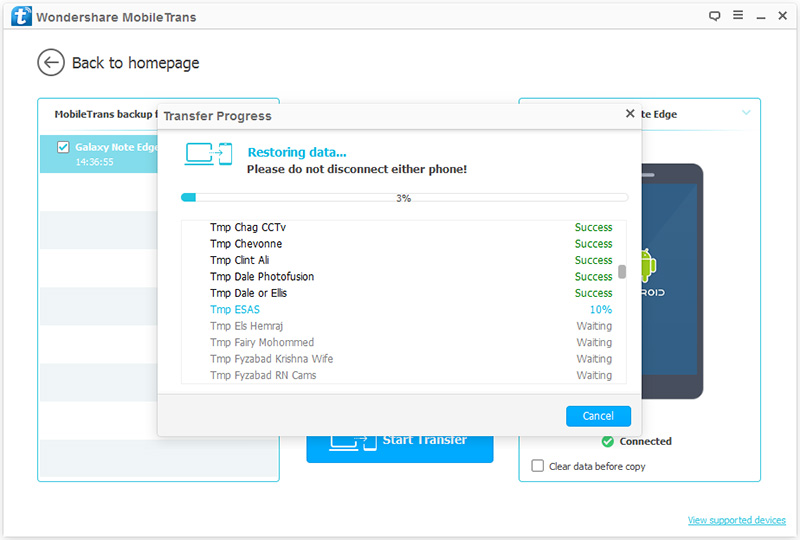
Note: Please do not disconnect your phone during transmission to avoid transmission interruption.
These are the two best ways to transfer data with Mobile Transfer software. If you accidentally delete or lose various files on your phone while using OnePlus Nord N20 5G, don’t worry, even if you empty the recycle bin, Android Data Recovery can help you retrieve your data safely and quickly.
Android Data Recovery is an extremely good third-party software with powerful data recovery, backup system repair and other functions, with the help of which you can easily recover any lost files on Android, not limited to contacts, call logs, messages and so on. At the same time, the recovery speed of the software is very fast, which greatly reduces the time of users.
Now, please click the corresponding button according to your computer system to download this software to your computer. After installation, please follow the steps in Part 3-4 to learn how to use this powerful software.
Step 1: Run the recovery software on the computer, and then click the “Android Data Recovery” module.

Step 2: Connect OnePlus Nord N20 5G to the computer with USB cable, and the computer will automatically detect your mobile phone. After allowing the USB debugging mode on your device, click “OK” to continue.

Step 3: Wait for your device to recognize, you will be asked to select the file types that you wish to scan for, then click on “Next” to go on.

Tip: Before scanning, you also need to install the rooting tool “FoneGo” as required to authorize the application to access your mobile phone.
Step 4: The whole scanning process will take some time. Of course, this is related to the amount of data you need to scan. Once the scanning is completed, all the scanning results will be clear at a glance. Now, you can click to preview any of them one by one. Then select the required files and click the “Recover” button to start restoring data to your OnePlus Nord N20 5G.

Tip: If you can not find the data you wanted, click “Deep Scan” to re-scan your device to find more contents.
Step 1: Return to the homepage of the recovery software and click “Android Data Backup & Restore” button.
Step 2: Connect your OnePlus Nord N20 5G to your computer using a USB cable and wait for the program to detect the phone.

Step 3: Once identified, select the “Device Data Restore” or “One-click Restore” button.
Step 4: Now, select the backup files you want to restore from the list and click the “Start” button to begin extracting all recoverable files from the selected backup files.

Step 5: Once done, select the required files and click the “Restore to Device” button to begin restoring data to your OnePlus Nord N20 5G. Besides, you can also click the “Restore to PC” button to save the selected data back to your computer. You can view the restoration progress on the page.
