For Samsung On5, On7, On8 users, in the use of these phones, they may encounter such a problem. Accidentally delete the phone data but do not know how to recover them. Similar problems are common, how can we solve this problem? What should you do if you want to recover the deleted data? For example, if you want to restore deleted photos and videos from your On 5/On 7/On 8, what are your solutions?
Android Data Recovery is a professional data recovery software. It support you restore a variety of data, including photos, music, text messaging, video, contacts and other data. It can be applied to a variety of Android phones, for example Samsung, Sony, HTC, LG, Sony, Huawei, ZTE, Motolora, etc., which is specially designed for Android equipment. Once you use the software, you can not only restore deleted data, but also can restore the lost data due to system crash, system upgrade, forget password and other unexpected situations. Of course, the software has high security, you can safely use it.


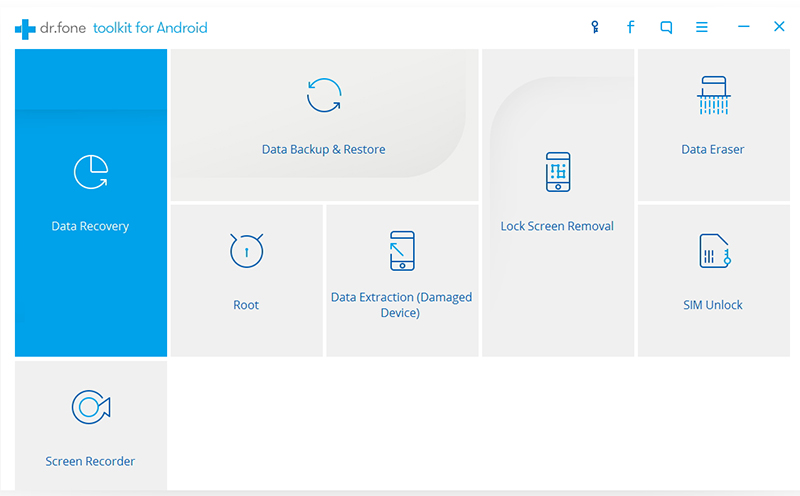
Step 1. Please download, install and run Android Data Recovery on your computer. Its operating interface as shown below, select “Data Recovery”.
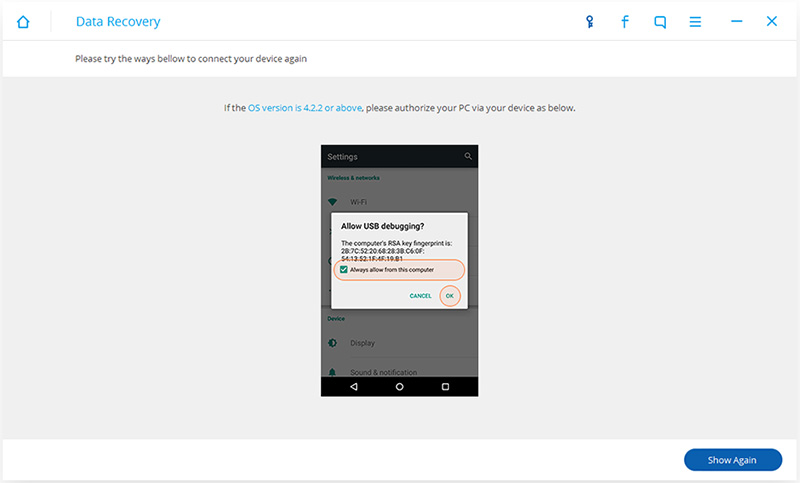
Then, use the USB cable to connect your Galaxy On 5/On 7/On 8 to the computer. At the same time, you also need to open the USB debugging on your phone.
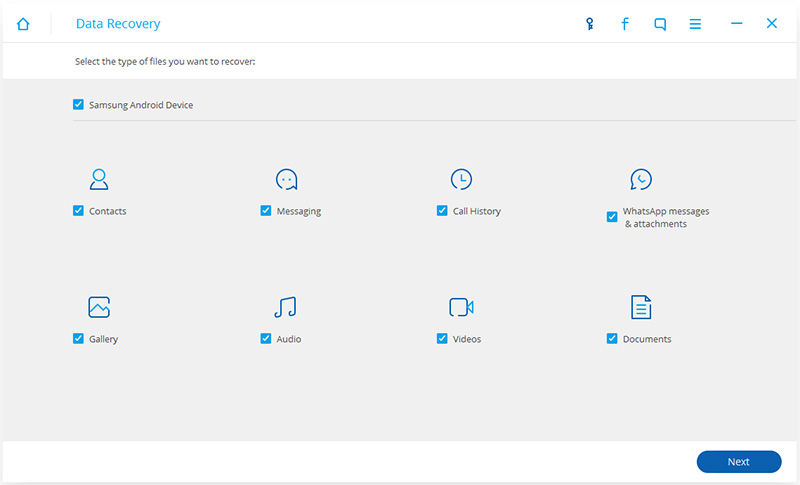
Step 2. When you can manage your phone data, you can select the data you need to recover. The program will show you all the recoverable data, please tick “Photos” and “Video” and then click on “Next”.
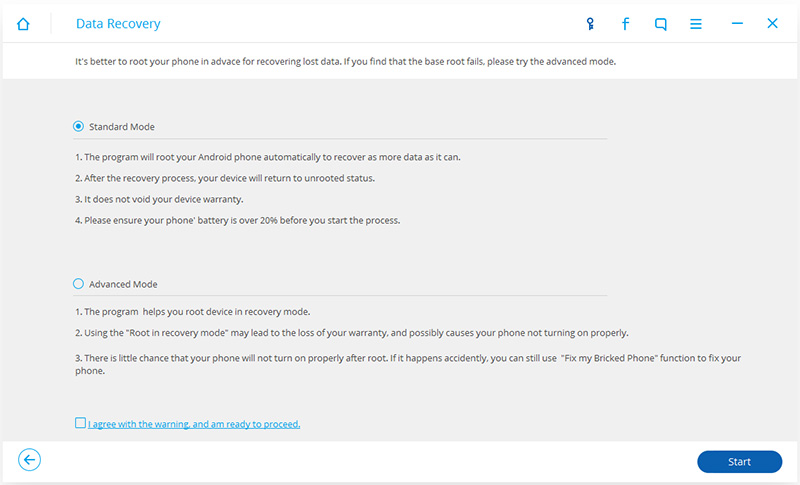
Step 3. You also need to select the scan mode. As you can see, the program provides two modes, one is the “Standard mode”, and the other is the “Advanced mode”. I recommend “Standard mode” because it works faster. Check what you need, click “Start”.
Note: There might be a Superuser authorization appearing on your device during the scan. If you get it, click “Allow” to continue. If not, just skip this step.
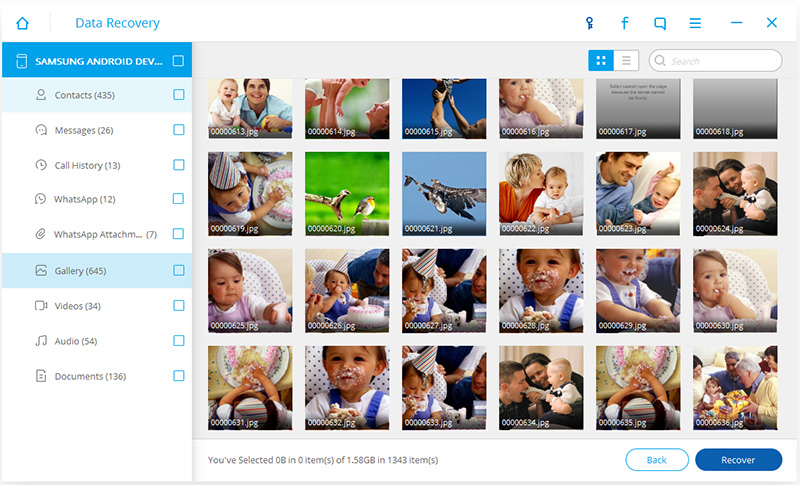
Step 4. When the scan is over, you can preview and select the photos and videos you wanted to restore. When you find them, check it out, and finally click “Recover” to save them all on your computer.