Summary: This article will show you three simple ways of how to use iPhone Data Recovery to recover deleted and lost Kik messages including chat history and attachments from any of your iPhone devices.
Kik is a very popular social software that can send free messages to friends who have kik installed in their mobile phones. However, many iPhone users have this trouble: accidentally deleted the Kik messages from theirs iPhone, or because of other wrong operations, the Kik messages are lost. But some of the Kik messages are especially important to them. What should they do at this time?
As we all know, Kik does not store sessions on the server. Therefore, when you accidentally delete the Kik information, you cannot recover the information directly from the application. Then if you want to restore Kik Messages and Attachments at this time, you can use iPhone Data Recovery.
iPhone Data Recovery is a professional software specially designed for iPhone and other iOS devices users to recover data. First, the iPhone Data Recovery page is simple, simple to operate, and powerful. Whether your data due to accidentally deletion, or your iPhone is locked because of lost or forgotten password, or got smashed, dropped into water, damaged, or even broken, iPhone Data Recovery can easily help users recover the deleted and lost data. Second, iPhone Data Recovery supports the recovery of various data types, including photos, contacts, call logs, videos, audio, text messages, Whatsapp/Viber/WeChat/Line/Kik Messages & Attachments, etc.. Besides, this software allows user to backup and restore iPhone data with ease. Next, let’s show you how to recover your deleted Kik chat history and attachments from iPhone by using this powerful program.


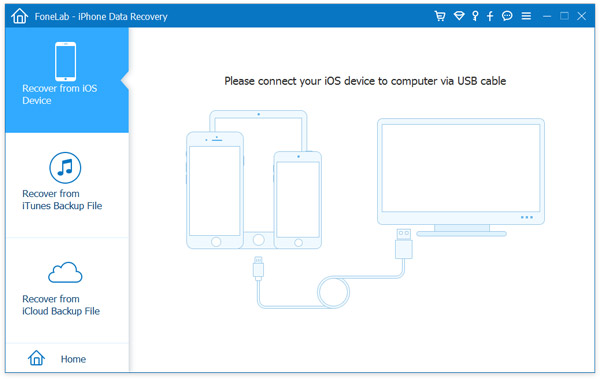
Step 1: Connect iPhone and computer with USB cable
Download and install iPhone Data Recovery on your computer and run it. Select “Recovery from iOS Devices” mode on the main page. Now connect your iPhone to your computer using a USB cable.
Step 2: Scan the missing data from iPhone
Once your iPhone is connected and detected, simply click on “Start Scan” to start scanning your iPhone for the missing data.
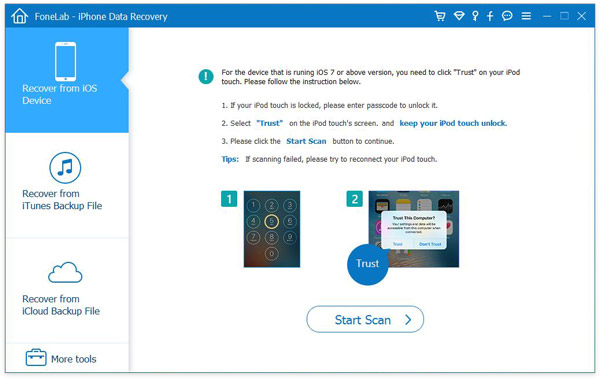
Tip: If you are an iPhone 4/3GS user, click on “Advanced Mode” in the lower right corner and enter the scan mode according to the prompt given by iPhone Data Recovery.
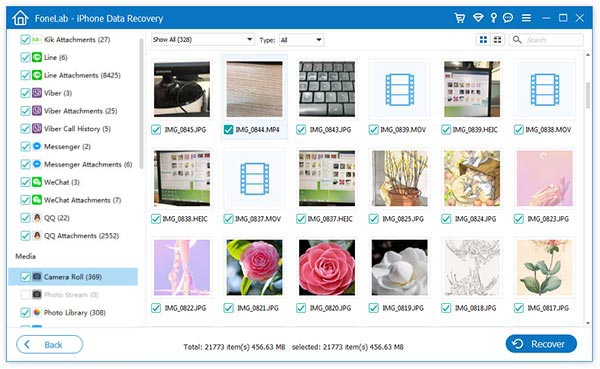
Step 3: Preview and restore the selected Kik Messages and Attachments
After scanning, iPhone Data Recovery will display the scan results by category on the page. If you only want to restore Kik Messages, then you only need to select “Kik” and “Kik Attachments” on the page and then preview it. Mark what you need to recover and click “Recover” to restore the selected data.
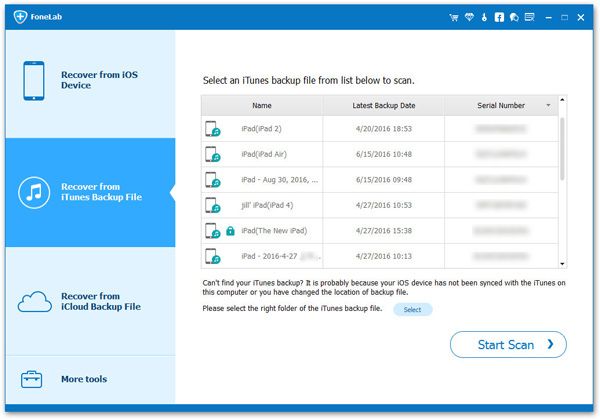
Step 1: After running iPhone Data Recovery, select the “Recover from iTunes Backup File” mode. Then you will find all the backup files on the next page. Select the backup file you have recently created and click “Start Scan” to extract the backup data.
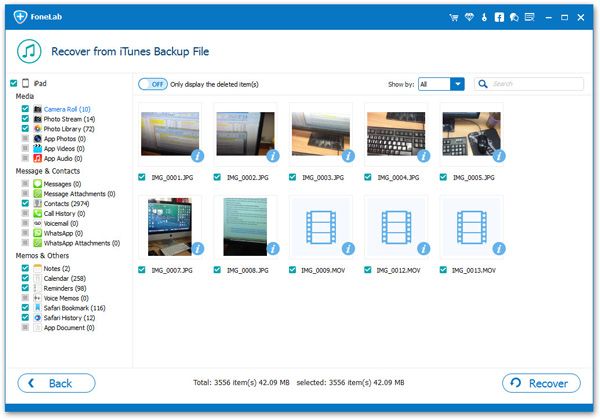
Step 2: After scanning, you can see the scan results displayed by category on the left sidebar. Select “Kik” and “Kik Attachments”, the mark the data you need to recover. Now click on “Recover” to save the data to your computer.
Note: After the data is lost, don’t connect the iPhone to iTunes to avoid syncing and updating iTunes backup files.
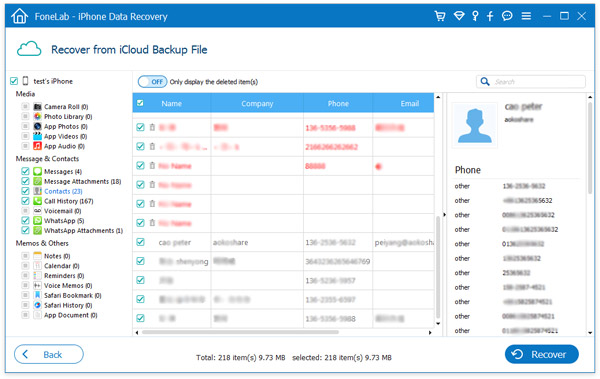
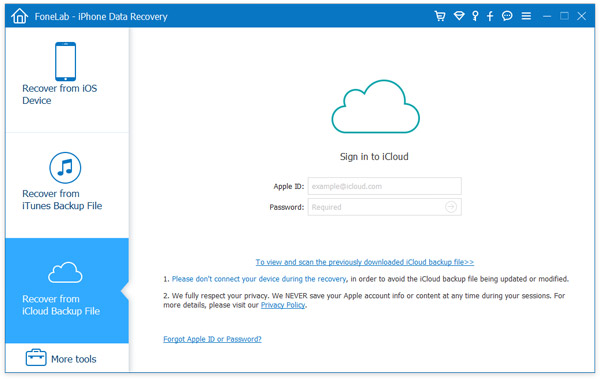
Step 1: First, run iPhone Data Recovery on your computer, then select “Recover from iCloud Backup File” mode and log in to your iCloud account.
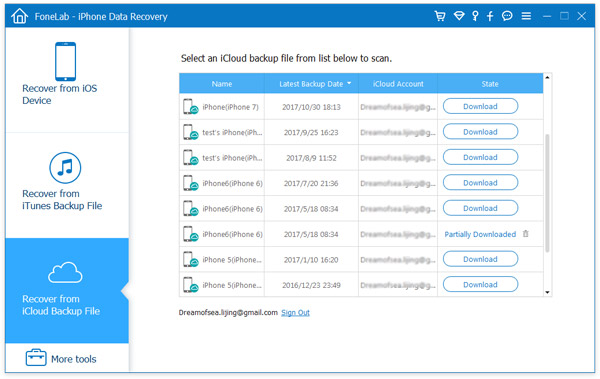
Step 2: Now, iPhone Data Recovery will automatically provide you with backup files in your iCloud backup account. Select the backup file you need to restore and click “Download” to download it to your computer.
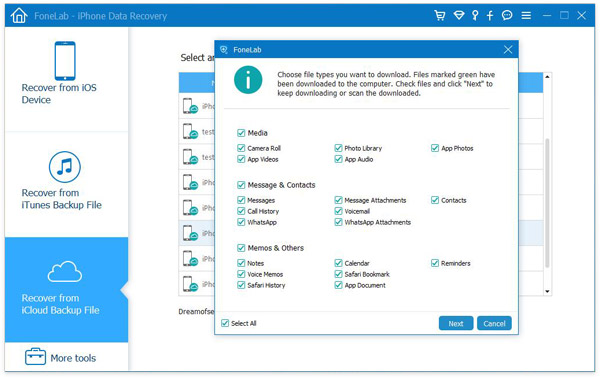
Wait until the download is completed, you can see all the recoverable data in the pop-up dialog, if you just want to get back your Kik messages, please check “Kik” and “Kik Attachments”, then press “Next”. Please be patient while waiting for the scan.
Step 3: After scanning, you can preview all scanned data in details. Choose those what you need and click “Recover” to save them back to your computer.