In what seems to be a worrying trend for Samsung, its latest flagship has only been on the market for a weekend and it’s already running into problems. Customers in Korea are complaining about an issue with the Galaxy S8 and Galaxy S8+ which is causing the display to have a red tint. Photos of affected devices have been posted to Twitter and Instagram side-by-side with non-affected handsets to highlight the difference, and “Galaxy S8 Red Screen” began trending on the county’s search engine, Naver.
So, how to fix your Samsung Galaxy phone that stucking in red screen, or extract data from your Samsung Galaxy phone with red screen? Here, we recommend you to use the Samsung Data Recovery.
Samsung Data Recovery is a Do-It-Yourself program which can help you recover files from all kinds of damaged Samsung devices including broken/dead/locked Samsung Galaxy phone or Samsung with broken screen, etc. All existing and lost files on your device will be found by the program and you are able to access and retrieve them with ease. It supports multiple media files including images, songs, movies, text messages and more. Can’t wait to recover files from your Samsung that stuck in red screen? Please download the free trial version of this program below and have a try.


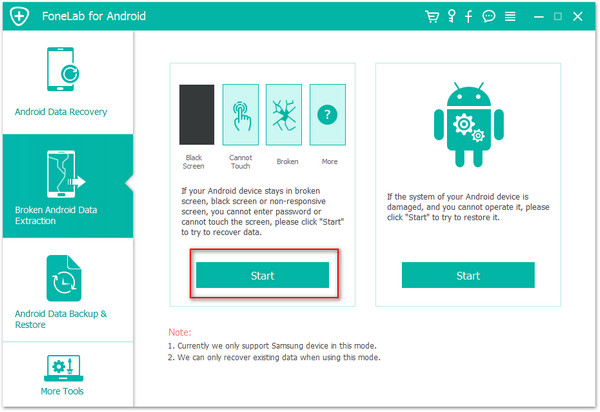
Download and install Samsung Data Recovery on your computer, and then run it on your computer. When you can see the primary interface, choose “Data Extraction” mode in the left column of the window.

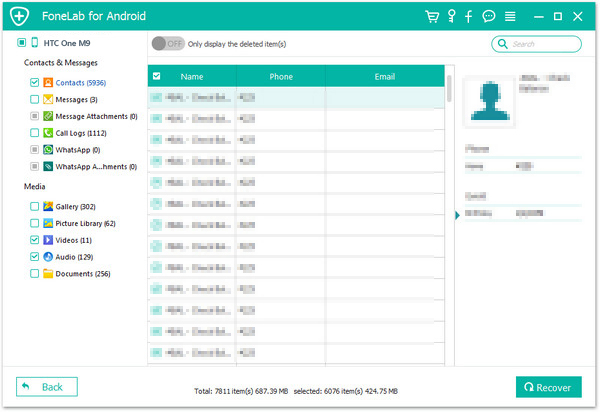
Select the type of file you want to restore, included contacts, text messages, photos, videos, WhatsApp messages and more, and click “Next” to enter the next step.

You need to choose the fault type of your Samsung Galaxy phone. One is “Touch doesn’t work or cannot access the phone” and the other is “Black/broken screen”, you should chooes one of them according to your phone’s fault cause.
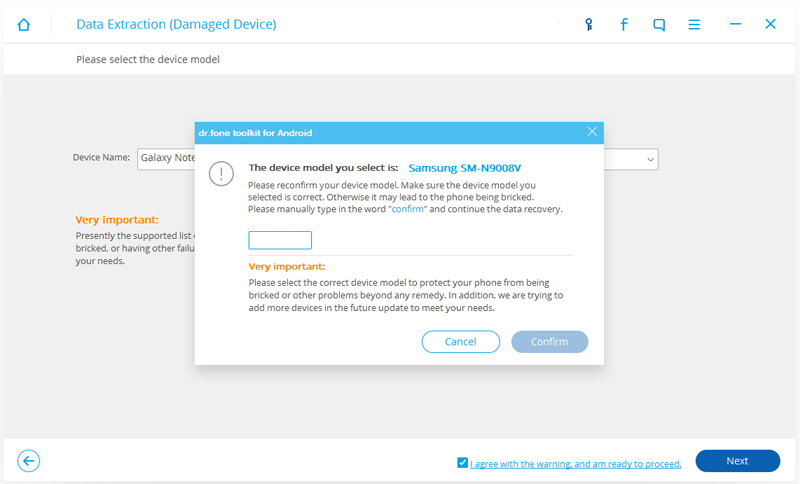
Skip to the next window, choose the correct “Device Name” and “Device Model” for your Galaxy phone. Currently this function only works for some Samsung devices in Galaxy S, Galaxy Note and Galaxy Tab series. Then click on “Next”.

Note: Please ensure that the selected information is matched, then type “confirm” in the textbox and click on “Confirm” to go on.
You need to manually operate to make your Samsung Galaxy phone into download mode. Specific steps are as follows:
1: Power off the Samsung Galaxy phone.
2: Press and hold Volume “-“, “Home” and “Power” button on the phone concurrently.
3: Press “Volume +” button to enter download mode.
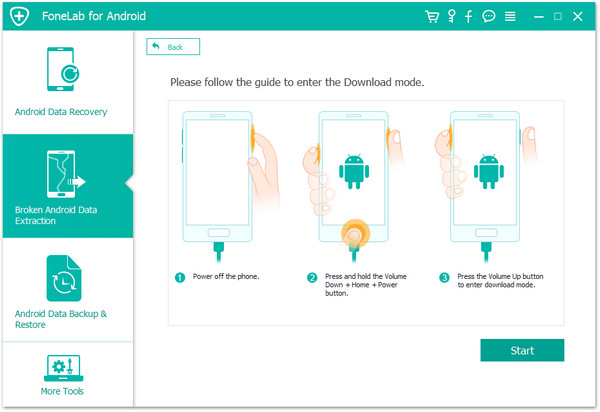
You can use the above figure to operate.
Please connects your mobile phone to the computer now. When your phone is recognized, the program will scan your files and display them in the windows.
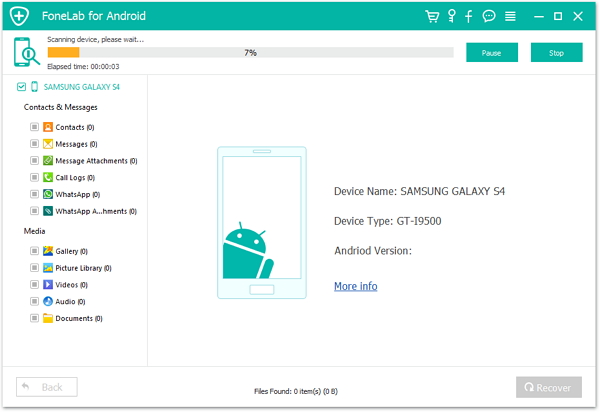
After scanning, you can preview and select the file you want to restore, check them, and click on the “Recover”.