Summary: How to upgrade IOS 13 system at ease without backup data? How to recover data quickly if data is lost after IOS 13 system upgrade? Here is a powerful tool called iOS Data Recovery to help you!
Recently, Apple released a new IOS 13.2.2 system update. According to the update instructions, the most important thing of this update is to “fix the problem that may cause the app running in the background to exit unexpectedly”. According to the official update announcement, IOS 13.2.2 also fixes some errors and improvements for iPhone. For example, it solves the problem that iPhone may not have cellular network service temporarily after the call, the problem that cellular data may not be available temporarily, the problem that Yubike accessories powered by lightning interface may have charging interruption, the problem that authentication may be prompted when using Kerberos single sign on service in Safari browser. It also solves the problem that the reply of S / MIME encrypted e-mail between Exchange accounts cannot be read. Since the announcement, many IOS users have upgraded the old version of IOS system in order to get a better experience when using IOS devices such as iPad and iPhone.

Upgrading IOS 13 and iPad OS can make your iPhone, iPad and iPod touch more powerful and secure than ever before. But there is a problem that should be noted that the data storage of your iPhone / iPad is not safe when the system is upgraded, and and the data is likely to be lost. In this regard, both Apple officials and others suggest that iOS users should back up the important data in the mobile phone before updating, because in the process of updating, it is easy to damage files, pictures, etc., resulting in data loss or deletion by mistake. But what if your iPhone / iPad stores a lot of complex data, if you don’t have time or bother to back up such huge data, or if you don’t have enough storage space in the cloud? What if you forget to back up your data and upgrade your system, but unfortunately lose important data? In fact, you can also use another simpler and more effective method, which is to use iOS Data Recovery directly to recover all your lost / deleted data quickly.
Best Method: Recover lost data from iPhone/iPad with iOS Data Recovery.
iOS Data Recovery software can solve the problem that iOS devices such as iPhone and iPad lose data because of upgrading the system. It is simple to use, powerful in function, high in security and strong in compatibility. It is a practical data recovery software. You only need to open the software, and then through a few simple steps, it can quickly scan all the lost / deleted data from your iPhone and iPad. You only need to select the data needed from all the scanned data for recovery. iOS Data Recovery supports the recovery of various data types, such as contacts, call records, photos, audio, video, files, etc. it can also be perfectly compatible with various iOS devices. Therefore, it is very practical. Even if your other iOS devices suffer from data loss due to the upgrade of the system, or for other reasons, such as black screen, water damage, system crash, etc .It can help you recover quickly. Therefore, you can upgrade iOS 13 system without worrying about the loss of data, because in case of data loss, iOS Data Recovery can help you recover quickly at any time.
Models Included: iPhone/iPad,etc.
Data Included: text messages, call history, contacts, photos, videos, music, files and more.
Here, we’ll show you three effective and simple ways to recovery lost data from iPhone/iPad after iOS 13 update.


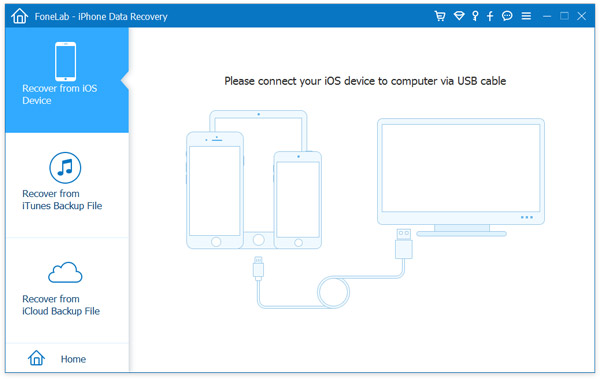
Step 1. After downloading, installing and launching the iOS Data Recovery on your computer, you need to select the “Recovery from iOS Devices” mode in the function homepage and connect the iPhone/iPad to the computer via USB.
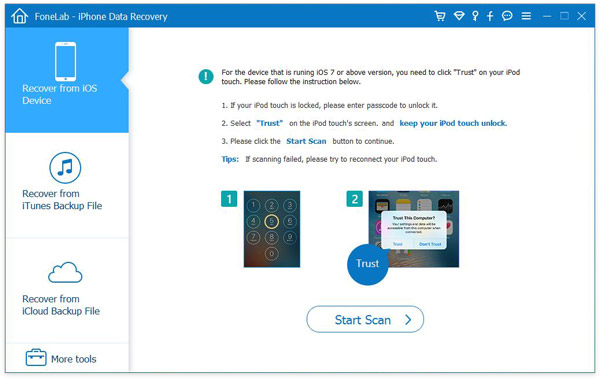
Step 2. After the iPhone/iPad is connected,you need to click the “Start Scan” in the page, and the iOS Data Recovery will scan all lost data from iPhone/iPad. During the scan, if you see the data you are looking for, you can click the “Pause” button to stop the process.
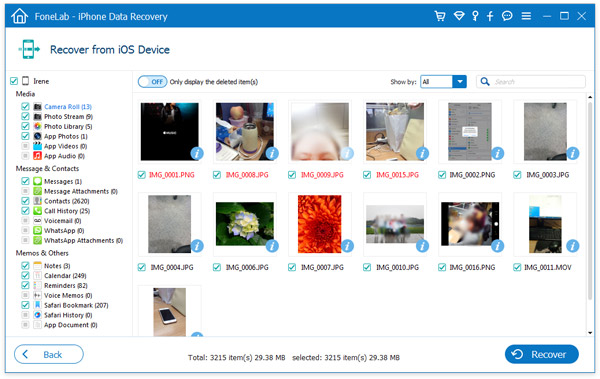
Step 3. When the scan is completed, you can see the all data displayed in different categories.You can preview them by double-click.
Step 4. Now,you just select the data you need from all the found data, and click the “Recovery” button. And soon, the selected data will be saved directory to your computer.
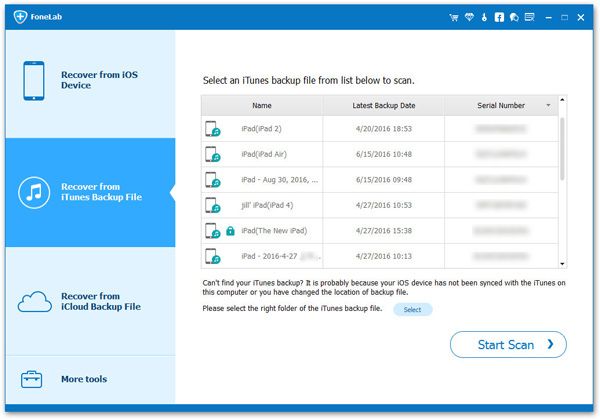
Step 1. Launch the iOS Data Recovery and enter the homepage, then select “Recovery from iTunes Backup File”. You also need to connect iPhone/iPad to the computer.

Step 2.The software will detect and display all iTunes backup files on the computer.You can check the backup files according to the creation date,then choose an iTunes backup file as you like and extract all the recoverable data by click “Start Scan”.
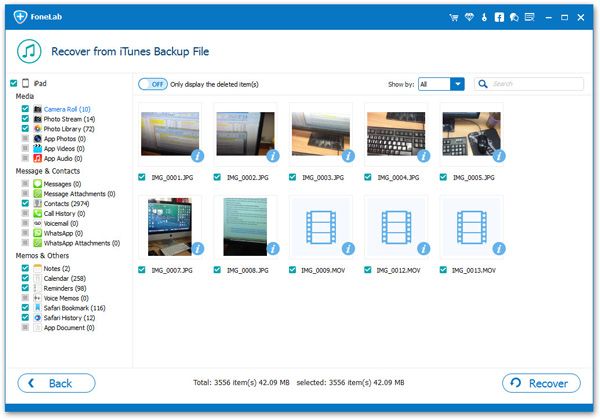
Step 3. After that, all data will be detected and showed in the backup file category. You can click to preview all the found result to check what you want. Select the data needed and click “Recovery” to save them on your computer.
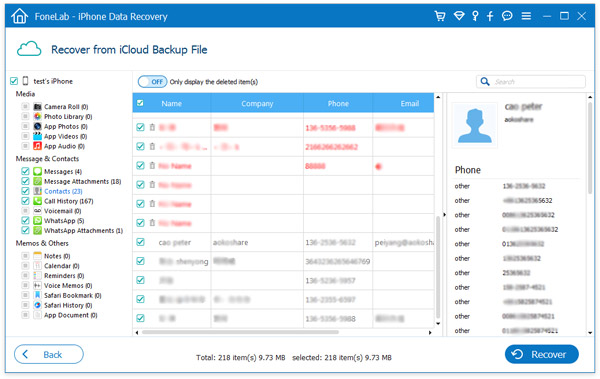
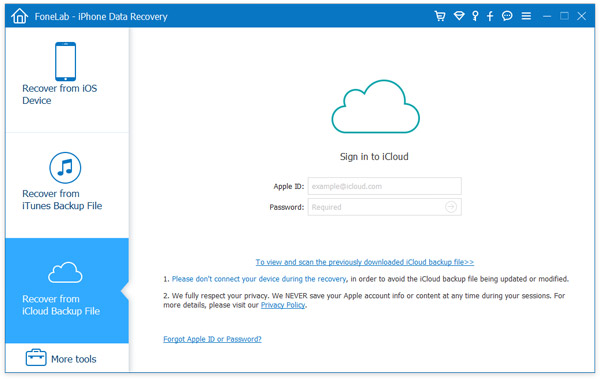
Step 1. After launching iOS Data Recovery to enter the homepage,you should select the “Recovery from iCloud Backup Files” recovery mode and then enter your iCloud account credentials to login..
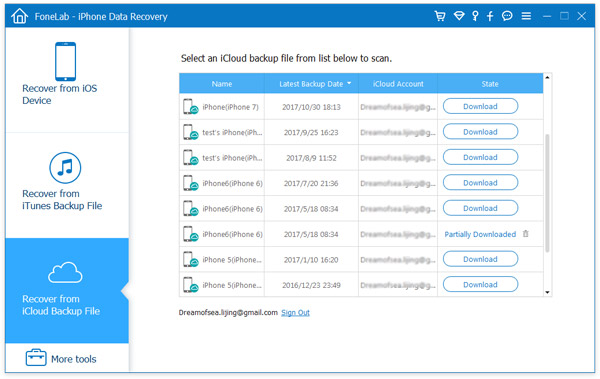
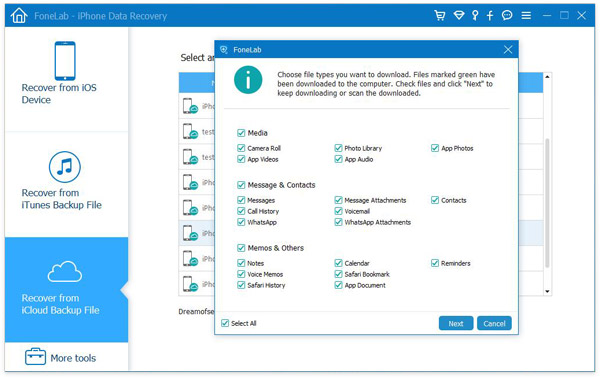
Step 2. After loginning to iCloud, the program can find all iCloud backup files in your account. Just choose the one to download as you like.This process may take a few minutes. Please be patient.
Step 3. When the download is completed, all the recoverable items will be displayed. But by default, they are all selected, and you just need to select those you want, and click “Next” to go on.
Step4. Now,you can preview all the scanning result, and then select the data you want. Click the “Recovery” to save them to your computer.