Phone to Phone Transfer is an easy-to-use third party software tool with which you are capable of copying your data, including contacts, SMS, photos, music,videos,bookmarks etc between Symbian, Android and iOS without any data loss.


Step 1:Launch the program on the computer
Launch Phone to Phone Transfer program on your computer. Then you will see the window as follow. Then click "Start" button.
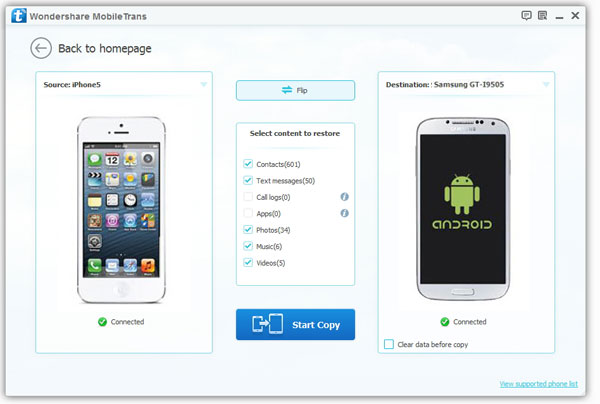
Note: Here take Android phones for example. The names of your devices will be displayed in the places of "Source" and "Destination". You can click “Flip” between the two phones when you decide to change the places of the two devices.
Step 2: Scanning to search the lost data from your iDevice
Now, data on your source phone that can be transferred are listed in the middle, such as contacts, photos, messages, etc. You only need to mark those you're going to move to another phone and click "Start Copy". Then they can be fully copied to your destination phone.
If you need to empty your destination phone before the transfer, tick off the "Clear data before copy" bar under the destination phone picture.
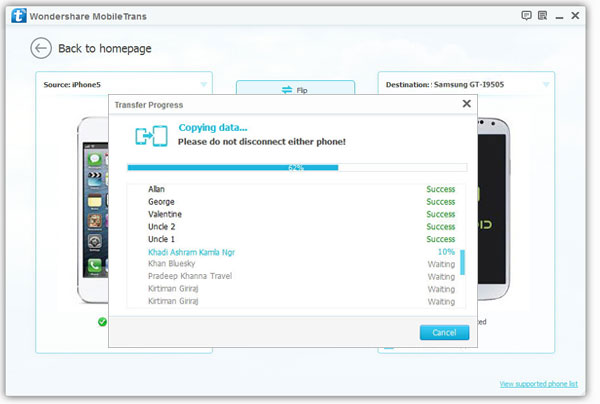
Be sure neither of your phones disconnects during the whole progress. When transfer progress is completed, please hit the "OK" button.
Note: The steps about other devices’ data transfers, like transfer data from Symbian/Android to Android, from Symbian/iOS/Android to Symbian, or from Android/iOS/Symbian to iOS are quite similar. You need to install iTunes on your PC, if you intend to transfer data from or to iOS.
Step1 :Backup Phone Data to the Computer
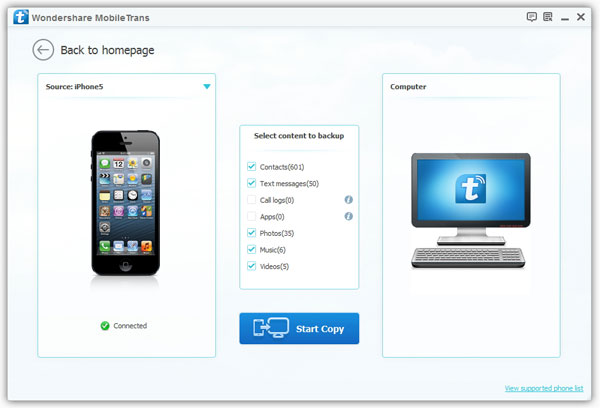
Firstly, connect your phone which need to backup to your PC via USB cable. Then click on the "Backup" button to bring up the backup window. Once the program detect your phone, the model of your phone will shows up, and all data that can be backed up are ticked. Mark the content that you want and click on the "Start Copy" button to transfer them to your PC for backup.
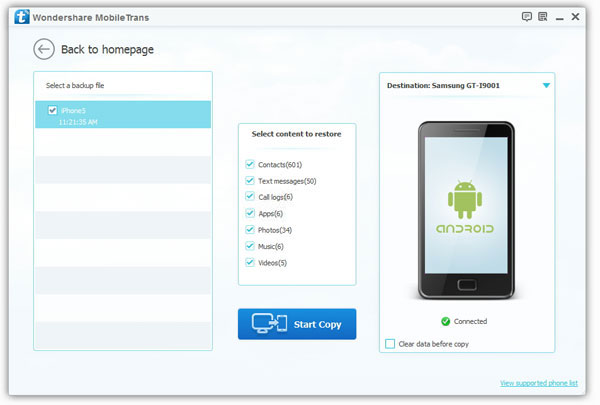
Step2 :Recover Phone from the Saved Backup File
Click on the "Restore" option in the homepage of Phone to Phone Transfer. Connect your Android phone, Symbian phone or iOS Device to computer via USB cable. Your phone will be recognized soon, and then appear in the window. Select a backup file that created on this PC previous from the left panel, at last, click on the "Start Copy" button and going to recover your phone or transfer to any supported devices.
Notes: Since wiped your iPhone/iPad/iPod touch/Android Device, you can not recover your data ever use the most professional recovery software, including the Dr.Fone for iOS, so before erasing your device, please remember to backup your data, you can use iTunes, iCloud, or some 3rd party tool like this Phone to Phone Transfer or iPhone Data Manager, so that you restore them if you want them back.
Step1: Connect Your Old iPhone/iPad/iPod touch/Android Device to the Computer
First of all, install and launch the phone to phone transfer tool on your Windows PC, and you will see the primary interface as the picture below.

Then connect your iPhone/iPad/iPod touch/Android Device to this Windows PC via an Apple USB cable. After that, click on "Erase Your Old iPhone/iPad/iPod touch/Android Device" button at the lower-right to brings up the data erasing window.

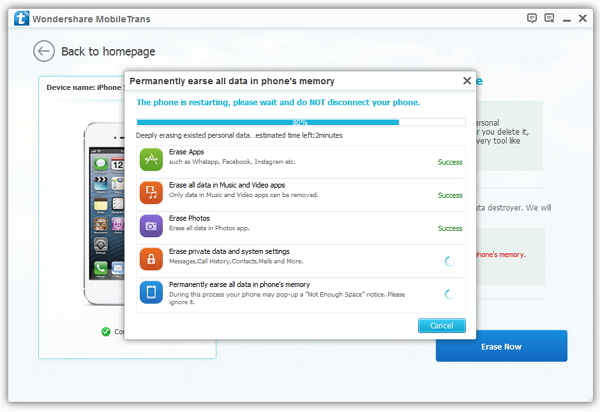
Step2 :Start to Erase Everything from Your iPhone/iPad/iPod touch/Android Device
Go to the lower-right corner and click Erase Now. A dialog comes out. Read the tips and enter "delete" in the box. Then, click Start to erase to erase all of your data from your old iPhone/iPad/iPod touch/Android Device.