 Currently, Apple jailbreak system version number to stay in the iOS 9.0.2 version, while starting from iOS 8.1, Apple blocked the jailbreak vulnerability, resulting in temporarily unable to jailbreak. However, Luca Todesco has just released a screenshot of successful jailbreak for iOS 9.2.1 system on his Twitter, to explained that he has been successful running Cydia program on iPhone 6 which is running iOS 9.2.1 system. But Todesco has not disclose the tool which to successfully jailbreak iOS 9.2.1, At least temporarily will not released.
However, even if Todesco has been successful, it will not mean that we will soon usher in a new system of jailbreak tool,
after all, iOS 9.2.1 is only a small-scale system upgrade, the major upgrade is the follow-up of iOS 9.3. Therefore, iPhone users might be more value that how to jailbreak iPhone iPad on iOS 9.3, isn’t it?
Compared to other who desperate to jailbreak their iPhones on the latest iOS version, here we want to give two advices: Back up your data before jailbreaking your iPhone, learn more about how to restore the lost data from iPhone after iOS 9.2.1/9.3 jailbreak. If you don’t have a clue, please calm down, in this article, we are going to tell you some skill, including how to back up your iPhone, fix iPhone out of recovery mode/black screen/white Apple logo, and restore lost data from iPhone after iOS 9.3/9.2.1 jailbreak.
Before introducing the tutorials, here we recommend to you the iOS Data Recovery tool, which can easily solve all the above questions. With the hlep of iOS Data Recovery tool, you can backup your iPhone data to computer or iTunes, fix the abnormal iPhone operating system to normal, and restore any lost data from jailbroken iPhone, including contacts, text messages, notes, calendars, call history, WhatsApp messages/chats/photos, photos, videos and more.
First of all, free download a Window or Mac trial version of iOS Data Recovery, and install it on your computer, then follow the below steps to have a try, it’s 100% safe and efficient.


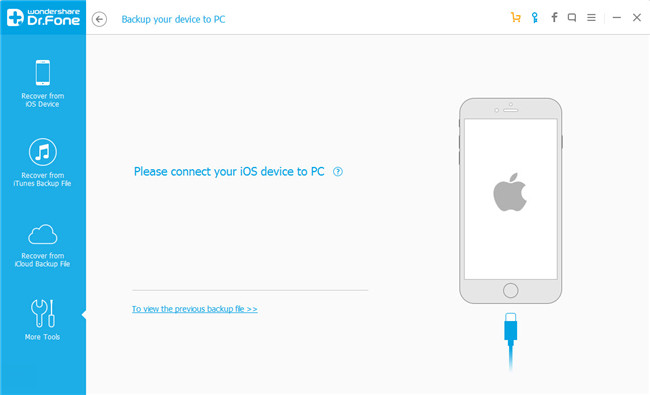
After running iOS Data Recovery on your computer, click on “More Tools” on the left sidebar of homepage, and select the “Device Data Backup & Export” option from the tool list. After that, connect your iPhone to PC via USB data line. By default, the program will automatically detect your iPhone soon.
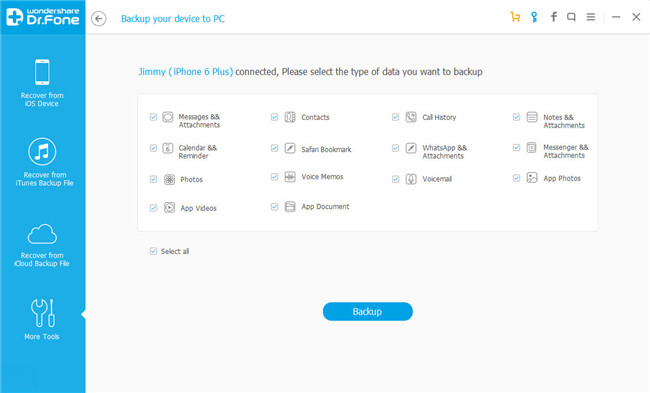
When your iPhone is recognized, you are allowed to select what file types from your iPhone to backup. Then click on “Backup”. The whole backup process will not take too much of your time, depending on the size of your selected data.
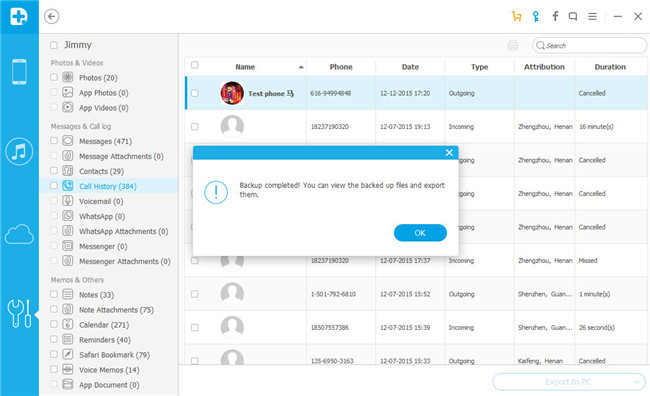
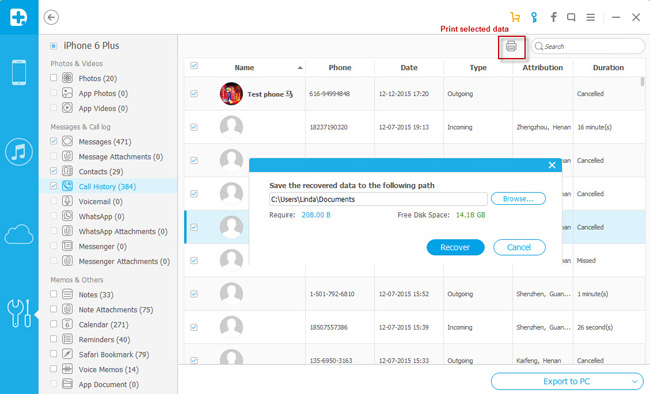
Now you need to select the files you want to backup, and tick the check boxes in front of them, then click “Export to PC” button to export the files to computer.
Step 1. Choose “Recover from iOS Device” mode and connect your iPhone to the PC. Then select the file types that you wanted to scan and click “Start Scan”.
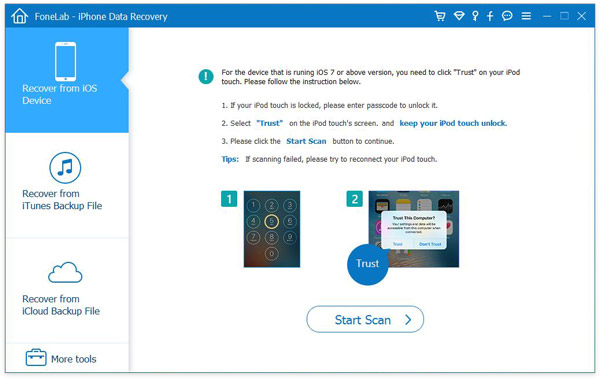
The program will automatically scan your iPhone for the lost data, the whole scanning process may last a few minutes, depending on the amount of data on your iPhone.
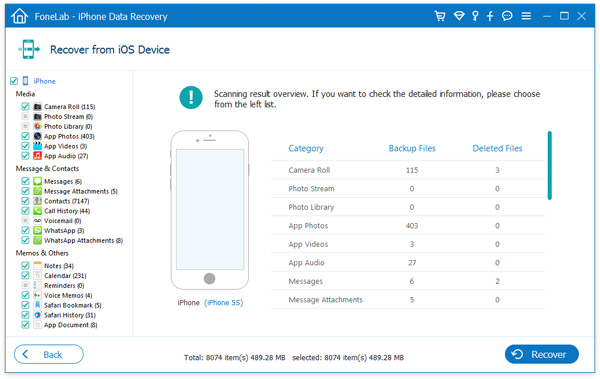
Step 2. After the scanning is complete, all the scanning result will be displayed, including contacts, text messages, WhatsApp data, media files and so on, you can click to preview them one by one.
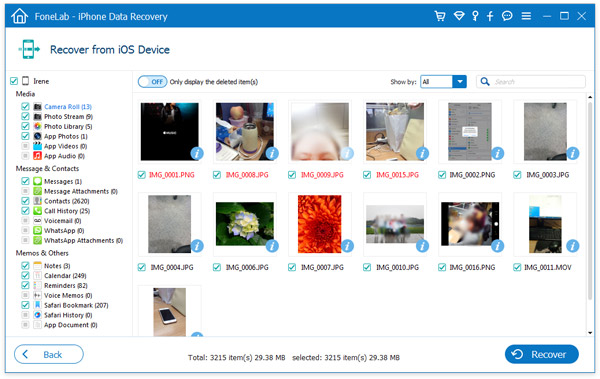
When you have marked the data you wanted, simple press the “Recover” button to restore them to your computer. As for text messages, iMessage, contacts, and notes, you can directly restore them to your iPhone with a click.
Note: Please do not disconnect your iPhone during the whole transfer process.