“Oh, I met a big big trouble which made me headache. I didn’t know what happened. All data on my Galaxy Note 7 were gone. I don’t know why, maybe I clicked some special buttons or run special functions. In a word, the most important things is that the lost data are quite important and I can’t ignore them. So, I need to find the way to recover the lost data on my Galaxy Note 7. And I think maybe I need to use my Mac to fix that problem.”
I feel so sorry to the above Galaxy user because losing data on the smart phone is a common but horrible trouble. But fortunately, I have a good news to him. The news is that he can recover all lost data on his Galaxy Note 7 easily with Galaxy Recovery for Mac.
Galaxy Recovery for Mac is good at finding lost and deleted contacts, messages, videos, photos, call logs, music and more files back from almost any Samsung smartphones and tablets on Mac without any difficulty. As the most professional recovery software, it wins a high reputation among users, for its high-rate recovery and safe recovery. By the way, it also fully compatible with other Android devices including Google, Sony, HTC, LG, Motolora, Huawei, ZTE and so on.


After download and installation, launch Galaxy Recovery for Mac. Then please use a USB cable to connect your Samsung and Mac. When your device is successfully connected, Galaxy Recovery for Mac will detect your device automatically.

Note: You can see the whole detail of the recovery process on the left side. Please close any other Android phone management software.
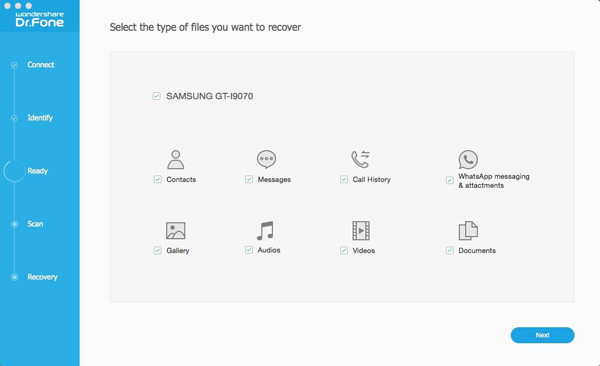
Here, you will see all file types from you Samsung. The program is ready to scan your device. so after you mark all file types, click “Next” button to move on.
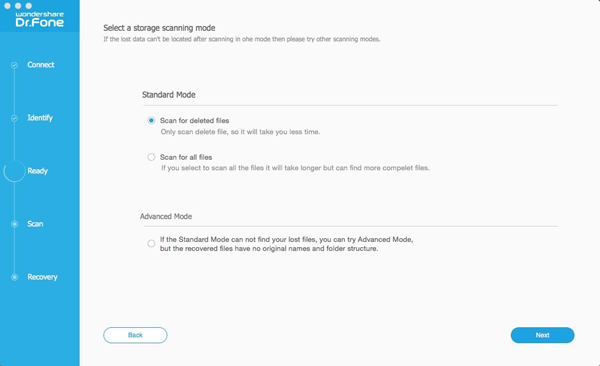
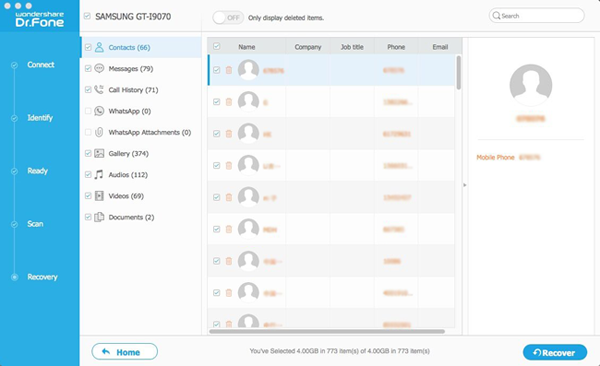
Galaxy Recovery for Mac begins scanning the deleted and existing data on your Smasung. When the scan is over, you can preview all found data from your device clearly. Select the items that you want to recover and click “Recover” to save them on Mac.